Passage of castlevania lords of shadow 2. Storyline. Fight with the smoking demon
Walkthrough Castlevania Lords of Shadow 2
First, training. It will be necessary to get up from the throne and go into the hall, where you need to press all the buttons on the display on the left. After the appearance of the soldiers, we continue to follow the instructions, it just makes no sense to beat them.
There is some problem with the keys when playing on PC, remapping the keys helps.
When everyone is dead and the control of the hero is mastered, you can practice climbing. Then there will be training with the boss and a fight with a bunch of idiots on the arm of a megarobot, which will first pat the main character, and then let him climb up the arm lowered down. Climbing will have to be done by clinging to small ledges and dodging shots.
Now you need to squeeze between the rotating elements of the mechanism, the main thing is without haste. Upstairs, it will be necessary to beat the soldiers, and in the end, force the enemy to shoot at three rivets near the wall. We tear out the wall and climb further to the wheel, then we roll down and again the ledges along which you need to climb up, where you have to tear off the rivets, thereby forcing the paladin to shoot. At this stage, he will shoot more accurately, so he will need to use dodge.
Fight with a paladin
We begin to beat the enemy until he starts throwing swords, from which it will be necessary to escape by jumping. Then we wait until the health is restored to the maximum, activate the rage and beat the paladin, sometimes switching to the sword, to restore health.
After the fight, we watch videos, then we wander in a sheet through the streets and succumb to the ghoul in the alley, and again a video showing the beginning of the plot.
Having gained independence, we move according to the sign, we come to the door, which will have to go in and hide in the darkness. We become a rat and slip past the enemy, then we move into his body and open the door. Behind her again are ghouls, it is necessary to envelop one of them in darkness, while the other moves away from the stairs, we dive there and crawl up. A little further we jump down, and then back up.
We go after the kid, then we grab the box with the crystal, the heart and make our way inside the tower along the ledges, to the very top. We go along the balcony to the lever, shoot to release the mechanism. We jump on the hanging plates, for which we swing them, moving from edge to edge. Don't forget about the cube below.


Fight against the bloody giant
Killing a comrade is quite simple, you need to hit on that part of the body where the blood is at that moment. You can get away from attacks with simple jerks to the side. To score a combo, you need to start an attack after the giant makes three hits in a row.
Having defeated the golem, we move into a small room, where we pump up magic and heal. After that, we leave it and move to the waterfall, which will have to be frozen with a throw of "white" magic. We climb on the ice and pick up the relic, it is located behind the boxes. Then to the catacombs. In the large hall, you will have to look for rings and climb them to the top. Screensaver, then you have to beat up the enemies, periodically repelling the boy from the demon. After the death of all enemies, use the altar of the wolf.
We climb up, the beast will lead us into the real world. We conclude that portals can be used to move between worlds. We go further, we kill the next demon, and further according to the index through the locked door, by means of the water frozen on the right. We select everything you need and freeze the air flow, turn into a rat and dive under the ice.
In the guise of a rat, we run through the ventilation, the fire must be jumped over, electricity should be avoided. Outside, we become a man and throw bats at the guard. Then again with a rat, and again into the ventilation near the box in the corridor. Inside we pass the cable, gnaw off the wiring and return. Here again we take the form of a man, rush with mice to the guards, and then we move into the equipment and open the door.
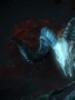
Fight with the smoking demon
We start with an ice arrow, we need to aim in advance. He will stop and continue to attack with current and a little in melee. It is better not to approach, but to beat him with a bloody whip, since his attacks are almost all circular. Then the minions will appear, we bring down everyone and freeze the demon again. And so, alternating approaches, we bring him to the grave.
After the death of the demon, we move through various dungeons to a room with a pool of blood. It will be fun here, you need to start with small monsters, and in the end finish off the big one. You have to tease him until he hits his forehead against the wall, and then hit him on the ridge. We take the key from the corpse and open the gate.
We go to the big chains, climb up them, jumping to the rings on the left. Then along the grips to another, we roll down and jump onto the ring, and again along the chains, alternating them so as not to fall off. Then there will be columns with fire.
And again we kill the demons, after which we climb up the rings. Then we collect bridges to the demon in a cage, we walk to him. Then we make our way to the door, there is a mechanism. Then we roll bridges to the cage, we cling to it and move it to the highlighted edge.
We bring down the harpies and climb onto the bridge, at the other end again the harpies and again they are in consumption. We get down and crawl under the bridge, there are two demons at the gate, we will have to kill them. We unlock the gate, we break through the internal passage with a sword and go down.
Fight against the three-headed demon
We start with the destruction of the barrier, it will be necessary to use the chaos mode and fiery fists. Then we crush the tentacles, while restoring our characteristics. And then we attack the freak himself, when he strikes with his hand, we need to freeze his forearm and climb up to the head along the arm, beat the creature on the ground and chop off the head.
Double two will be harder. After freezing, with the help of fiery fists, we break the armor of the forearm and only then we climb. We wait a little at the head, the boss will try to grab. Then one more head off, at this moment the creature will start to hit harder, but now you need to finish it off without climbing, just in the forehead.
We select the artifact and go to the part of the map where the rise is visible. Upstairs, we select everything and recharged with energy from the artifact, we break through the ceiling. We go forward, at one of the gates we will meet guards. We run into the store and go to the elevator, having risen we stand at the statue with a sword and call the wolf.
In the building you will need to find a demon, and then proceed to the elevator. Monsters will meet at the exit, we kill them and go to the door. Here we undermine the passage, and then we freeze the fire. This does not quite help, so back and freeze the statue on the pipes. After exiting the elevator, kill everyone and follow the sign.
We move around the building with a rat, through ventilation. After that, there will be several skirmishes in the city, after which it will be necessary to go upstairs, where it will be necessary to turn off the electricity with a shot at the antenna. After entering the building, we move along the right side to the ledge, along which we pass into the room and then in the form of a rat we go into the sewer.
Inside the room, we turn into a man and kill all the monsters, below we kill the enemies with shields. We freeze the fire barrier to spin the wheel inside. Then we start the generator near the door, after which it will open. In the fog there will be simple and armed ghouls, they will be consumed, after which we dive into the passage, where we follow the sign to the hatch.
We make our way to the technical department, in which we rise up to the door, after it we drown the ice and disinfect ourselves. With a fight we pass the tunnels, carefully climb the mine, with unstable ledges. On the bridge we kill everyone and leave to the right, along the ledge. We turn on the door with fire arrows, after which we ride the elevator down, where after traveling in carts we go down. We go around the current, hanging on the side of the car, then we jump. Here we distract one guard with mice, we move into the second one and open the door. After killing everyone, we move over the fence, then through the pipes above. We enter the body of another enemy and unlock the door, the field of which we return, turn into a rat and make our way through the guards.
We beat until we can bite, then we jump out the window and run along the handles on the right to the roof, where we have to hurry down. We throw mice at the shooter, after which we make our way through the car, in the tunnel we need to freeze near the stairs, and then get into the window. In the body of the guard, we unlock the lock, inside we beat the creature, then we leave along the side of the car. At the top, when running, we slip into the lamp holes. Now you have to hit everything that is available, even, if necessary, workers.
We go after the robot, in the room we bring down all the "beauties". We send the robot to turn on the lever, and with the hero we tear out the wires from the riser located on the other side. There will be more enemies ahead, after their destruction we climb onto the ledge, we also give the robot a command to climb higher, the gate will open. Now up the beams and into the open window.
Twice we use the portals, until the skeletons, which will have to be killed. Then we hide from the girl with the lantern. We go around the rooms in which we splash blood on 4 crosses, the lady is busy with the same thing, so we have to redo it in some places. The main thing is not to fall into her bloody cloud. After we go out and smear another cross, now we pass over the bridge. We select the girl located on the left.

Fight with the witch under the dome
We kill demons and collect energy. Then we make holes in the dome with chaos magic, after which we throw fire arrows into the dome. The next stage is the most difficult, before the impact you need to slow down the witch. Further, after inflicting a lot of damage, the witch will begin to multiply, start up electric circles, from which you need to jump back and still have time to hit the images. The fourth stage will require the use of fog skills to get out of the fetters, you can also be treated by the girl behind the cage. If you act correctly, victory will come soon.
We return and use the ability to climb up and go through the grate, you can also go through mines. We jump to the fountain, kill the enemies, then we climb onto the building and on the sign we move over the wall. Inside the garage we seep through the grate and go into the elevator.
Upon arrival, we bring down the freaks, then we apply current using the lever in the basement. On the next floor, we kill everyone again and again we pass through the found lattice to the new elevator, if there is no power, we must return to the basement to the lever.
At the top, in the guise of a rat, we crawl through the hole, and then, as a person, we enter the body of the exited worker and open the door.
Demon fight in the ruins
“The devil is not as scary as he is painted” - this is exactly the case. To begin with, we bounce off with each of his movements, in close combat he is not very strong, so sparring is quite possible, and yet, be sure to shoot at him from a distance. If the demon's mouth opens, then its activity increases. When he throws energy from the ledge, you need to leave jerkily to the side.
When the enemy dies, we go along the bridge, then we climb through the ruins to the opposite bank. Here on the ledges up, as indicated by the marker. After the rise, we kill the whole company, the main thing is to know that the sorcerer strengthens the soldiers, so we must try to bring him down first. We use the knife switch and go upstairs to the church. After leaving the temple, we follow the bridge.
Fight with the forest guard
Here you have to be invisible to get past the spearman. The main thing is not to rustle with foliage, to turn into smoke for the transition; no need to stand for a long time at one point, he smells someone else's smell and will pursue. Shooting at the bells, you can lure the villain to this point. We open the gate with a knife switch, go in and go to the elevator, at the top we replenish energy and health reserves. We shoot the owl with an ice arrow, and take what we need, after which the battle will begin.
We start as standard - with a massacre, use simple attacks, save energy. We calculate blockable melee attacks and act, successfully reflecting them. When his life level drops, he will take up swords and attacking at close range will become almost useless. And so on until the very end, when he starts to hit with magic. Here, either break through the block, or shoot from afar, who pumped what. After killing the freak, we return to the boy.
Next, we stomp on the marker, killing everyone along the way, until we reach the speckled column, it is a lever. We rise, bring down the guards and further along the ledges. We supply electricity to the theatre. Why we climb onto the stage, then through the balcony, jump and climb under the stage like a rat. Then we light the stove and again we leave like a rat along the footbridge on the right. And finally activate the lever on the right side of the stage.
Puppet theater production
The first is a fat man with a hammer, the second is a workshop. The third will be an adult doll, the fourth step is to change the background to the image of the roof, the fifth is a demon doll, then a small doll and a theatrical background. Now we need to grab the heart from the stage.
Fight against toy master
We start by killing the knight. The number of types of his attacks is three, so it will be easy to cope, just sometimes we jump away from attacks. Now master. It's best to hit him while hovering in the air if you have this skill pumped in. Then a dragon will appear, from the fire of which you need to dodge and have time to hit on the head, at the end we explode by shooting fire at the ball near the muzzle. And again the master. When he is on two legs, we shoot him with fireballs in the head, falls to the floor, we attack melee, and so on a couple of times. There is energy in the well nearby, you can use it. After finishing the fight, we go back to our son.
Fight against giant robot
We start with the destruction of the servants, in parallel collecting the energy of chaos. Then we hit him right on the forehead, he will start to retreat, then fire arrows will come into play. After the destruction of the armor, it is necessary to hit on the head. And when it falls, we break the rods on the back, two are enough.
Again we follow the sign. We bring down the demons and go to the hatch. Through the sewer we go out to the demons and destroy them, then we climb the stairs. To do this, we shoot fire at the fasteners, inside we jump on the carts to the top, where we lower the bridge, firing chaos magic.
We fall, kill the guards and climb up the ice, kill everyone again and go through the grate inside to supply power. Then back, turn on the fan and follow it further up. In another building, you will have to go down and go through the library.
Fight against a giant demon in the street
We closely monitor the freak, you can not come close. Attacks can be devastating. We shoot from a distance with fiery arrows, replenish energy by killing minions, it is best to use circular combos for this.
When the creature "glues its flippers", we move further along the marker, the door opens with a knife switch behind. There will be many enemies, several large robots and a couple of ordinary ones. The fight will be hard, so it's worth killing the small robots and climbing the column away from the thugs.


Fight against a man with a cross in a church
The enemy will use a lot of circular attacks, so it's better to hit him on the fly. When the enemy loses part of his life, you will fall to the ground, where he will fight better. But the tactics of the battle will change little. Well, in the last phase it will be necessary to destroy all the stones around.
After the victory, we go after the man.
Fight against the demon in the blood
To win, it will be necessary to partially damage the demon, then the possibility of a double jump will appear. For the fight, the easiest way is to hang more and hit, when the head appears, we aim at it, if it misses, then all over again.
After killing the creature, we move along the marker, jump in a double jump, then into the hatch. We move through basements, in some places like a cloud. In a room with security, we make our way in stealth. We throw mice at the guard and run forward, to the right of the 3rd guard we fly fog behind him. But before that, we distract others with mice.
Now the fields with rays. We all just run, jump, do not stand on the plates for a long time. Then as a cloud up through the fan. Here we crawl away from the head of the Sith into the corridor located next to the entrance to the room.
Here begins a joint test for two. Pretty simple as a matter of fact. In the first, we jump onto the hook and tell our partner when to pull. In the second, you need to hit the boards with arrows, while creating platforms for your partner. Plus look around and don't leave the platforms. Here you have to make a shot, take a step, and so quickly and without stopping.
On the square we spare no effort, we deal quickly with everyone, until help comes. We first bring down the magicians from the statues. The assistant will distract some of the enemies, but this does not help much. The result - all the enemies are dead, watch the cut-scene.
Fight against a demon with a scythe
At the beginning, we hit close and on the fly until it staggers. Then we kill the crowds of the dead, and then the freaks that call them upstairs. When the boss loses a lot of life, he will take on the form of a man, but blades will fly around him. They can be passed by becoming a cloud.
We go out and the street, kill everyone and go back. We are looking for a map for fast travel, we are transferred to the very east, now follow the sign to the elevator. Then we jump on the platforms, kill the enemies at the door, the switch is located below. We go around the littered passage, going further and diving under the arch. At the top we use a mirror.
Fight with the devil
We go along the snake, bring down the guards and break all the chains. Now the battle with his son, you have to move very quickly, the enemy is strong, now and then attacks from the darkness. Attacks from the air help, the damage is dealt a lot. Sometimes Satan takes off and shoots with fire, here you have to have time to jump back as soon as the mark appears.
That's all, the last boss was defeated, the game Castlevania Lords of Shadow 2 ended.
Castlevania: Lords of Shadow 2 is an attempt to restart the iconic platformer, which later grew into a full-fledged slasher. The developers of the application were able to achieve good results, according to critics. They didn't want to deceive anyone by letting down anyone's expectations. As a result, a sequel was obtained, albeit with a delay of 4 years. And before you start describing the game Castlevania: Lords of Shadow 2 (walkthrough), you should praise the developers. They were able to release a full-fledged and large-scale continuation of the first part.
Are there any changes?
The combat system has not changed, much to the regret of gamers. It was she who was the main drawback of the first game. Even if we talk about the addition of Castlevania: Lords of Shadow 2 Revelations. Passing it in this regard is not much different. As many already know, the main character of the first part, Gabriel, defeats the evil character, after which he turns into Dracula. However, his adventures did not end there. There are a huge number of heroes in the world who want to destroy the vampire.
The game Castlevania: Lords of Shadow 2 (its passage begins from the moment when the paladins, having gathered in a crowd, are again trying to take our hero's castle by storm). We have to fight with them, from time to time quenching our thirst with the help of a warrior who has unsuccessfully turned up under the arm. Battles look epic and large-scale. The video is of very high quality. Let's take a closer look at the plot of Castlevania: Lords of Shadow 2, walkthrough.
Part 1. Training fights

It all starts with a video showing Dracula sitting on a throne. At this time, the doors are broken down by paladins. In order to start the game, you will need to approach the broken gate, after which the training mode will be loaded. Playing by following the prompts is very simple. Therefore, the enemies will be destroyed quickly enough. After that, a video will start in which the main character will move part of the gate. After the cutscene, you find yourself in a corridor. Here you need to show a quick reaction, passing a variety of obstacles that threaten immediate death to the character. If everything is completed successfully, a balcony will be waiting at the end of the corridor. From it you will see the knights in the courtyard. It is at this moment that the first boss will appear.
Battle with the first serious enemy
He will jump from a rather impressive mechanical golem, holding fiery swords in his hands. To defeat him, you must try to use long-range attacks. In this case, you should not get hit. Flaming weapons can cause serious damage. As soon as half of the health is knocked down from the boss, the video will turn on. It will show how Dracula jumps on the golem's hand. The paladin will leave the battlefield, and you will have to fight with the knights. They will appear from the hatch located on the golem. We play further in Castlevania: Lords of Shadow 2. The passage may end for you if you do not hide from the arrows. And they will begin to pour in large numbers.
As soon as the victory over the knights is won, the robot will begin to destroy the castle. At this point, you need to try to cling to the ledges on the arm and climb up. Be prepared to be fired upon by the Paladin using a fiery bow. Position yourself so that the arrows hit the rivets holding the golem's arm. As soon as you get up, the knights will attack again. After their destruction, the Paladin will again take over you. During dodges, you must apply the same tactics as when lifting up. The boss must knock down the mounts. As a result, Dracula will be able to be at the head of the robot.
End of the first part
When the Paladin knocks down the last fastening, a helmet will fall from the head of the golem. You will need to disable his systems. After that, you just need to defeat the boss. This will end the first part of the game Castlevania: Lords of Shadow 2. The passage of the final battle will be accompanied by a cutscene in which the defeated paladin will fall to his knees in front of Dracula. He will take the cross in his hands, but he will not be able to defend himself. The whole scene will end with a flash that scatters all the knights on different sides. The video will end with frames in which our hero will hold a flaming cross in his hands. A warrior can be seen behind him, but his face cannot be distinguished.
Continuation of the game
The second part of the game begins with the appearance of Dracula on the streets of a modern city. You will need to explore the alleys. During this, you will encounter a monster that will devour the person it killed. The passage of the game Castlevania: Lords of Shadow 2 implies that you will need to fight the monster. But it will not be possible to kill him until an unfamiliar knight comes to the rescue.
After the battle, Dracula will lose consciousness. He will come to his senses already in some unfamiliar room. There are people here. After reinforcing their forces with them, a video will start. From it it will become clear that the necromancer returned Dracula to life. He did this in order to have someone to resist Satan. However, before that, it is necessary to conduct certain investigations and gain strength.
Distracting maneuvers

A marker will appear on the map. It is to her that you will have to move. When you reach the place, you will see the door from the garage. You won't be able to open it, as some kind of security system blocks it. You can destroy it with magic. Go further into the building. You will enter a corridor that will be guarded by a monster. You can't kill him because he's armored. The passage of the game Castlevania: Lords of Shadow 2 implies that you need to move into a monster using magic. After that, go to the door, open it by using magic, leave the body of the monster and continue to the next gate.
There are several soldiers in the hall, which you will enter by passing through the gate. They can be distracted with bats. As soon as they pass to the opposite corner, you will need to run to the stairs. It is located on the left side. After that, you need to go along the corridor, guided by the signs. It is not recommended to attract the attention of soldiers.
After that, you will again find yourself in the events of the past. You will have to move straight along the corridor. In some places, you will need to remember acrobatics. At the end you will find a lever. To open the passage to the hall, you need to lower it. After that, you will have to move along the chandeliers. This is the only way to go through the entire hall and reach its opposite edge. Falling is not recommended. After passing the hall, you must again run along the corridor and climb the wall.
Gotta get to the lab
After the ice sword cutscene is shown, you will need to get to it. This is not easy to do, as the corridor will begin to collapse. If you fell, then this will end the game Castlevania: Lords of Shadow 2. The passage on the PC will have to be repeated from the last saved point. The sword is guarded by the golem. In order to kill him, you need to hit the places from which blood flows. After the victory, remove the crystal from the monster's eye socket. To exit the room, use ice magic, turning it into a waterfall. Climbing up it, go along the next corridor, which will lead you to the hall. They will try to kill Dracula's son there. You must prevent this. As a reward, you will receive a wolf amulet. Go up. Vaulted arches will help with this. After that, follow the wolf, which will come out to meet you.
Dracula will enter the modern world. But with him will come an enemy who will need to be killed. After that, move to the next room by using ice magic on the waterfall and climbing up the pipes. Run through the corridors, find a spinning fan and freeze it. After that, turn into a rat and overcome this obstacle. As a result, you should end up in a room with a guard and a laboratory. Move into a scientist.
After the video, you will have to fight the monsters, and then the woman who turned people into them. To defeat her, you need to use a freeze, as she is able to quickly teleport. After her death, you will be taken to Zondek. We continue the game Castlevania: Lords of Shadow 2.
Passage of the Gorgon
After talking with Trevor, Dracula will again fall into the past. Walk along the corridors to the room, which later turns out to be an elevator. After leaving it, you will find yourself in a room with lava. There will be a girl named Ariel. She will show you the way forward. Get into the next room with a lake of blood. Several monsters will come out of it, the most dangerous of which is the largest. You have to fight him last. Use your blood to open the door. Once in the room with lava, climb up the chain and debris up. There will be Steno's girl. You need to talk to her.

Get to the room in the shape of a circle. There you have to fight the demons. If you have installed the Castlevania: Lords of Shadow 2 DLC game, passing it will imply frequent encounters with monsters. Be prepared for this.
After that, get up on the opposite side and run to the room with a large device and a control panel. After creating the platforms, continue on your way and climb the stairs to the top to talk to the dwarf. In order to release him from the cage, you need to move it and platforms to the lockpicker. After that, a door will open, through which you will enter a corridor with lava. In order to pass through it, apply a few drops of blood to the altar located on the floor.
As a result, you must get into a hall with monsters that you need to kill. Climb up and fight the demons again (executioners with huge maces). After their death, you will receive a key that will open the gate to the next room. You need to get to the altar, behind which there will be a descent down. Following it, you will find yourself in a corridor with a statue of the Gorgon. She will hand over the power of chaos. After that, 3 of her sisters will appear, turning into one monster with 3 heads. You have to hit the tentacles and the head. Three times you will need to repeat a simple combination. Freeze the paw, climb it and cut off the head. After the death of the monster, you will receive a stone of Chaos. It will help create an opening at the top of the enfilade. Get to it with the help of the ledges and the petrified monster. You need to find the mark of the wolf and follow him into the modern world. On the way, you can stop by the dwarf's shop to buy something.
The search for an antidote
Let's continue to describe the game Castlevania: Lords of Shadow 2 (passage in Russian). In the next part, you need to get the antidote for the demonic virus. It is located in Biochemist. Use the elevator to get out and fight the monsters. Use magic on the water pipes to put out the fire and get into the elevator. You need to get to the bridge, which will interfere with the monsters. Run into one of the buildings, find ventilation, turn into a rat and run through it. Exit the building and fight the monsters again. After that, climb up the beams to a small platform. Fight the demons one more time. Blood magic will then help you get into the building by disabling the security system. Find ventilation and repeat the trick with turning into a rat. Make your way to the lower room where the monsters are waiting for you.
Find an electric generator, start it. Locked doors will open. Use the elevator to leave the building and get outside. Monsters are waiting there. Destroy, burn their armor and only after that start beating the demons. After their destruction, go to the laboratory, where again you need to kill the monsters. Go through the building, go outside, kill all the demons that came to hand, sit in the elevator. This will complete this stage of the game Castlevania: Lords of Shadow 2 (walkthrough). Part 5 will start right after that.
Battles on the train
Make your way to the right place using the platforms. After that, go down the mines, hitting the room with the guards. You will need to set bats on the far one, and just move into the near one yourself. Go to the next room, distract the person closest to the stairs with the help of all the same mice. The way forward is simple. It is necessary to jump into the next room and move into the guard. Open the door, turn into a rat and run to the train.
On the train, you must not only fight, but also hide from the guards. At high speed, you will need to dodge various obstacles. Actions will take place outside and inside. At the final stop, the Zondek knight will be waiting for you. After talking with him, hit the road again, fighting the monsters. It is necessary to get to the destroyed building and climb on it on the wreckage.
We continue the search for an antidote

After talking with Trevor near the bars, you will again find yourself in the past, in a gloomy hall, where Camilla will be waiting for you. She will poison you with blood, resurrect skeletons and try to kill Dracula. We must go to the gate, behind which is the wife of Dracula. After that, quietly activate the portals with the blood and exit the castle. Camille will need to be destroyed using Chaos Magic. Periodically, you will need to fight demons, replenishing your mana supply. After the death of the witch, you will return to the modern world.
Make your way up from the dungeon through the grate and fight the monsters that are armed with explosive projectiles. After that, go into the building and turn on the electricity. After passing through the columns and bars, you will reach an elevator that will take you up. There will be an antidote, which will be able to get first in the form of a rat, and then, having moved into a doctor. After killing the professor who keeps the antidote, take the syringe. Zondek immediately uses the substance on the prisoner, who will become much more powerful after that. However, it will be easy enough to kill her.
What actions to take next?
What does the passage of the game Castlevania: Lords of Shadow 2 on XBOX 360 and PC mean next? We need to meet with Trevor, collect the mirror and go to the past. While heading down the road, you will have to fight with a large number of monsters. Save your strength. As a result, you will get to the passage that will lead to the Keeper of the Forest. After talking with him, go through the obstacles. Don't step on the leaves. After the obstacles, get to the elevator and fight the Guardian. You have to dodge his sharp counterattacks. Try not to get hit by the staff. You will find a mirror shard in his head.
At the next stage, you need to reach the theater and fight the monsters. Turning into a rat, make your way through the cracks in the floor to the main mechanism. Press the lever located there. In addition, it will be necessary to perform all the actions that the presenter will describe. At the end of your presentation, you will be given a heart. Put it in the body. After that, the host will become a demon, which will have to be fought. You will also need to kill a toy knight, a dragon, a doll. Try not to fall into their hands and dodge direct blows. After the battle, you will be given another piece of the mirror, which must be taken to your son.
Fight with your doppelgänger
Next, you will have to fight monsters on a stone platform. After the victory, you need to go upstairs and find the elevator. Run in the direction of the cursor on the map. Monsters will attack from time to time. After fighting with them, you will see a man in a hood, after which another monster will appear. He will rush after the man, and small monsters will attack you. Fight them off and enter the building through the roof. Follow the purple line. Get to the library and kill all the monsters. After that, you will meet a monster that ran after a man. Lure him outside and kill him. To catch up with a man, use a street lighting pole. The man will try to kill you with a whip. Dodge clicks by using punch combinations to attack. For the final blow, you need to become a shadow and slip between the knives. As a result, Dracula will not kill a man. He will go with you, helping to destroy the monsters. Then again you have to fight him after he turns into a monster. The best shots will be made in the jump. Try not to get retaliated. Prepare for the appearance of your double after the death of the monster. He needs to be hit in the head.
Fight with the helper of Satan
We continue the passage of the game Castlevania: Lords of Shadow 2. The second servant will meet at the next stage. Get to the ventilation by going down into the sewer system along the corridors. You will also need to use the power of darkness in order to climb up. Defeat the guards and get through the door. Try not to hit the lasers. It is necessary to climb to the upper platform, using the power of darkness. After that, use the elevator.
After that, exit the room and carefully walk down the corridor. You will be opposed by monsters that were resurrected by the servant of Satan. It is necessary to inflict blows on the head to all three in turn. After that, it is necessary to deal with the servant.
So, the game Castlevania: Lords of Shadow 2. Walkthrough. "Mirror of Destiny" What awaits us at this stage? After talking with Trevor and Zondek, you will need to kill the last servant of Satan. Together with the warrior Zondekka, go to the castle, collect a mirror on one of the platforms, open the gate. To save yourself from the flames that will break out of the open doors, hook on the rope. Help the warrior by creating plates. Please note that you can not go far from the mirror. After completing the mission, leave the castle.

Final battles
Now let's talk about the stage of Castlevania: Lords of Shadow 2 "Revelations". The passage involves a battle with the forces of darkness. They can spawn demons. You must have time to kill them, otherwise a huge number of new monsters will appear. You need to open the gate at any cost. Behind them will be a minion of hell, who will tell the plans of Satan. Connect the fragments of the mirror again, go to the throne. You will need to complete some tasks from the starting mission. After that, the secret of the warrior accompanying you will be revealed. He is the son of Dracula Alucard. An angry Zondek will then appear. After a while, an old woman with a scythe materializes in his place. Kill her with jump attacks. Demons will periodically appear, which can be killed due to a high jump. Each killed monster will bring you life and mana. After killing the old woman, find Satan's helper on one of the streets. At this stage of the game Castlevania: Lords of Shadow 2 "Revelations" (see walkthrough above) will be completed.
The last and most difficult battle awaits you. Climb up to the dragon's chains and break them. Green smoke will be poisonous to you and should be avoided. While cutting the chains, you will be attacked by monsters. Killing them restores mana and health. After completing the task, you must fight Satan, who will inhabit Alucard. He will have the same powers as Dracula. You don't need to use combinations. Try to dodge attacks. It will be a long last stage of the game Castlevania: Lords of Shadow 2. Passage, its finale will be reached after killing Satan.
Everyone can complete the add-on to the game
The developers didn't stop there. They came up with an addition. It's called Castlevania; Lords of Shadow 2 Revelations. Passing it implies that you will play for Trevor. However, according to experts, this game is nothing interesting. The events of the add-on will unfold some time before the start of the sequel. The son of Dracula, who became a vampire and took the name Alucard, will do everything possible to awaken his father. You will have to run from one end of the location to the other, solving not quite difficult riddles and periodically defeating weak monsters. There is no plot as such.

What is the main disadvantage of the Castlevania: Lords of Shadow 2 expansion? Many did not like the passage for Alucard due to the fact that Alucard himself was absent. Instead, you will control the doll without emotions and thoughts. Such a character does not cause feelings. Accordingly, the addition will not bring a lot of positive emotions.
The game has four difficulty modes:
- He was green. Damage acquired by the player is reduced by 50%, more consumables drop, and a small penalty is applied at the end of death.
- "Fearlessness itself." The player gains 100% damage, the number of consumables dropped at the standard level, the penalty at the end of death is simple. Simple enemies restore their own health at a rate of 50% of the original.
- "Who doesn't have enough Wang"? .. The damage acquired by the player is increased by 35%, the health points of enemies are increased by 50%, the enemies have higher resistance and a powerful elemental aura. There are more special enemies in the location, fewer consumables drop out, and the penalty at the end of death has been increased.
For ordinary enemies, health points are restored to the full extent, and for special opponents - up to 50%. But the chance of dropping more useful loot has been increased!
- "Easily?". The damage acquired by the player is increased by 70%, the enemies have more health points by 90%, stronger resistance and elemental aura. Even more special opponents, extremely few consumables, a larger penalty at the end of death.
The health points of ALL enemies are fully restored. Prey drops even more useful.
Whatever the chosen level of difficulty, it does not affect the linearity of the passage of the game. We proceed to the passage of the game Shadow Warrior 2 on the site StopGame.Ru.
STORY TASK "YES SHIT OF BUSINESS"
Examine the Temple of Passion and find the artifact. When you find it, bring it to Mamushi Heike at her estate.
Location "Temple of Passion".
After the download is complete, read the manual. Here are all the keyboard shortcuts:
- Movement - keys W, S, A, D.
- Run - double-click on the W key.
– Crouch – press and hold the CTRL key.
- Jerk - SHIFT key.
- Jump - "Space".
- Double pressing the space bar - double jump.
- Having made a double or a simple jump, press the SHIFT key in flight in order to make an additional dash.
– Left mouse button – melee or ranged attack.
– Right mouse button – aim for ranged weapons. For melee weapons, hold down the right mouse button to charge the weapon and deliver a strong blow.
– Key I – open inventory.
– Rotate the mouse wheel to switch between weapons.
- ALT key - switch between the ranged weapons used.
- G key - switch between the melee weapons used.
- Keys "1", "2", "3", etc. - change weapons depending on the slot they occupy.
- M key - open the mini-map.
- R key - reload weapons (wipe the sword).
In addition, there is a very entertaining function - "photo mode". Press the F9 key and the game will stop. Along with this, you can rotate the screen as you want by holding the right mouse button and moving the "rodent" itself on the table.
At the end of the beginning of the game, turn around to notice a narrow river. Climb it and go left, straight into the cave. In the caves you will be able to find your first collectible, the Statue of Prosperity. For the search for such statues, you can not only take successes, but also get coins.
With each new statue, the number of coins will increase by 100 units (the first statue - 5000 coins, the second - 5100 coins, etc.).
Follow the marker, get up and enter the temple. Attack the indicated wood wall in order to find the cave entrance.
Cheap starting skills
Domestic passage will focus not only on completing the main and side quests, but also the description of perks and weapons. First, let's deal with perks.
For completing tasks and killing enemies, you gain karma. The higher your karma, the closer you are to a new level. Any new level of the main brave man is an additional skill point.
Initially, skills are divided into three categories - "Life", "Abilities" and "Resource".
"Master of Destiny"
– Level 1. Increased big damage by 10 points. One skill point.
– Level 2. Increased big damage by 20 points. One skill point.
– Level 3. Damage increase by 30 units. Two skill points.
– Level 4. Increased damage by 40 units. Two skill points.
– Level 5. Increased damage by 50 units. Three skill points.
Master of Destiny.
"Doctor's Call"
- Level 1. Increased the chance of dropping first-aid kits from killed enemies by 10%. One skill point.
- Level 2. Increased the chance of dropping first-aid kits from killed enemies by 20%. One skill point.
- Level 3. Increased the chance of dropping first-aid kits from killed enemies by 40%. Two skill points.
Doctor call.
"Healing Flame"
– Level 1: When you spend Chi, you regenerate health. Restores 25 health points and consumes 35 chi points over 2 seconds. One skill point.
Pressing the Q key and holding it increases the casting time of the spell - you restore more health, but spend proportionally more energy.
Healing flame.
– Level 2. Increases the amount of health restored by 10%. One skill point.
- Level 3. Increases the amount of restored health by 25%. One skill point.
- Level 4: Significantly reduces the casting time of Healing Flame by 25% (from 2 seconds to 1.5 seconds). Two skill points.
"Master of Chi"
- Level 1. Increase the maximum number of qi energy by 10 units. One skill point.
- Level 2. Increase the maximum number of qi energy by 20 units. One skill point.
- Level 3. Increase the maximum number of qi energy by 30 units. One skill point.
- Level 4. Increase the maximum number of qi energy by 40 units. Two skill points.
- Level 5. Increase the maximum number of qi energy by 50 units. Three skill points.
Chi master.
Four skills are initially available in the Resources tab.
"Ammo Collector"
- Level 1. Increase the number of dropped projectiles by 10%. One skill point.
- Tier 2. Increases the number of projectiles dropped by 20%. One skill point.
- Tier 3. Increases the number of projectiles dropped by 30%. Two skill points.
- Level 4. Increase the number of dropped projectiles by 40%. Three skill points.
- Level 5. Increase the number of dropped projectiles by 100%. Ten skill points.
Ammo Collector.
"Karma Collector"
- Level 1. Increase the amount of acquired karma by 5%. One skill point.
- Tier 2. Increases the number of projectiles dropped by 10%. Two skill points.
- Tier 3. Increases the number of projectiles dropped by 15%. Three skill points.
Karma Collector.
"Bullet Bag"
- Level 1. Increases the number of maximum carry light and medium bullets by 10%. One skill point.
– Tier 2. Increases the number of maximum carry light and medium bullets by 20%. One skill point.
- Tier 3. Increases the number of maximum carry light and medium bullets by 30%. One skill point.
- Tier 4. Increases the number of maximum carry light and medium bullets by 50%. Two skill points.
Bullet bag.
"Greedy Gatherer"
- Level 1. Increases the radius of automatic collection of money and consumables dropped by enemies by 1 meter. One skill point.
- Level 2. Increased the radius of automatic collection of money and consumables dropped by enemies by 2.5 meters. One skill point.
- Level 3. Increased the radius of automatic collection of money and consumables dropped by enemies by 5 meters. Two skill points.
Greedy collector.
Starting weapon
At the beginning of the game, three weapons of various types and types are available to you.
"Little Wang". This is a melee weapon that deals 33.3 damage by default with a multiplier of 2.1. If you multiply both of these indicators, then it will turn out to be non-specialized weapon damage per second of time - 73.5 units. Three slots for adding components.
Note. When calculating damage per second for firearms, both the simple coefficient indicated under the damage and the miss coefficient are taken into account. You will notice it below.
Small Wang, the first blade of the main brave.
"Devolver Serpent". Ranged light firearms with 63.6 damage and 1.1 multiplier. Damage per second, taking into account both coefficients, is 55.6 units.
Three slots for adding components.
Devolver Snake.
– Clip size: 6 rounds.
– Reload time: 1.75 seconds.
– Missing rates: 2.5.
"Friend". Medium firearm with three component slots. The damage from one fired bullet is 4.0 units at a factor of 20. So, damage per second is 63 units.
Buddy.
– Clip size: 90 rounds.
– Missing rate: 10.0.
It is necessary to make a simple or double jump and press SHIFT to jerk. Jump down, where the first rivals are waiting for you.
Rats (type "Animals"). When you meet a rat the size of a dog, pray that it does not conclude that you have cheese. They attack only in close combat, therefore it is recommended to shoot with ranged weapons from a distance.
Fang (type "Animals"). For those who consist of only one mouth, the whole earth is like a delicacy. These opponents attack both in close combat and spit some kind of acid from a distance, spraying it in front of them.
From now on, the fourth few perks will become cheap - "Soldier". Initially, two new skills will appear.
- Level 1. Sting special move (W + RMB) - the main character makes a lunge, attacking an opponent with a melee weapon. Unlocked automatically.
– Level 2. Increased damage from the Sting special move (W + RMB) by 10%. One skill point.
– Level 3. Increased damage from the Sting special move (W + RMB) by 50%. One skill point.
– Level 4. Increased damage from the Sting special move (W + RMB) by 20%. Two skill points.
– Level 5. Increased damage from the Sting special move (W + RMB) by 30%. Two skill points.
The sting.
"Vortex"
- Level 1. Special move "Whirlwind" (RMB + A or D) - the main character rotates a melee weapon around him, causing damage to all opponents surrounding him. Unlocked automatically.
– Level 2. Increase the range of the Whirlwind special move (RMB + A or D) by 20%. One skill point.
- Level 3. Increased damage from the special move "Whirlwind" (RMB + A or D) by 20%. One skill point.
– Level 4. Increase the range of the Whirlwind special move (RMB + A or D) by 50%. Two skill points.
– Level 5. Increased damage from the special move "Whirlwind" (RMB + A or D) by 50%. Two skill points.
Vortex.
Wipe both types of enemies from the face of the earth. Familiarize yourself with special melee attacks. Press W and the right mouse button at the same time to attack the enemy in a lunge.
Press the key and the right mouse button A or D in order to attack in a circle (rotation depending on the pressed key).
Go through the open gates. Climb up next to the statue in order to replenish the chi energy. Looking ahead, we recall that there are a couple of types of such statues.
Some restore chi energy, others restore health, others restore projectiles, and the fourth are simple checkpoints.
Get down and take away the mysterious artifact. Watch the cut-scene.
Chief Temple Guard (Toro, type - "Demons")
When fighting this opponent, it is recommended to attack with melee weapons for as long as possible. When you notice that the health bar above the boss has turned gray, then stop attacking him. In this mode, the opponent is invulnerable. But a couple of simple enemies will appear. It’s just them that you will have to erase from the face of the earth, so that the boss becomes vulnerable again.
By the way, the boss himself will not attack you.
If you see that the boss, bouncing a little, begins to swing from a turn, then know that at the moment some kind of weapon will fly in your direction. Easily dodge to the side or hide behind cover. You have the ability to perform a dash to the side! To do this, press the A or D key and press Shift.
The function also works when jerking back.
Hammer (type "Demons"). Of all the tools, the hammer is, to put it mildly, not the sharpest. Based on this, he walks everywhere with a blade. This opponent is recommended to be shot from a distance.
He only attacks with melee weapons, his long blade. Remember that you have the ability to repel the attacks of your rivals with your blade.
During the fight with the boss, you have the opportunity to lure him to the ledge on the side, where there is a barrel with a red label. At the end of the shot, it explodes.
Stand by the door above and watch the cut-scene. Follow forward, use the ladder to get up (on W). Jump higher by double jumping and grabbing onto the ledge.
Here you will find new rivals - Megarachnids (type "Animals"). They attack in melee. Along with this, if the arachnid runs up from a distance, it can jump right at you from a distance of 2-3 meters.
Go outside and kill Molotovs and new rivals - Crawlers.
Crawlers (type "Demons"). In the wilds, these ferocious demons breed wonderfully and multiply. Well, at least someone in that place is fine! They attack with their own long claws, which are similar to those of Wolverine.
Kill from a distance with ranged weapons. get ready to jump as well as with Megarachnids.
After killing everyone, get into the car by pressing E.
Location "Yakuza Manor".
Go inside the house, stand up and interact with the door. Watch the cut-scene.
Then, in order to complete the quest, talk to Kikuchio, standing to the left of the door. Choose the first phrase to get another prize:
– 10000 coins.
– 1 skill points.
- Shotgun "Hauer".
New weapon - "Hauer Shotgun"
Three slots for adding components, ammo damage 76.8 units at a factor of 0.9.
– Clip size: 6 rounds.
– Clip reload time: 2.8 seconds.
– Miss rate: 45.0.
– Damage radius: 12 meters.
Hauer.
With all these coefficients, damage per second is 51.1 units.
STORY TASK "MY BRAVE"
Make your way to Zilla's lab, find the Oyabun's daughter Kamiko, and then take her to Smith's hideout.
A new task will automatically start. Move forward and try to open the door using the fake access card. Nothing will come of it.
New rivals will appear in the passage of Shadow Warrior 2 on the portal StopGame.Ru.
Floating drones (type "Cyborgs"). These scoundrels will attack you from a distance. Don't try to destroy them with melee weapons, because any time you get close to them, they will fly away. And they do it all at high speed. They attack mainly with missiles, producing two at a time.
You need to be in constant motion.
One of the drones should drop your first record (collectible). Stand up the steps where the game takes you. Here, one more new rivals will appear along with the Floating Drones.
Grunt Zilla (Cyborgs type) . As you have guessed, you have to fight in this mission against various cyborgs. Intimidation, the effect of surprise, fanatical devotion and merciless performance to the favorite - these are the four trump cards of any ZillaCorps warrior. Yes, and shooting at anything that moves. Attack with only two blades.
Try to keep your distance. In addition, when it disappears (applies a temporary effect of invisibility), you will still begin to see the aura of this opponent.
One of the Rubaks must drop a card of the first level of access. Go to the indicated door, near which there will be a second opponent - Zilla's Shooter. Everything is the same, only without swords and disappearance, but with ranged weapons.
Zilla's soldier is the same enemy, but instead of two pistols in his hand, one. If you get close, he can attack you with his foot.
Open the door and go inside. Kill all enemies. There will be a new opponent - the Swordsman of Zilla. Again, this is a cyborg. Unlike Bruisers, he wields a huge two-handed blade.
As well as Rubak, applies the effect of invisibility. Like the Guardian of the Temple, it unleashes a stream of energy at you on a grand scale.
One of the opponents will drop a second level access card. Take it, stand upstairs and go through the door. Watch the cut-scene.
Defeat rivals, among which new ones will appear.
Zilla's Crusher (Cyborg type) . Just like a simple attack aircraft, only heavy. And electrified. He has more durable armor compared to a swordsman, which also uses one melee weapon.
Able to teleport from place to place, and attack you with electricity.
Special Enemy "Lieutenant Akimbo"
Immunity to your properties. Attack him with firearms from a distance. As with the Temple Guardian, at about half of their total health, the lieutenant will hide under the shield and become invulnerable. Kill his associates who first appeared, and then deal with the boss himself.
It will drop a third access level card and a new weapon!
New Weapon - Dec-ARD
This is a light firearm (pistol). The damage from one bullet is 47.6 units, and the coefficient is 1.3.
– Clip size: 8 rounds.
– Clip reload time: 1.6 seconds.
– Miss rate: 3.0.
– Unique highlight: when hit in a weak place for 5 seconds, the weapon deals 30% increased damage.
Dec-ard.
So, taking into account both coefficients, it is possible to calculate the damage per second - 51.6 units. Enter inside the laboratory and interact with Kamiko lying on the table. Watch the cut-scene.
Location "Dragon Mountain".
In order to complete the quest, it remains to perform a couple of actions. Go to the indicated place, enter the building and go up to the second floor. Take a new weapon.
New weapon - Pilischa!
This weapon is of the "Special" type. Damage is 68.8 seconds at a factor of 1.5. So, it is possible to deal 108.4 damage per second.
There are three slots for components.
Special Effect: Damage dealt to small enemies is increased by 25%.
Pilischa!
From the table, take a new perk from the "Properties" category.
New Skill - Mind Control
– Level 1. Accelerating the recovery of the supply of qi. Restores 0.5 points of Chi every second, up to a maximum of 50% of a large amount. That is, if you spent less than half of the qi energy, and you had a completely filled scale, then qi will not be restored.
One skill point.
- Level 2. Qi is restored at the same rate, but up to 75% of a large supply. One skill point.
– Level 3. There is a Qi leak equal to 1%. Two skill points.
– Level 4. Qi recovery rate increases to 1 energy point per second. Two skill points.
Mind control.
– Level 5. Chi energy is fully restored at a rate of 10 units per second. Ten skill points. Here you can apply skills in almost one second.
Take also the talisman, after which move along the marker to Hideo. Talk to him twice to receive a reward for completing the quest "My Brave".
Quest "My Brave". Prize:
- Two skill points.
- Skill "Disappearance".
- Weapon "Zaibatsu Swords".
New Skill - Vanish
– Tier 1. An old ninja move that allows the user to hide their own presence. Unlocked automatically. The duration at this level is 8 seconds, along with this, the damage you deal is increased by 50% (only with melee weapons !!!).
Cast in two seconds and consumes 50 Chi.
Disappearance.
– Tier 2: Significantly reduces the cost of casting Vanish by 25%. One skill point.
– Level 3: Increases the duration of Vanish by 25% (up to 10 seconds). One skill point.
- Level 4. You gain an additional 50% melee damage bonus. Two skill points.
New Weapon - "Zaibatsu Swords"
Three slots for adding components. Damage of 36.1 and a multiplier of 2.0 gives a total of 75.9 damage per second. Please note that in addition to a simple melee strike, when you press the left mouse button, you produce some energy flow that deals damage to the one who is in the front rows.
It is not possible to do so, of course. There are 100 shots available (until you find the right ammo).
Zaibatsu swords.
This property is called "Whiplash". It deals 63% damage from the original. In other words, if you attack only from a distance, then the opponent gains damage per second of "75.9 units x 0.63".
But if you attack an enemy at close range, then deal both 75.9 units per second and "75.9 times 0.63" units per second (their total value) at once.
Go to Smith, start a conversation with him. It will be marked on the map with a yellow "exclamation point". At the time when you start the conversation, then double-click the left mouse button on the words of Smith himself, which says that it is necessary to cure Kamiko's body.
This is how the quest will begin.
STORY MISSION "Warm BLOOD"
Find the medicine ingredients for Kamiko and bring them to Smith.
Follow the marker to Larry - this is another seller, the same as Hideo. Only Hideo sells melee weapons and everything related to them. In addition, it is possible to buy skills from him.
For his part, Larry sells the weapons themselves and ranged ammunition (firearms). Talk to the man to get Golden Chrysanthemum Powder from him.
Approach the car and interact with it. Watch the cut-scene. From now on, teleportation will be cheap for you.
This is an alternative to fast travel in most games. Press I and go to the "Assignments" tab. You will notice the map. It currently has three icons - these are three missions, two of which you have already completed.
Click on the mission "Warm Blood" and press the "Start" button.
Location "Shadow Hills".
After moving to a new location, go through the bridge. There will be a couple of opponents in a huge clearing, including Hammers, Fangs and Reinforced Toro (Guardian of the Temple). Unlike the previous Temple Guardian, this opponent is immune to your properties and is characterized by survivability (higher health points).
Apply different growths and explosive barrels to inflict additional damage on your opponents. At the end of the victory, go to the chest that has grown to the thickets and reach out from it for a demonic wand. This is one of the quest items.
Follow the marker and interact with the raw crystal on the stand, behind the bridge. Move on to the next marker. At the end of the auto-save checkpoint, you will encounter new enemies.
Stingtail (type "Animals"). The size of a large dog, this mutant scorpion combines the piercing forks with the cranial properties of a spoon. In general, the enemy attacks mostly in close combat. It is recommended to destroy such rivals with firearms.
Attention! Keep in mind that all of these enemies have fire resistance.
Thorntail (type "Animals"). It’s great that the fleas are too small, and we don’t see them ... “YOUR MOTHER! BURN HIM SOMEONE!". Unfavorable creation.
Of the annoying properties, we note that the opponent can fold into a goblet and roll straight at you, attacking with his own spikes.
Finally, there will be a special enemy - the Sharp Spike. Spitting from a distance. Try to shoot without getting too close.
At a time when the opponent's health is about 50% of the big one, he will use an invulnerability shield. Until you wipe Thorntails from the face of the earth, the shield will not fall. At the end of the victory, you will receive a new and new weapon skill!
New Skill "Ammo Bag"
- Level 1. Increases the maximum number of charges you can carry with you by 10% (ammunition - gasoline for chainsaws, projectiles for Zaibatsu blades, etc.). One skill point.
- Level 2. Increases the maximum number of charges you can carry with you by 20%. One skill point.
- Level 3. Increases the maximum number of charges you can carry with you by 30%. One skill point.
- Level 4. Increases the maximum number of charges you can carry with you by 50%. Two skill points.
Ammo bag.
New weapon - "Yumi"
This is the first weapon from the new Artillery category as part of the Shadow Warrior 2 action game on StopGame.Ru. Has three slots for upgrades. Damage 157.2 at a factor of 0.5. Damage per second is approximately 82.5 units. Arrows are used as projectiles. It's basically just a bow.
The miss rate is 4.0, which is taken into account when calculating damage per second.
Yumi.
Unique property: 5% chance of turning the opponent into a hare on a successful shot.
Follow then until you find yourself in the village. If you find a dark hare here, then shoot at him so that he turns into a Necrorabbit. For killing this special enemy, you will receive an additional prize.
Go then, along the marker, until you notice the Claw Tern.
This special enemy is immune to your abilities and fire, but is highly vulnerable to frost damage. Take advantage of this. At the end of the kill, take his skin.
Follow then and take the second raw crystal. Killing opponents, make your way to the next marker. In the village, as shown in the screenshot below, there is a separate yard with a house.
Go inside and find a new weapon in the chest on the first floor.
New weapon - "Thresher"
This weapon belongs to the "Shotguns" category. His damage is 57.6 units at a factor of 1.2.
– Clip size: 11 rounds.
– Clip reload time: 3.5 seconds.
– Miss rate: 40.
– Damage Radius: 15.
Thresher.
Taking into account both coefficients, weapon damage per second is 52.6 units.
Get to the last crystal and take it.
Then hold down the T key and hold until you automatically teleport back to Dragon Mountain. Approach Smith and talk to him. As a prize you will receive…
Quest "Warm Blood". Awards:
– 10000 coins.
- One skill point.
- Skill "Emission Qi".
- Weapon "Cleaver".
New Skill - Chi Burst
– Level 1. Qi transforms into a wonderful energy surge. Doesn't affect elite or empowered enemies in any way (like Enhanced Toro from the previous mission). Works on enemies just in front of you, of a simple size. Range - 7 meters, qi consumption - 20 units.
Unlocked automatically for completing the quest.
– Level 2. The range of this skill is increased by 25% (up to 8.75 meters). One skill point.
– Level 3: Chi Burst starts to deal damage to large enemies. One skill point.
– Level 4. “Qi Burst” affects not only those in front of you, but also all other opponents near the main brave. Two skill points.
Release of qi.
How does it work? Press the C key for a simple energy burst attack. Press C throughout the dash for a kick.
Finally, when the perk is level 4, you can press C in the air to hit the ground.
New weapon - Cleaver
This weapon belongs to the "Small Swords" category. Damage is 33.3 units, coefficient 2.2. Given this, you have the ability to deal 77.0 damage per second.
Three slots for components.
Cleaver.
At the time when you turn in the quest to Smith, then you will finally have the opportunity to complete side tasks. Go from Smith to the center of the village and enter the building on the left side of Wang's apartments. Go up to the second floor and talk to Mamushi Heika. She will have a story and side quests for you.
Take the second one first.
SIDE MISSION "Q_title_005seu"
Find the Shadow Cookers in the slums and deal with them. Send a message to let everyone know that Mamushi Haika is not to be trifled with.
– 10000 coins.
- One skill point.
- Skill "Master of the Black Rites".
- Weapon "Duke".
Move to the specified location.
Calamity location.
Move to the indicated place, killing the yakuza. Rivals are actually similar to cyborgs, both in techniques and in variety. Talk to the drug dealer and go to the indicated place.
Here you have to wipe out other opponents and the protector of the cook, some of which will be new.
Then return to the drug dealer and determine the real location of the Cook. Go and kill the boss. The fight will be divided into three stages, as in most cases.
Attack the Cook until he activates invulnerability. Now kill his defenders. At the time when the shield falls, finish off the enemy.
Collect a prize, which will include a new perk.
New skill - "Intoxication"
– Tier 1. Enhances the properties of Poison-class weapon upgrades. Vulnerability to poison effect +10%. One health point.
– Level 2. Vulnerability to the effect of poisoning + 20%. One health point.
– Level 3 Toxic Corpse Explosion Damage +20%. One skill point.
– Level 4 Toxic Corpse Explosion Damage +50%. Two skill points.
Intoxication.
In addition, you will receive new weapons.
New weapon - "Claw of the Claw"
From the "small swords" category. Three slots for upgrades, 36 damage at a factor of 2.1 gives a total of 79.4 damage per second. Small enemies take 10% more damage than the original. If you kill with a special move, then for 10 seconds you increase the chance of critical hits by 15%.
Paw of the Cogterni.
Return to Mamushi and turn in the quest. As a prize, you will receive a new perk and a new weapon.
New Skill - Black Rite Master
– Level 1. Using this perk, you will be able to use the abilities “Chi Burst” and “Grapture of Darkness” on strengthened enemies. To use, you need a Level 4 Dark Grab and a Level 3 Chi Burst. Chance of effect on strengthened enemies + 10%. One skill point.
– Level 2. Chance of effect on strengthened enemies + 25%. One health point.
– Level 3. Chance of effect on strengthened enemies + 50%. Two skill points.
Master of the black rites.
New weapon - "Duke"
This is the first weapon in the Grenade Launcher category. Damage of 108 units at a factor of 1.2 gives 85 damage per second.
– Clip size: 6 grenades.
– Missing rate: 7.
– Damage radius: 3.5 meters.
STORY MISSION "INDUSTRIAL ESPIONAGE"
Find Kamiko's secret notes and return them to Mamushi Heika.
– 15000 coins.
- Two skill points.
- Skill "Capture of Darkness"
- Weapons "Slugehammer" or (!) "Qi-genocide."
At the end of the appearance on the location, you will notice new rivals.
Scorpidroid (type "Cyborgs"). A scorpion robot known for its plasma sting. But everyone, in most cases, forgets about its vacuum addition. Attacks up close and from a distance.
not strong armor, so it is possible to kill with any weapon.
In addition, there will be a chief - Transistor ZL-209. Wipe it off the face of the earth to get a new perk and a new weapon.
New Skill - Explosive Bag
- Level 1. Increases the maximum number of explosive projectiles that you can carry. Missiles and Grenades + 10% to a large supply. One skill point.
- Level 2. Missiles and Grenades + 20% to a large supply. Two skill points.
– Tier 3. Missiles and Grenades +30% to a large supply. Two skill points.
- Level 4. Missiles and Grenades +50% to a large supply. Three skill points.
Bag for explosives.
New weapon "Monsoon"
– Clip size: 7 shells.
– Miss rate: 4.0.
– Damage radius: 4.5.
Monsoon.
If you take at least 10 damage, then within 10 seconds, the cooldown time is reduced by 2 times.
Mother of drones. A larger rival from the category "Cyborgs", an analogue of floating drones.
Follow the marker. Meet a couple more new opponents, among which there will be only cyborgs - KISS (a cyborg lady with fans) and Herculon (a huge robot, one and a half times smaller than Transistor). Once in a multi-storey building, kill the first squad of rivals. Climb into the shaft and jump up in order to fly up on the springboard.
On the second floor, wipe out another enemy group from the face of the earth. Get into the apartment and go to the indicated place. At the end of the cutscene, take Kamiko's access card.
At the time when you become at the specified TV station, then move from the bottom up, killing all the opponents. When they are wiped off the face of the earth, follow the marker and talk to the drone named Sin.
Follow to the indicated place. Here you will need to visit three points, kill enemies and pick up laptops from chests. Next to one of them there will be a chest (about 50 meters away), in which you have the opportunity to find a new weapon!
New weapon - ""
Large enemies deal 10% increased damage. When parrying, there is a 30% chance to cast Chi Burst.
Oni Blade.
Take the three laptops and teleport back to Dragon Mountain.
ATTENTION! You will need to choose a prize - one of two weapons. We'll outline both below!
New weapon - Sledgehammer
– Clip size: 13 rounds.
– Reload time: 3 seconds.
– Miss rate: 40.0.
– Damage radius: 16.0 meters.
Sledgehammer.
If you make two simultaneous kills, then within 10 seconds you will receive a bonus to the rate of fire + 50%, which is extremely important in the passage of Shadow Warrior 2 on StopGame.Ru.
New weapon - "Qi-genocide"
Damage is 60.2, which at a factor of 1.5 gives 92.4 damage per second.
– Clip Size: 120 Plasma.
- Used 12 shells at a time.
– Clip reload time: 3.3 seconds.
– Miss rate: 7.0 seconds.
– Damage radius: 3.0 meters.
Qi genocide.
If you keep a constant flame, then the rate of fire increases by 10%.
The choice is yours!
SIDE MISSION "Chi-teres"
Bring raw from the miners living west of Calamity.
– 15000 coins.
- One skill point.
- Skill "Capture of Darkness".
The task is taken from Master Smith. Move again to the Shadow Hills location. Follow the marker where you will come across a closed door. Then you will need to find the key to which you are also led by the handle. The key lies in the basement of the said building.
Nearby is a chest with one of the collectibles.
during this segment you will meet with three new enemies.
Dynomite (type "Animals"). Dynomite find friends. What is that ticking sound? Try to destroy these kids from a distance, because when they die or get close to your character, they will explode.
antom (type "Demons"). A very unpleasant opponent, attacking with claws.
Serpentaur (type "Demons"). This enemy causes trouble in that it can attack both from a distance and close. So they also appear in whole "packs", 8-10 pieces each. But the whole essence is contained in the fact that these rivals breed by simple cloning.
At the time when Serpentaur raises his own weapon, after a couple of seconds it doubles or even triples.
Take the key and open those very gates. Get to the right place, where you have to wipe Zilla's cyborgs from the face of the earth. Having done this, pick up the item on the specified unit.
Teleport back to Dragon Mountain and turn in the quest to Master Smith.
P.S. But if you find the locations of the "Evil Guard" boss and kill him (get the corresponding achievement), you can get new perks from the second category.
New Skill - Pyro
- Tier 1. Enhances the properties of upgrades of weapons of the class "Flame". Ignite result damage increased by 10%. One skill point.
– Tier 2. Ignite result damage increased by 20%. One skill point.
– Tier 3. The duration of Ignite effects is increased by 15%. One skill point.
– Tier 4: The duration of Ignite effects is increased by 15%. Two skill points.
Pyro.
As for the reward for completing the quest, there will be a second perk.
New Skill - Grab Darkness
– Level 1. You will be able to summon demonic spikes from the underworld. Does not work against enhanced and elite opponents. The range is 6 meters, the effect will last for 3 seconds. Works with rivals in front of you.
Consumes 30 qi. Unlocked as a reward for the Qi-ter quest.
– Level 2. Affects all enemies near you. One skill point.
- Level 3. Damage increased by 40%. One skill point.
- Level 4. The skill will work in battle against large enemies.
Darkness capture.
SIDE MISSION "SHINJUCH SCROLLS - PART 1"
Search Grandpa Smith's house for ancient blacksmith scrolls.
The quest is taken from Master Smith at the end of the "Chi-tera" quest.
– 15000 coins.
- One skill point.
- Weapon "De Volt".
After showing up in the new location of the Shadow Hills, move along the marker until you hit the gate. Along the way, you will meet new enemies - Claws. Some Talons transform into more wonderful creatures - Talons.
Be careful!
When you reach the door, you will update the task. You need to find the key. Easily follow the marker showing you the way. After taking the key, go back and open the door (gate).
Go to the indicated house, in which, on the second floor, find "Grandpa Smith's Diary". Teleport back and talk to Smith to complete the quest. And here's the prize...
New weapon - "De Volt"
– Clip size: 32 arrows.
– Reload time: 1.5 seconds.
– Miss rate: 4.0.
De Volt.
SIDE MISSION "SHINJUCHED SCROLLS - PART 2"
Determine what happened to Smith's student and save him if he is still alive.
The task is taken from the same master Smith. Upon completion of the first part of this secondary quest.
– 15000 coins.
- One skill point.
- Skill "Whip".
When you appear on the location, then move along the marker, killing opponents. New enemies - Hata Mari. These female warriors are similar to KISS from the Cyborg category, but are yakuza. wage war with fans. When you get to the right place, talk to the man in the cage. Go to another marker, where you will need to wipe out Sentry with different resistance.
This is an elite soldier, be careful. Having obtained the key from him, you can also pick up a new perk.
New Perk - Killer Instinct
– Level 1. The attacker's damage is increased if he is on death and the verge of life (low health). The threshold of fate at which the perk is activated is 20% of the total supply. Damage is increased by 20%. One skill point.
- Level 2. The threshold of fate for activation is increased to 30% of the total supply. One skill point.
- Level 3. Damage while the perk is active is already increased by 50%. Two skill points.
Killer instinct.
Return with the key to the cage and free the man. Move to Dragon Mountain and turn in the quest to Master Smith. You will also receive a perk as a prize!
New perk - "Whip"
- Level 1. Release a deadly ammunition that will make holes in everything in its path. Unlocked automatically as a reward for completing this side quest.
– Level 2. The range of the whipping strike is increased by 15%. One skill point.
– Level 3. The range of the whipping strike is increased by 30%. One skill point
– Level 4. The execution speed of the whipping strike is increased by 50%. Two skill points
– Level 5. The range of the whipping strike is increased by 30%. Two skill points.
Hard hit.
Side Quest "SIDE MISSION: SHINJUZED SCROLLS - PART 3"
This part of the side quest chain is already taken from Hideo, a weapon upgrade vendor. Talk to him.
– 20000 coins.
- Two skill points.
- Skill "Bag for energy projectiles".
It is possible to purchase both perks and weapons from sellers. The assortment is replenished sometimes at the end of the execution of quests. At the moment, it is possible to purchase one weapon and two new perks from the seller.
New weapon - "Plasma cutters"
This is a melee weapon with three upgrade slots. Damage of 37.8 and a multiplier of 2.3 gives 92.7 damage per second. Special shells of 8 pieces are used.
If you have the Whip Strike property (and you took it at the end of the last side quest), you can increase the damage of this property when you have plasma cutters in your hands by 80%. Assuming you have ammo.
Plasma cutters.
New Skill - "Below Zero"
– Level 1. Enhances the properties of upgrades of weapons of the “ice” class. Chill effect is increased by 10%. One skill point.
– Level 2. Chill effect is increased by 25%. One skill point.
– Level 3: The duration of the chill result is increased by 25%. One skill point.
– Level 4. Freeze chance 15%. Two skill points.
Below zero.
New Skill - Lightning Strike
– Tier 1. Enhances the properties of weapon upgrades of the “electricity” class. Vulnerability to the effect of electric shock 10%. One skill point.
- Level 2. Vulnerability to the effect of electric shock 20%. One skill point.
– Level 3. Vulnerability to the effect of electric shock 30%. One skill point.
– Level 4. Damage from the result of electric shock 15%. Two skill points.
Lightning strike.
Go to Larry. It is possible to purchase Chi Genocide from him (if you did not choose him as a prize for completing Mamushi's quest) and three second weapons. In addition, there are two new perks.
New weapon - "One-Stop"
– Miss rate: 4.5.
– Damage radius: 4.5.
One-stop.
New weapon - AR-53
– Clip size: 60 rounds.
– Clip reload time: 2.5 seconds.
– Miss rate: 5.0.
AR-53.
New weapon - "Stick of Doom"
25.jpg - Stick of fate.
– Clip size: 2.
– Reload time: 2 seconds.
– Miss rate: 65.0.
– Damage radius: 8.0.
– Crit Bonus +50%.
New Skill - Healer's Touch
– Level 1. Increases the healing abilities of all first aid kits. Medkits restore 10% more health points. One skill point.
– Level 2. Medkits restore 20% more health points. One skill point.
– Level 3. Medkits restore 40% more health points. Two skill points.
– Level 4. Medkits restore 60% more health points. Three skill points.
– Level 5. Medkits restore 100% more health points. Ten skill points.
Healer's Touch.
New Skill - Energy Projectile Bag
- Level 1. Increases the number of energy projectiles that can be carried. plasma and Energy by 10%. One skill point.
– Level 2. Plasma and Energy by 20%. One skill point.
– Level 3. Plasma and Energy by 30%. One skill point.
– Level 4. Plasma and Energy by 50%. Two skill points.
Bag for energy projectiles.
NOTE! This perk may not be taken, because you will receive it for completing the current side task.
Zilla City location.
Follow the marker, killing various opponents. Chat with the person and follow to the indicated place. Interact with the panel to open the door. Go to the trampoline and jump up to the top tier. Chat with the Antiquarian, who will need to be killed at the end (and his yakuza associates).
Return along with the scroll that fell from the antiquary to Dragon Mountain and chat with Master Smith in order to complete the task and the entire quest chain in the passage of the game Shadow Warrior 2 on the StopGame.Ru portal.
STORY MISSION "LEAKING TROUBLE"
You need to go to the wastelands and find the source of the dark slime.
The next story quest is taken from Mamushi. Specify more details about the task.
– 15000 coins.
- Two skill points.
- Skill "As if the wind."
Move to the specified location. Get to the closed gate and inspect it. You need to find the key.
Follow to the indicated place. Here it will be necessary to defeat the boss - the Gatekeeper. At the end of its destruction, a couple and the key of diaries you need will fall out.
Use this key to open the gate and follow through the gorge.
Examine the next gate, after which wipe the monsters off the face of the earth. Take place in the opened passage, go up to the second floor of the house and talk to the demon.
On the first floor you have the opportunity to find new weapons.
New Weapon - Enra's Judgment
– Clip size: 12.
- Used 5 projectiles at a time.
- 10% chance to save projectiles.
– Reload time: 3 seconds.
– Miss rate: 0.5.
– Crit Chance: 6.6%.
– Crit Bonus: 60%.
- Damage dealt to small enemies reduced by 11%.
- Restores 4.4 fate points at the end of a kill.
- If you purchase 100% ammo, you increase your reload chance by 25% (it's not clear what that might mean).
Enra's Justice.
Return and go through the gate. There will be a huge battlefield where you have to fight Elite Puzan. Talk about everything with Kamiko, and after that you will automatically move to the Dragon Mountain.
New skill - "Like the wind"
– Level 1. Increases movement speed by 10%. One skill point.
– Level 2. Increases movement speed by 15%. One skill point.
– Level 3. Increases movement speed by 20%. Two skill points.
– Level 4. Increases movement speed by 25%. Three skill points.
Like the wind.
STORY MISSION "GREAT TROUBLE IN CALMITY"
Calamity was attacked. You need to climb Dragon Mountain and get to Smith before it's too late.
The task is done automatically.
Move up until you encounter the first enemies. One of them will drop a new weapon.
New weapon - Katana Z45
At 32.9 damage and a multiplier of 2.3, it gives 80.6 non-specialized damage per second. When you kill in one moment for 10 seconds, you gain damage resistance + 75%.
Katana Z45.
New weapon - "Fujin"
– Miss rate: 5.0.
– Damage Radius: 4.0.
- If your health is less than 50% of your total health, your rate of fire is increased by 25% for 10 seconds.
Fujin.
Go upstairs and talk to Hideo. Take place in the garage and go down into the pit in order to find a hole. Jump down and go through the cave.
Perebeyte all opponents, and then double jump hook on the specified ladder.
New weapon - "King Skeletron"
– Clip size: 90 missiles.
– Reload time: 4.0 seconds.
– Miss rate: 16.0.
– Movement speed: - 20%.
- At the end of three seconds of constant fire, chi energy begins to recover at a rate of 2 units per second.
King Skeletron.
Bring the medicine you found right there to Master Smith and watch the cut-scene.
You will also receive a new perk.
New Skill: Wrath of Shadows
- Level 1. You will be able to turn into an unstoppable killing machine. Base duration 12 seconds, damage increased by 50%, destiny leakage +2%, chi leakage +2% and damage resistance +25%. Unlocked automatically.
shadow wrath.
- Level 2. Damage resistance from the use of the perk "Wrath of Shadows" increases to 50%. One skill point.
– Level 3. Perk damage bonus increases to 50%. One skill point.
– Level 4. Access to Whipping Strike when dealing melee damage 100%. Two skill points.
- Level 5: The duration of "Anger of Shadows" is increased by 67%. Ten skill points.
Go to the square and fight the Corrupted Kamiko. In battle, head to worry about kicking the ground. You will see how the monster raises its own paw high.
While the enemy is bouncing, he can land anywhere. But a couple of seconds before landing, a red light will appear in the place where Kamiko falls.
Corrupted Kamiko.
Whenever you see yellow energy shields, avoid them. In the middle of the fight, Kamiko will become invulnerable. You will need to kill her minions. Do this in such a way as to avoid the yellow energy barriers (you will always need to move around Kamiko behind these barriers).
Wipe off the face of the earth and watch the cut-scene. Collect the necessary items and enter the portal leading to the Shadow Hills.
Location "Palace of the Ancients".
Go ahead and talk about everything with Ameonna. Now she is your main quest giver. Pick up the main quest and two extra quests from Gozu, the demon near the entrance to the palace.
But for now, head back to Dragon Mountain. Talk to Hideo, who will have a new weapon for you.
New weapon - "Gobin Rude"
– Use of projectiles: 8 arrows.
– Miss rate: 3.0.
- On a critical hit, the chance of the next critical hit within 10 seconds increases by 10%.
Gobin Rud.
Larry will have one new perk and one new weapon for you.
New weapon - Raven
– Clip size: 200.
– Recycle time: 6.0 seconds.
– Miss rate: 18.0.
– Movement speed is greatly reduced by 30%.
Crow.
New Skill - Heavy Bullet Bag"
– Level 1. ammo and heavy bullets – stock + 10%. One skill point.
– Tier 2. Ammo and Heavy Bullets – +20% stock. One skill point.
– Level 3. ammo and heavy bullets – stock + 30%. One skill point.
– Tier 4. ammo and heavy bullets – +50% stock. Two skill points.
Bag for heavy bullets.
New skill - "Elemental Shield" (for completing the quest)
- Level 1. Vulnerability to elemental effects is greatly reduced by 10%. One skill point.
- Level 2. Vulnerability to elemental effects is greatly reduced by 20%. One skill point.
- Level 3. Vulnerability to elemental effects is greatly reduced by 30%. Two skill points.
- Level 4. Vulnerability to elemental effects is greatly reduced by 50%. Three skill points.
- Level 5. Vulnerability to elemental effects is greatly reduced by 100%. Ten skill points.
Elemental Shield.
SIDE MISSION "MONSTER TEA PARTY"
You need to find out what happened to the tea plantation of the cultists, deep in the wastelands.
– 25000 coins.
- One skill point.
Based on the quest, you will need to visit three different points and inspect the tea pots. Then move to the remaining checkpoint. Only upon completion of the inspection of the three places will the necessary gates open. Cross the bridge, wipe out the enemies and pick up the real tea extract on the top of the hillock.
Teleport to Dragon Mountain, go to the Palace and talk to Gozu to turn in the quest.
At the end of this quest, Larry will have a new weapon that you have the opportunity to purchase.
New weapon - "Major Fletcher"
– Clip size: 16.
- The use of shells: 4. Plasma.
– Miss rate: 50.0.
– Damage radius: 8.0 meters.
- If you have more than 50% of shells, then the chance of reloading the clip is 30%.
Major Fletcher.
SIDE MISSION "DEMON TRADING"
Some of the cultists went missing while they went to Calamity to get provisions. You need to find out what happened and return them intact if possible.
– 20000 coins.
- One skill point.
- Skill "Second Chance".
- Weapons "Stapler" or "Kazagurum".
Move to the location and go to the indicated place. In the house on the ground floor you will find a corpse. Climb to the second floor and take the evidence from the box. Move to Dragon Mountain and chat with Larry. At the time when you determine about the yakuza member, then return to the location and go to him.
Talk and kill all opponents. Without fail, take the head of the Cardinal.
Use it on the gate in order to open the passage further. At the end, you will need to visit a couple of places and release a total of five cultists. When freeing the first two, in the house on the surface, kill the elite fighter Fury Shooter to get a new perk.
We continue the passage of Shadow Warrior 2 on the site StopGame.Ru.
New Skill - Auto Reload
Enables automatic reloading of inactive weapons.
– Level 1. Cooldown delay 100. One skill point.
– Level 2. Cooldown Delay 80. One skill point.
– Level 3. Cooldown delay 60. Two skill points.
– Level 4. Cooldown delay 5. Ten skill points.
Auto recharge.
At the time when you begin to release the second two, located nearby, in the dungeon, then at the end, go towards the fifth. Go down and under the grate of the dungeon, find a new weapon in the water.
New weapon - "Hedgehog"
With a base damage of 41.6 and a multiplier of 1.9 per second of time, it deals 84.1 damage. Small enemies deal 10% increased damage.
Hedgehog.
At the time when you release all the cultists, then return to the quest giver and choose one of the proposed weapons as a prize.
New weapon - "Stapler"
– Clip size: 30 arrows.
– Reload time: 1.5 seconds.
– Miss rate: 3.0.
– Crit Bonus: +50%.
– 30% chance to replenish 50% of the ammo in the clip on kill.
New weapon - "Kazaguruma"
Kazaguruma.
In addition, you will receive a new skill as a prize.
New Skill - "Second Chance"
– Level 1. Duration 5 seconds, damage while active + 50%. One skill point.
– Level 2. Duration 8 seconds. One skill point.
– Level 3. Damage while active + 100%. Two skill points.
– Level 4. Damage while active + 100%. Ten skill points.
Second chance.
SIDE MISSION "STRAWBERRY - PART 1"
Someone filmed Ameonna while she was bathing. Find this pervert and hand over the photos.
– 20000 coins.
- One skill point.
- Weapon "Triad" or "Beast".
Move to the location and go forward. Kill an Elite Elite Enemy Fart that you won't miss. Kill the rest of the opponents.
This whole horde will drop new weapons and a new perk.
New skill - "One with nature"
– Tier 1. Maximum Fate recovery 20%, 0.5 HP regeneration per second. One skill point.
– Tier 2. The maximum fate recovery is 40%. One skill point.
– Tier 3. 1 HP regeneration per second. Two skill points.
One with nature.
New weapon - "Shogun"
– Clip size: 5 rounds.
– Reload time: 2.5 seconds.
– Miss rate: 60.0.
– Damage radius: 10.0 meters.
- 50% chance of dealing double damage with the last bullet in the magazine.
Shogun.
Get to the right place and chat with the photographer. Kill the opponents and talk to him again. Return to the Palace and turn in the quest.
You will need to choose one of two weapons.
New weapon - "Triad"
– Clip size: 6 rounds.
– Reload time: 2.0 seconds.
– Miss rate: 3.5.
– If you kill an enemy with a correct shot in a weak place, then for 10 seconds your rate of fire will be increased by 25%.
Triad.
New weapon - "The Beast"
From the Melee Weapons category. With a base damage of 46.4 and a multiplier of 1.8, it can deal 88.9 damage per second to enemies. If you target a target with Shadow Grab when it hits with a special move, it will increase the damage of the perk by 10%.
SIDE MISSION "STRAWBERRY - PART 2"
Gozu asked you to bring him all the erotic tapes of Ameonna of Calamity.
– 20000 coins.
- One skill point.
- Weapon "Machine gun 666" or "Farewell kiss".
At the end of the last quest, Larry got one more weapon available.
New weapon - "Marvin"
– Clip size: 40.
– Use of projectiles: 2.
– Reload time: 1.5 seconds.
– Miss rate: 3.0.
- 30% chance to transform the target into a hare on a critical hit.
Marvin.
All you need to do is find and wipe out eight opponents from the face of the earth, from which bottles of whiskey will fall out. But at the location it is possible to find the Black Rogue, a boss from which a new perk will drop.
New Skill - Elemental Focus
Increases the conversion of simple damage to elemental damage.
– Level 1. Damage converted to elemental is increased by 5%. One skill point.
– Level 2. Damage converted to elemental is increased by 10%. One skill point.
– Level 3. Damage converted to elemental is increased by 20%. Two skill points.
Elemental focus.
After killing another boss, you can take the second skill.
New Skill - Loyalty Card
Affects the prices, quantity and quality of goods in stores.
- Level 1. Prices for the purchase of goods are reduced by 10%. One skill point.
- Level 2. Prices for the purchase of goods are reduced by 25%. One skill point.
- Level 3. The quality level of goods in stores increased by 20%. Two skill points.
- Level 4. The number of goods in stores increased by 30%. Two skill points.
Loyalty card.
In addition, the location has two weapons.
New weapon - "Double Dao"
Melee weapon with a base damage of 43.3 and a multiplier of 1.9. Damage per second - 88.8 units. You gain a +30% crit bonus.
Double Dao.
New weapon - "Einhander"
– Clip size: 60 rounds.
– Reload time: 1.5 seconds.
– Miss rate: 12.0.
– 25% chance to reload a clip by taking more projectiles (50%).
In addition, at the time when you turn in the quest to Gozu, you can choose a prize - one of two weapons.
not strong.
New weapon - "Machine gun 666"
– Clip size: 100 rounds.
– Reload time: 3.5 seconds.
– Miss rate: 13.0.
– Slow movement speed by 20%.
Machine gun 666.
– Miss rate: 2.0.
– Damage radius: 5.5 meters.
– Slow movement speed by 10%.
Goodbye kiss.
SIDE MISSION "STRAWBERRY - PART 3"
You need to chat with Sin about Ameonna's erotic tapes.
– 25000 coins.
- Two skill points.
- Weapon "Fire Fist".
Go to Zilla City and look for the Sin you met earlier. Identify the photographer, and then wipe out 5 photo vending machines. Then set the explosives on the car and leave this place.
Turn in the quest to Gedzu to get a well-deserved prize and continue playing Shadow Warrior 2 on StopGame.Ru.
New weapon - "Fire Fist"
– Clip Size: 50 Plasma.
– Shells per second: 6 pieces.
– Reload time: 2.0 seconds.
– Miss rate: 15.0.
– Damage radius: 20.0 meters.
– Damage 10% per second for continuous fire.
Fire fist.
STORY MISSION "ANCIENT TIES"
Find Kamiko's Ancestral Chi and bring it to Ameonna.
– 25000 coins.
- Two skill points.
- Skill "Spontaneous knockout".
- Weapon "Springchester" or "Farewell Kiss".
Move to the location and go to the desired house. Kill all opponents, climb onto the roof and jump down. Watch the cut-scene, and after that, kill all the defenders of the house.
Among them there will be a chief, from whom you will take a new weapon.
New weapon - "Swords of the outlaw"
With a base damage of 51.7 and a multiplier of 1.8, you have the ability to deal 99.1 damage per second with this weapon. In addition, the damage dealt to empowered and elite opponents has been increased by 10%.
Swords of a criminal.
At the time when you plant the explosive on the door (it will need to be found), and after that you kill Mamushi, then take away the wakizashi. Give it to Ameonna. Choose a prize.
New weapon - "Springchester"
– Use of projectiles: 10.
– Miss rate: 0.5.
Springchester.
New Weapon - "The Last Kiss"
If you did not choose it as a prize in a side task, then there will be an opportunity to take it in this one.
New Skill - Elemental Knockout
- Level 1. The resistance of enemies to the power of the elements is reduced by 5%. One skill point.
- Level 2. The resistance of enemies to the power of the elements is reduced by 10%. One skill point.
- Level 3. The resistance of enemies to the power of the elements is reduced by 20%. Two skill points.
- Level 4. The enemy's elemental resistance is reduced by 30%. Three skill points.
- Level 5. Enemy resistance to elemental power is reduced by 40%. Three skill points.
Natural knockout.
STORY MISSION "AMAZING"
You need to find and kill Kamiko's body.
– 25000 coins.
- Two skill points.
Move to the location "Devil's Mountain". Go up the hill and kill the opponents, as well as the boss, from which the weapon will fall out.
New weapon - Overseer
– Clip size: 50 rounds.
– Reload time: 3.0 seconds.
– Miss rate: 7.0.
– Damage +20% for 6 seconds on kill.
Overseer.
Chief Consuming Kamiko
You have to fight with Kamiko's body again. In this case, spikes will appear from under the soil. In addition, when falling from a height, Kamiko will launch some kind of sharp stakes, which are directed in your direction.
Also, avoid the boss' dashes.
After defeating her, watch the cut-scene again. It's not the end yet! Take the weapon lying on the ground, which was left after the defeat of the boss.
New weapon - "Kingdom Destroyer"
With a single rocket damage of 703.4 and a multiplier of 0.25, you have the ability to deal 187.4 damage per second and 75% poison damage.
– Miss rate: 3.0.
– Damage radius: 5.0 meters.
- Movement speed slowed by 10%.
- When killed for 10 seconds, increased damage by 10%.
Kingdom Destroyer.
STORY TASK "ALL IN THE FAMILY"
You need to find and chat with Oyabun to get a part of his body. Yes, there is no need for blood.
Meanwhile, Larry has a new addition to his shop.
New weapon - "Puncher"
– Clip size: 40.
– Reload time: 1.4 seconds.
– Miss rate: 6.0.
– Damage 10% when approaching.
Perforator.
New weapon - "Mosol"
– Clip size: 8 rounds.
– Reload time: 4 seconds.
– Miss rate: 50.
– Damage radius: 13 meters.
- 5% chance to restore 50% Wrath on kill.
Mosol.
Hideo also has a weapon for you.
New weapon - "Kuzuri"
Kuzuri.
ATTENTION! If you start this task, then all past side missions will be prohibited from completing. It's like a transition to the third chapter.
Move forward until you meet Mezu. Chat with him, after which you will automatically return to the Palace of the Ancients. Go to Ameonna and talk about everything. Repulse the opponent's attack, after which try to open the door.
Here it will be necessary to remove the seal set with the help of qi energy. Take the blade from the stone and hit it on the door with a seal in order to get out.
New weapon - "Sword"
This blade is actually a simple weapon from the "Swords" category. With a base damage of 53.7 and a multiplier of 1.8 per second, it is possible to deal 102.9 damage. You have a 10% chance to use Vanish when hit with a special move.
Sword of Exile.
Then it will be necessary to go to the western and eastern towers, destroying the seals with this sword. In that place, head to kill the defenders and disable both columns. When finished, return to Dragon Mountain and go up to the second floor of the Yakuza office.
Talk to Mezu to complete the quest and choose a prize.
New Weapon - Lumberjack's Tenderness
From the "Chainsaw" category. With a base damage of 90.2 and a multiplier of 1.5, it deals 144.1 damage per second. Damage resistance is increased by 10%, and movement speed is reduced by the same percentage. 100% chance to generate 0.1% Fury on hit.
In other words, with every blow you increase your own anger.
The tenderness of the lumberjack.
New weapon - "Cerberus"
- Clip size: 3 rounds.
– Reload time: 2.2 seconds.
– Miss rate: 75.0.
– Damage radius: 8.0 meters.
- Crit chance +20% for 10 seconds when killing three enemies at the same time.
Cerberus.
Be careful! For completing the next task, you will receive the weapon "Cerberus", based on this, in this case, it is better to choose "Tenderness of the woodcutter".
STORY TASK "STOP THE SLIME"
The Priest of Ameonna has been summoning the slime in the forest for a couple of weeks now to hasten the destruction of the Outer Gate. Stop them.
– 30,000 coins.
- Two skill points.
“Cerberus weapon!”
Follow the indicated location and talk to Mezu. Having moved to the Black Hills, find two reapers and wipe them off the face of the earth. Take the dropped spheres with which to open the gate further.
Then you will need to wipe out the High Priest from the face of the earth. Pay attention to his vulnerabilities and strengths, after which choose the appropriate weapon.
high priest.
After killing the enemy, return and talk to Mezu.
STORY TASK "CORPORATE MATTERS"
It is necessary to obtain data for Shin on where Kamiko's body is at the moment.
– 35000 coins.
- Two skill points.
Move to the Sina TV station. It turns out that the passage is blocked. You will need to follow the marker and jump onto the visor where the door code is located.
After taking it, return to the dead end and interact with the panel. Go to the station, stand upstairs and talk to Sin. Having learned what and how, go down and clear the station from the Crushers and other Zilla soldiers.
At the time when everyone is wiped off the face of the earth, stand back up and check with Shin if he managed to find Kamiko's location.
SIDE MISSION "HEISENBERG - PART 1"
You need to get raw materials for cooking Shadow.
The task is taken from Kyoko, who will show up on the first floor of Wang's hideout on Dragon Mountain.
– 30,000 coins.
- One skill point.
- Talisman "Hand of Reincarnation".
– Weapon “Eternal Infinity”.
Move along the two indicated points where you will need to kill the enemies "on a leash", and after that, reach out from the chests to reach the raw dark downpour. After that, you will need to visit another point where the last vase with the ingredient is located. Return to Kyoko and turn in the quest to receive your reward.
Talisman "Hand of Reincarnation" affects the possibility of triggering "Second Chance". Recovery -60.
New weapon - "Eternal Infinity"
– Clip size: 70 rounds.
– Reload time: 1.7 seconds.
– Miss rate: 14.0.
– Only simple class upgrades are allowed.
- 100% free clip reload chance. In other words, you will have endless ammo!
Eternal infinity.
SIDE MISSION "HEISENBERG - PART 2"
You need to go to the abandoned laboratories of Zilla and cook Shadow in that place.
The task is taken from Kyoko.
– 25000 coins.
- One skill point.
- Weapons "Slicers" or "Purifier".
Follow the indicated location, get the right code in order to launch the portal and get from the Shadow Hills to Zilla City. Move through the lab until you find that there are not enough parts on the equipment. Destroy three ZL-209 robots from the face of the earth to get three batteries.
In addition, pick up one more detail, after which you will return to the laboratory equipment and interact with it.
At the end, return to the Dragon Mountain, talk to Kyoko and choose a prize.
New weapon - Slicers
– Use of projectiles: 4 plasma.
– Deals 70% damage with Whip when projectiles are present.
New weapon - Purifier
– Clip size: 48 rounds.
– Use of projectiles: 6 charges.
– Reload time: 3 seconds.
– Miss rate: 35.0.
– Damage radius: 14.0.
– 20% chance to replenish 50% of the ammo in your clip on kill.
Purifier.
SIDE MISSION "HEISENBERG - PART 3"
Go and close the drug deal with the Kyokagami.
– 30,000 coins.
- Two skill points.
- Weapons "Gidora" or "Jigoku".
Jigoku.
Taken from Kyoko at the end of the previous task.
Go to the destination where you need to deliver the drug. On the way you will meet the chief - "Lord of War". Wipe it off the face of the earth, you can pick up new weapons.
New weapon - "Minion of Chaos"
– Clip size: 160 rounds.
– Reload time: 5.5 seconds.
– Miss rate: 22.0.
– Slow movement speed by 30%.
- Miss rate reduced by 30% per second while on constant fire.
Minion of chaos.
Follow to the marked place and interact with it. Then take place at another point where Kyoko and Kagami will be waiting for you. Wipe out the giant robot bosses from the face of the earth, after which you will return to the Dragon Mountain and talk to Mezu.
Choose your prize.
New weapon - "Jigoku"
– Clip size: 9 rounds.
– Reload time: 1.7 seconds.
– Miss rate: 3.5.
- 100% chance to replenish 1% Wrath on hit.
New weapon - Ghidorah
– Crit chance 10%.
– Damage Resistance +30% for 15 seconds on Special Move Kill.
SIDE MISSION "STOP THE PROPAGANDA"
Ameonna's followers set up a pirate station in Zilla City. They are trying to recruit new members to her cult. You need to plant false propaganda on them to sabotage their work.
The slightest path to the city leads through the Speed Portals scattered across the Shadow Hills.
The task can be picked up from Sin through a laptop on the second floor of Wang's lair.
– 25000 coins.
- One skill point.
- Talisman "Heavy Metal".
Follow the new location, go to the portal, which will be deactivated. Need to find a battery. Get to the right place and pick it up.
Then return to the portal and shove the battery into the control panel. Enter the portal, climb to the top of said tower and interact with the laptop to plant fake propaganda.
Talisman "Heavy Metal" allows you to immediately use two assault rifles.
SIDE MISSION "SOMETHING MORE"
You need to find the control chip and allow Kamiko to reprogram it in order to sabotage Zilla's super soldier program.
– 30,000 coins.
- One skill point.
– Weapon ZI-ROB1N.
The quest is taken through the "ghost" Kamiko on the second floor of Wang's lair.
Travel to Zilla City and revisit the lab where you first met Kamiko. Make your way to the right place, interact with the control panel and kill the opponents that appear. The quest will automatically give up.
New weapon - ZI-ROB1N
– Use of projectiles: 40.
– Miss rate: 5.0.
– Crit Chance: 10%.
– Boost +100% when approaching.
STORY MISSION "FURIOUS CONQUERATION"
The task will automatically become cheap at the end of the last storyline. You need to free Kamiko's body from Zilla's headquarters.
– 35000 coins.
- Two skill points.
- Orochi's Hand Blade.
Move forward, wipe out the huge robot-boss Resistor ZL-260 and other rivals from the face of the earth. The boss will drop a new weapon.
Resistor ZL-260.
New weapon - "Zweihander"
With a single bullet damage of 7.2 and a multiplier of 25.0, the damage per second is 118.0 units.
– Clip size: 120.
– Cooldown time: 3.0.
– Miss rate: 14.0.
– Movement speed slowed by 10%.
- Clip reload time on kill is reduced by 25% for the next 5 seconds.
Zweihander.
Get into the building, get to the elevator and kill the enemies. Jump up and go to meet Zilla. At the end of the cut-scene, the fight will begin.
Chief Mechanoid Zilla
Avoid missiles flying at you, move to the side of the electricity discharges. In general, it is necessary to use any weapon with high physical damage in most cases, because the Mechanoid elements are indifferent. Apply "anger," remember.
At the end of the victory, you will automatically receive a prize.
Zilla's mechanoid (in the "wrath of shadows" mode).
New weapon - "Hand of Orochi"
With a simple damage of 43.3 and a coefficient of 2.4, damage per second is 110.6 units.
In addition, movement speed is increased by 10%. Dealing 100% damage triggers Whip. Enemies will not be able to block attacks.
Orochi's hand.
STORY MISSION "BATTLE AT THE GATES"
You must prevent Ameonna from destroying the Outer Gate.
– 40,000 coins.
- Two skill points.
Go ahead and talk to Mezu, after which you will have to fight the Old Goddess Ameonna. The only difficulty is that sometimes Ameonna becomes invulnerable. Moreover, she begins to restore her own health.
But everything is very easy: you have to wipe out its rear part, its belly, from the face of the earth. Shoot him while Ameonna is healing.
Old Goddess Ameonna.
Yes, a couple of times she will be able to return to full health. But, in the end, you will wipe your belly off the face of the earth, and the boss will no longer be able to be treated. Fight until you notice the final cut-scene that completes the passage of the game Shadow Warrior 2 on the site StopGame.Ru.
During the battle, weapons can be reached from the chest.
New weapon - ".50"
Passage of the game Sherlock Holmes vs Arsène Lupin
The most relevant articles, selected just for you:
The game has four difficulty modes: - "He was green." Damage acquired by the player is reduced by 50%, more consumables drop, and a small penalty is applied at the end of death. - "Surely...
In our world, the war does not end under any circumstances. First, GDI defeats Nod, then the Brotherhood suddenly comes to life and Kane again threatens the “Global Defense Initiative” with nuclear warheads… Everything…
CHAPTER 1 - DEPARTURE Prince Noctis Lucis Caelum left his native kingdom along with three of his own friends. He is on his way to Altissia, the capital of Accordo, where he must forge an alliance between two...
1. A corner of paradise The first day spent on the island will introduce you to the local conditions of fate. Many features will not be cheap yet, so follow the recommendations clearly when placing the chest and…
It has become fashionable now to scold the militants. How they were so guilty - I have no idea. There is nothing the critics will lose - graphics, level design, lighting, textures, sound. That will poisonously pass through ...
Castle siege
The peace of Dracula (Gabriel Belmont) was disturbed by intruders. After emptying the glass of blood, we move towards the gate and perform simple tricks: rotate the camera 360 degrees, make a jump, directed and circular attacks. Fighting their way through the gates, soldiers in iron armor emerged from the siege works. We block the first attack by holding the button shown, and after the flash, without releasing the button, we inflict a series of crushing blows. Powerful attacks of enemies cannot be repelled, so when we see a red flash on their swords, we press the block + movement buttons in any direction. We restore health by drinking the blood of stunned soldiers. To do this, we come close to them, click on the button shown and, after the collision of the circles, click on the same button again. From the next task, QTE can be turned on and off at any time. After missing the first hit, quickly press the jump button to dodge subsequent hits. In addition to the usual whip, Dracula has the Sword of the Abyss and the Claws of Chaos at his disposal. The first allows you to restore health with each hit on the enemy, and the second allows you to break through shields and deal increased damage to enemies in strong armor. Combining the acquired knowledge, we destroy the last group of enemies.
Dracula (Gabriel Belmont).
After pushing through the structure, climb the debris on the left side and move to the right. We highlight active points for which you can catch on. We jump onto the beam, grab the chains and, having moved to the column, we go down. Having got out, we are attacked by a huge siege titan and a paladin. We dodge powerful blows and block weak attacks. The opponent is most vulnerable against Chaos Claws. Don't forget to replenish your health with the Abyssal Sword. Having half exhausted the scale of the enemy's defense, we move to the arm of the titan. During the fight with the knights, the paladin will periodically give the command to the titan to destroy the castle. We jump before the hand hits the wall. After the appearance of reinforcements, the paladin will again proceed to active actions. We hold on to the hand by pressing one of the buttons after the convergence of the circles. We climb up on the right side, highlighting active points if necessary.
The enemy will try to hit us with explosive arrows, so we try to move faster. The camera will point to three mounts. We cling to them and quickly slide down as soon as the icon decreases in size. If you bounce ahead of time, then the enemy will still have time to change the place of defeat. We continue to climb up. Again, we highlight active points and bypass the mechanisms at the right time. Next, with the help of titanium, we destroy three floor mounts. We approach the highlighted steel plate and discard it to the side. We climb up, move to the left and go down. We continue to move to the left side, climb up and destroy the three floor mounts in an already proven way. We discard the steel plate and hit the heart of the titan.
In the battle with the tireless paladin, we often dodge to the side, since he is not limited to one powerful blow. We try to block simple blows, then make destructive counterattacks. Periodically, the enemy will shoot arrows. At this point, just run around the safe areas, avoiding the pictograms. If the paladin moves away from us, then he is preparing to release his main weapon. Depending on the orientation of the flight of the weapon, we jump or dodge to the side. Don't forget to use the Sword of the Abyss and the Claws of Chaos.
Gabriel Belmont was once a Knight of the Order of the Brotherhood of the Light. His journey began in the distant eleventh century. Having successfully defeated Satan, for a number of reasons, he became the immortal Dracula. Gabriel's beloved Maria gave birth to his son Trevor, who, under the auspices of the Brotherhood, went to destroy his traitor father. Gabriel did not know about the existence of his son, therefore, without hesitation, he killed him. Before his death, Trevor managed to tell who he really is. Gabriel desperately tried to save him by sharing his blood, but it was too late. He buried his son in the castle and promised to exterminate the human race. The blood of Dracula seething in Trevor's veins every year gave him boundless strength and the power of his father. And finally, having risen from the dead, he proclaimed himself Alucard and swore to end Dracula once and for all. At this time, Trevor's heir Simon grew up, who decided to follow in his father's footsteps. Going to the castle of the majestic vampire, he met Alucard and together they managed to send Dracula to a temporary rest.

Brotherhood paladin.
Awakening
A little less than a thousand years have passed. Outside the twenty-first century. Waking up from a long sleep, we go outside and follow the boy into the alley. There we will face a monster that we cannot resist. Someone in black armor comes to the rescue and cracks down on our offender. Once in the same cell with people, we immediately approach them. We kill a man and drink the blood of a woman.
Zobek, founder of the Brotherhood of Light and former comrade of Gabriel, did not take long. He promised to deprive Dracula of immortality if he did not allow the coming of Satan to earth. Zobek brings us up to date. We have to find and kill the servants of Satan before they complete preparations for the return of their ruler. Ministers hide among the people and occupy the highest positions in society. Zobek managed to get on the trail of one of the ministers. Using the portal, he sends us to the headquarters of the Bioquimec pharmaceutical corporation.
Bioquimec Corporation
Scientific area
We open the Travel Book, which contains four large sections - abilities, map, items and reference. We get acquainted with the new information marked with a question mark. Having finished, we turn around the corner and open the gate near the box. We will return here a little later, but for now we will go further, climb higher and, turning left, we will pick up the Memorial. We leave for the previously opened garage, select the Daggers of Shadows and throw them at the two highlighted mechanisms. We raise the gate and find ourselves in a corridor controlled by the Golgothian guard. Hiding in the darkness on the right side. At the back is a grate, behind which is a Box of Pain (available with the Mist ability). By controlling the rat, we bypass the guards and move to the other end of the corridor, where we stand on a similar shadow portal and again assume our familiar appearance. We sneak up on the enemy and take possession of his body. Time is limited, so we immediately head to the retinal scanner near the door, scan and go through the gateway. We start the disinfection process by pulling the lever on the left side.
We select a swarm of bats and release them into a constantly moving guard. When the guard near the stairs goes to check on his partner, we quickly run to the stairs and go upstairs. We grab the active point on the right side when the closure stops. Then quickly move to the left and jump to the next structure. We jump down, catch up with the guard and take possession of his body. Interact with the device to the right of the door, go into the room and use the Box of Pain. We get the Stone of Life - by collecting five of these stones, the health scale will increase. After leaving the room, we turn into a rat through the shadow portal on the left side. We move to the illuminated ventilation grate on the other side. Having penetrated inside, we run forward, jumping over obstacles. We collect the skulls and go forward at the fork. At the end, we gnaw through the wires, thereby stopping the blades, and, returning to the fork, turn right. Having collected skulls for 150 points, we acquire the first skill for the shadow whip - "Dodge".

Zobek's bodyguard.
We get out of the ventilation, get to the stairs, near which there is a guard, and penetrate into the next ventilation shaft. We move along the only path, bypassing the bare wires, and as a result we will find ourselves in a room with a Box of Pain. Having acquired the second Stone of Life, we return to the room from where we got into the room with the first Box. We hide in the shadows again and take on the appearance of Dracula when the guard passes us. We quickly release a swarm of bats into it and climb the stairs. To the left behind the bars is a Box of Pain (available with the Mist ability). On the top bridge is another Box of Pain (available with the Double Jump ability). Climbing up, on the left we will see three tanks. We cling to the active point on the nearest of them (available with the “Double Jump” ability) and slowly, avoiding getting damage from steam, we move to other active points. From the last far right tank, we jump to the stairs behind us and use the Pillar of Sacrifice.
We follow the mysterious guy and we are transported to the castle.
Bernhard wing
Behind is an abyss. We hit the mechanism with a Chaos Bomb (available with the “Chaos Bomb” ability) and move along the lowered structure to the left side. Use the Box of Pain, look to the right side and throw a Void Projectile at the waterfall (available with the Void Projectile ability). We cling to the wooden fortification behind our backs and quickly move along the active points towards the waterfall. Active points are best highlighted so as not to lose precious seconds. We rise along the waterfall and jump over to the next fortification on the right side. Climb even higher, use the Box of Pain and jump down. We select the Soldier's Diary and go into the room with the map. The last fork will lead to the City of the Damned.
On the right lies the illuminated body - examine it and pick up the Soldier's Diary. We follow the corridor and get to the statue of blood, completely restoring health. We go around the wreckage on the right side and interact with the Box of Pain. We cling to a wooden beam on the wall, climb up and, jumping over the dips, we get to the Box of Pain. Having gone down, we go to the destroyed illuminated stairs and climb on other active points.
We run along the balcony and get to the room, where we pull the lever and open the locked mechanism. We use shadow daggers to destroy blood clots. Once in the hall, we jump onto the structure and swing it, running back and forth. We jump over to the next structure, then to the structure on the right side and in this way we get to the balcony with the Box of Pain. Jump down and interact with another Box of Pain next to the wreckage. We freeze the waterfall (available with the ability "Projectile of the Abyss"), quickly climb up, move to the left and go up to the balcony. Use the Box of Pain and jump down. To the right of the waterfall is a drain leading to a grate, behind which is a Box of Pain (available with the Mist ability). We climb the stairs, cling to the wooden fortifications on the left side and climb onto the balcony. We move to the other side, jumping from one structure to another, previously swinging them.
Memories haunt Dracula. Trevor's ghost keeps reminding him of past mistakes and terrible deeds. We get to the destroyed tower, stand on the beam and cling to the active point on the central structure. Move to the right and climb up. We go to the left and select the Soldier's Diary. We rise along the wooden structure, jump onto the platform and, after swinging it, jump over to the other side. A little further behind the bars is a Box of Pain (available with the Mist ability). Also, if we jump down, we will find ourselves in Carmilla's Lair. Returning back, turn left and jump down, where behind the bars we will find the Pillar of Sacrifice (available with the Fog ability).

Ahead is the Sword of the Abyss. The forces of the castle will do everything possible to prevent us from reaching it. We run through safe areas and at the right time we cling to active points. The sword is pumped along with the whip, which allows you to open new and complex combinations. Abyss magic is not infinite, so when it runs out, the use of the sword will become impossible. However, you can get Abyssal Magic right during the battle. To do this, we continuously strike at the enemy and fill the concentration scale displayed in the central lower part of the screen. After filling the scale, each subsequent hit will provoke the fall of spheres from the enemy. The concentration gauge only fills up when using the main weapon - the shadow whip. We collect the spheres and thus fill the scale of the Magic of the Abyss. The stone golem can stomp its foot and bleed the ground. At this point, you need to jump. After dealing enough damage to the golem, it will begin to glow. Come closer and pierce the heart. At the second stage, damage to the enemy can only be applied to the upper part, i.e. in a jump. We dodge more often, because the enemy has become more aggressive. We pierce the heart of the golem again and finally deal with it.
We select the Primordial Stone of the Abyss. Switch to the Void Sword, throw Void Projectiles at the waterfall and quickly climb up until the freeze effect ends. In the absence of Abyss Magic, we go into a small room and fill the scale through the Statue of Magic. Nearby is the Statue of Blood - use it to fully restore health. Once at the top, we destroy the barrier and pick up the relic "Tears of the Saint", which completely restores health. Most relics can only be used once.
The passage on the right side will lead us to the ruined corridor. Along the way, on the wall we find a keyhole for the key to the dungeon. We cross a huge abyss and at the other end we interact with the Box of Pain. We go down the active points and, having finished our work, we go up along them. Returning to the fork, turn right and go forward at the next illuminated fork. Around the corner to the right is a Box of Pain - interact with it. Opposite, behind bars is another Box of Pain (available with the Mist ability). At the fork itself, if you look up, you will see active points. Climb up them (available with the Double Jump ability) and pick up the Soldier's Diary. We get out into the open. On the left, behind bars, is the Pillar of Sacrifice (available with the Mist ability). You can get to it by jumping from above. Ahead are waterfalls. We freeze them with abyss projectiles and quickly climb first on the left, then on the right. Having climbed to the very top of the right waterfall, we cling to the active point on the left side and continue to move in the same direction. Next to the waterfalls lies the body of a soldier - we pick up the Diary. To the right are wooden fortifications. Climbing up them, we jump over the gap on the left side and go down lower and lower to the Box of Pain. We jump on a small area from above (available with the “Double Jump” ability), climb on the active points and use the Pillar of Sacrifice. We go back and move on.

Trevor is in danger. The vampire grabbed him, but when he saw us, he immediately let go. These creatures must protect the castle from intruders. The cursed blood of Dracula took possession of their body and mind. We destroy enemies by blocking regular ones and dodging strong blows. Periodically we help Trevor to get rid of captures. Get the White Wolf Medallion from Trevor. From now on, we will be able to move between the real world and the castle through the Wolf Altars, which are marked on the map with the corresponding symbol. We climb up the active point on the column. Turn left, jump over the gap and get to the Box of Pain. We approach the Altar of the Wolf and call on the white wolf with the help of the medallion. We climb up, go to the right and follow the wolf (even more to the right, on a cut-off area with fences, there is a Pillar of Sacrifice, which can be reached with the “Double Jump” ability). Returning to the real world, we continue the search for the servant of Satan.
Scientific area
We jump down and replenish the Abyss Magic bar through the Statue of Magic. We go down even lower through the gap on the left side. Cursed blood haunts us here as well. We destroy the enemy, we approach the closed doors and we release the Abyssal Projectile into the waterfall on the right side. We climb on the ice, shift to the left and move to the other side. There is a statue of blood in the corner - we restore health if necessary. We freeze the fan with the Abyssal Projectile, quickly hide in the darkness on the left side and, dressed in a rat, we run into the ventilation system. In the future, it will be possible to climb up the airflow from the fan (available with the Mist ability) and get to the Pillar of Sacrifice by climbing up the hotspots and transforming into mist again. Then we go down through the grate and insert the key to the dungeon into the keyhole for additional experience points.
Driving a rat, we pass fire and electric traps and turn left at the first fork. In the future, the far right pipe will lead to a room with a Box of Pain. On both sides there is a trap in the form of a press. First, let's go along the left side, gnaw through the wires and, returning back, run along the right side. We get out into the room, take the form of Dracula and use the Box of Pain.
Having got out into the corridor, we turn right and penetrate into the next ventilation. We gnaw through the wires, go back and through the darkness behind the box we take on the appearance of Dracula. The guard called a technician for help. Being behind cover, we release a swarm of bats on guard, run up to the equipment and move into it. We interact with the device on the right side to get into the gateway. After disinfection, we will get into a cell with a secret development, where we will encounter a servant of Satan, Raisa Volkova. Guessing our presence, she will break the gas containers, which will lead to the immediate infection of scientists. We try to deal with the possessed, avoiding damage and thereby filling the concentration scale. We collect valuable orbs to fill the scale of Abyssal Magic.
The gas also had an effect on Raisa. We switch to the Sword of the Abyss and immediately after the appearance of the enemy, we release the Projectile of the Abyss into it. Having cooled the ardor of Raisa, we continue the fight, blocking the usual ones and dodging powerful blows. Periodically, small electric traps will appear on the floor. We avoid dangerous areas and try to stay away from Raisa. We use the arrived possessed to replenish the Magic of the Abyss, by gaining concentration and then collecting spheres. We repeat the same type of stages of the battle several times and, having won, we send the servant of Satan to Zobek through the opened portal.

Raisa Volkova.
Three Gorgons
City of the damned
Trevor reminds us that we have lost the Force of Chaos, which is now with the Gorgons - Euryale, Stheno and Medusa. Once in our possessions, we go forward a little and pick up the Soldier's Diary. We get to the round room, pull the lever on the left side and go down to the City of the Damned.
Evirala warns us of danger and informs us that Medusa owns the Force of Chaos. We jump even lower and find the Box of Pain. Behind the statue lies the body of a soldier - we take away the Diary. We pass into the next round room and find ourselves surrounded by the dungeon overseer and dungeon minions. A large representative has strong armor, so it is useless to attack him in the forehead. The weak point is the back, which is very easy to get to with the Dodge ability (roll over the enemy). Occasionally, the enemy uses a battering ram, and if you jump aside in time, you can force him to crash into a wall and unleash a flurry of combination blows on him. Having defeated the overseer, we take away the Dungeon Key, with the help of which the mechanisms and caches are unlocked. We insert the key into the indicated device, then we use this device and, by pressing the corresponding button in time, we open the door. To open other doors, we approach them and donate blood.
If you go through the door on the left and then on the right we will find the Soldier's Diary. We bring down the structure over the abyss (available with the Chaos Bomb ability) and move to the other side. We get to the lava, stand at the edge and look to the left. We jump to the island (available with the "Double Jump" ability), use the key to the dungeon and donate blood to get extra points. Returning back, we jump from the chains to the column and climb the topmost bridge using the active points on it. We go to the right, turn around and jump to the area on the right. We go all the way forward and jump even lower through the rift on the right side to the Box of Pain. Again, we jump from the chains to the column, but we do not climb to the end, but we descend on the intermediate bridge, where the Pillar of Sacrifice is located. After moving to the other side, we will get out to the center of the City of the Damned.
We go outside and turn right (if we go along the metal beam on the left side, we will find the Altar of the Wolf; we climb higher along the active points and get to the keyhole for the key to the dungeon). We jump onto the island, and then onto the chain. The longer we hang on it, the faster it goes down. Therefore, we climb up as quickly as possible and cling to the topmost active point on the column on the left side. If we do not have time, then we can temporarily grab onto other low points on the column and allow the chain to slow down. We shift to the left, jump over to the next chain and go down. We jump over to the broken column, move to the left and along the three chains we get to the very top. We move to the other side through safe pipes, from which steam and lava do not ooze.
We meet Stheno and, on her advice, we go to the dwarf in captivity, who should help us in exchange for freedom. We pass to the cliff and look to the left. Jump over to the Box of Pain and use it. We jump down, destroy the minions and climb up the active points on the wall. We select the Soldier's Diary and interact with the device, with which we pave the way to another similar device. Three times we press the "forward" button and go through the platforms to the island (three times "to the left" will lead to the keyhole for the key to the dungeon).

Chupacabra.
The captive was our old friend Chupacabra. We go down, use the device and press the "forward" button three times. We move to a small island, interact with the device and press the buttons "left" - "forward" - "forward". We activate the device on the wall to lower the cage with the Chupacabra. Re-pave the path to the previous island. We go there, use the device and click on the buttons "forward" - "forward" - "right". We pass further and pave the way to the Box of pain: "left" - "back" - "back". If you go through the bars (accessible with the ability "Fog"), then we get to the elevator - a short way to Carmilla's Lair. We go back and lay the platforms to the cage by pressing the "left" button three times. We go to the central island, use the device and press the buttons "left" - "left" - "back" and thereby bring the cage to the highlighted lockpicker. The Chupacabra kept his promise and showed the way to Medusa.
We approach the edge, donate blood and go to the other side. Having got out into the open space, we dodge the attack of the deep harpy by pressing the appropriate button in time. Having dealt with the enemies, we go up the active points on the wall and, returning to the place where the cut-scene began, we will find the Soldier's Diary in a dark corner. We descend back to the place of battle, climb up the active points on the columns and pick up the Soldier's Diary. Having moved to the other side, we exterminate the harpies. Then we approach the edge with the destroyed fence and jump over to the column. We go down, move all the way to the left and go up. Two guards will try to stop us at once. One thing pleases - both are without armor, so we can hit anywhere. The opponents are serious, so first we will kill one, then the other. One of them will most likely set fire to his hammer and become more dangerous than before - we'll start with him. Having defeated the guards, we select the key and insert it into the device. We lower the grate, take a couple of steps up the stairs, turn right and jump up. Use the Box of Pain and go back down. We pass into the round room, rise to the pedestal and activate the device. We go down and select the Soldier's Diary. If you go through the broken window and jump down, we will find a keyhole for the key to the dungeon.
We return the second main source of power - the Force of Chaos. Cursed blood took possession of the Gorgon sisters and united them into a single huge creature with three heads. We destroy the barrier by activating the Claws of Chaos and inflicting several powerful blows. The battle tactics are quite banal: we run up, jump up and attack the heads. We don’t get carried away too much, otherwise you may not have time to dodge to the side or step back, depending on the type of enemy’s blow. You can replenish your Abyss and Chaos Magic by destroying the tentacles in the foreground. Magic will come in handy anyway. After dealing enough damage to the Gorgon, she will lower her hand, which needs to be frozen with Void Projectile. Then climb on the active points on the hand, occasionally shifting to the right to avoid a collision with the other hand. After that, we move already horizontally, we get to the head and destroy it. At the next stage, we act according to a similar principle. When the other hand is stuck in the ground, freeze it with Void Projectile, activate the Chaos Claws and destroy the stone protection on the hand. We climb up, move horizontally and jump from one point to another so as not to be slammed. We follow the head of the Gorgon and, as soon as she gets out, we jump over to her. With the last head, everything is much simpler: when it starts to take in air, we shoot it with the Abyssal Projectile and end the fight by tearing the heart out of the monster's chest.

We select the Stone of Primordial Chaos and climb up along the active points on the Gorgon and the column. The rift leads to an air stream, rising (available with the Fog ability) along which we will return back. Before reaching the statue of magic, let's look into the room on the left side and use the Box of Pain. We bring down the ceiling with an orange glow with the Chaos Bomb. To do this, activate the Chaos Claws, select the Chaos Bomb and throw it at the flimsy structure on the ceiling. We climb even higher along the active points on the left side. We go down the stairs to the round platform, interact with the device and get to the open area, where we will face the overseer and the minions. Now that we have the Force of Chaos, we can break through the strong armor of enemies. Having dealt with everyone, we select the dungeon key, insert it into the device on the right side and open the door. We donate blood, cross the bridge and go straight to the Chupacabra store. The showcase contains a large number of relics, some rare items and very valuable keys to the dungeon. In addition, here you can buy one Crystal of Life, Chaos and the Abyss, which are not found on locations. Before leaving, we will receive the Dragon Talisman from the Chupacabra, which allows us to summon an assistant in the form of a huge Dragon during the battle. To reuse it, you need to collect scales that fall out of killed enemies, or buy them in the Chupacabra shop.
After going down the elevator, we go to the right and pick up the Soldier's Diary. On the left is the Pillar of Sacrifice. Spilling blood on him, we get a rune. After collecting four of these runes, a test will open. In total, there are sixteen runes in the game. It is possible to get to the Kleydos arena through the mirror in the Chupacabra shop. Pillars also drop improvements in the form of the ability to carry more relics. Ahead and slightly to the right is a room with a map. Thanks to it, you can instantly move around the already explored locations of the castle. Map rooms in the castle allow you to move only through the locations of the castle. The same rule applies to map rooms in the real world. To the left, on a small island (accessible with the Double Jump ability) is a Box of Pain and a Soldier's Diary.
Antidote: Part 1
Center
We call the wolf through the Altar and follow him. We move to the underground parking in the center. We get to the elevator and go up to Zobek's headquarters.
The virus is actively spreading throughout the city. During the interrogation, Raisa Volkova did not say anything worthwhile. Zobek tried to read her thoughts, but only stumbled upon an abyss of chaos and darkness. The only chance is to return Raisa to her human form. To do this, you need to get an antidote, which was probably created along with the virus to protect scientists, minions of Satan and other important people.
We get to the elevator and go down to the parking lot. On the left is a grate (available with the Fog ability), passing through which we will reach the keyhole for the key to the dungeon, and if we move even further, we will find the Box of Pain.
We go on the right side, destroy the possessed and approach the door on the left side. Destroy the passage with the Chaos Bomb. We block two fiery streams with Abyssal Projectiles. This is not enough, so we throw another projectile at the fire system on the ceiling on the right side. We pass to the elevator, go upstairs and go outside. We deal with the enemies, jump over the debris and head to the bridge. We destroy the possessed and move to the other side. We pass to the end, climb up the active points on the right side and use the Box of Pain. We jump down and go into the bookstore.

Soldier of Satan.
We hide in the darkness, turn into a rat and penetrate the ventilation, which is next to the exit. The shaft will lead us to another room. We take the usual form and climb to the next floor. After jumping down through the window, we pick up the Memorial in the corner on the right side. We leave the alley, kill the only obsessed and jump even lower. We pick up the Memorial, located on the right side. We destroy the enemies, jump over the gap and deal with many more possessed near the fountain. To the right of the fence is a generator. We throw a shadow dagger at its upper part. Climb up the active points on the pipe, move to the right and jump down. We pick up the Memorial, jump over the fence and again climb through the pipes to the window of the building.
After disinfection in the shower room, we follow the corridor and deal with the enemies. We pick up the Memorial, go back and go into the room on the left side. We destroy the door and climb up the active point on the wall. We move into the room, hide in the darkness and turn into a rat. We move through the bars, skip the room with the Box of Pain and go into the next one. We go down through the gap in the floor. We run a small room on the right side, where we turn to Dracula and deal with the enemies. In the room on the opposite side is the Magic Statue. We go down, destroy the shields of enemies with the Claws of Chaos and finish them off with a whip. We go around on the left side. We free the passage, stopping the fiery streams with Abyssal Projectiles. Use the Box of Pain and interact with the device. We go back, activate the lever and restore the power supply. We pass through the opened door. Top right - Memorial (available with the "Double Jump" ability). We climb up along the active points at the other end of the corridor and, turning around, we get to the Box of Pain. Having got out into the hall, we clear it from enemies. The fight may seem difficult, in this case we destroy the skeletons one by one. We rise to the second floor, then to the flight between the second and third floors, where we will find the Memorial. We jump from the stairs (available with the “Double Jump” ability) to the next floor, turn around and jump onto the stairs. The fourth floor contains the Box of Pain and the keyhole for the dungeon key. We pass into the already familiar corridors and do not forget to look into the ward with the Box of Pain. We use the elevator to go down to the lower floor. Printable version of the page:
Read all the latest about games and look at Castle siege
The peace of Dracula (Gabriel Belmont) was disturbed by intruders. After emptying the glass of blood, we move towards the gate and perform simple tricks: rotate the camera 360 degrees, make a jump, directed and circular attacks. Fighting their way through the gates, soldiers in iron armor emerged from the siege works. We block the first attack by holding the button shown, and after the flash, without releasing the button, we inflict a series of crushing blows. Powerful attacks of enemies cannot be repelled, so when we see a red flash on their swords, we press the block + movement buttons in any direction. We restore health by drinking the blood of stunned soldiers. To do this, we come close to them, click on the button shown and, after the collision of the circles, click on the same button again. From the next task, QTE can be turned on and off at any time. After missing the first hit, quickly press the jump button to dodge subsequent hits. In addition to the usual whip, Dracula has the Sword of the Abyss and the Claws of Chaos at his disposal. The first allows you to restore health with each hit on the enemy, and the second allows you to break through shields and deal increased damage to enemies in strong armor. Combining the acquired knowledge, we destroy the last group of enemies.
Dracula (Gabriel Belmont).
After pushing through the structure, climb the debris on the left side and move to the right. We highlight active points for which you can catch on. We jump onto the beam, grab the chains and, having moved to the column, we go down. Having got out, we are attacked by a huge siege titan and a paladin. We dodge powerful blows and block weak attacks. The opponent is most vulnerable against Chaos Claws. Don't forget to replenish your health with the Abyssal Sword. Having half exhausted the scale of the enemy's defense, we move to the arm of the titan. During the fight with the knights, the paladin will periodically give the command to the titan to destroy the castle. We jump before the hand hits the wall. After the appearance of reinforcements, the paladin will again proceed to active actions. We hold on to the hand by pressing one of the buttons after the convergence of the circles. We climb up on the right side, highlighting active points if necessary.
The enemy will try to hit us with explosive arrows, so we try to move faster. The camera will point to three mounts. We cling to them and quickly slide down as soon as the icon decreases in size. If you bounce ahead of time, then the enemy will still have time to change the place of defeat. We continue to climb up. Again, we highlight active points and bypass the mechanisms at the right time. Next, with the help of titanium, we destroy three floor mounts. We approach the highlighted steel plate and discard it to the side. We climb up, move to the left and go down. We continue to move to the left side, climb up and destroy the three floor mounts in an already proven way. We discard the steel plate and hit the heart of the titan.
In the battle with the tireless paladin, we often dodge to the side, since he is not limited to one powerful blow. We try to block simple blows, then make destructive counterattacks. Periodically, the enemy will shoot arrows. At this point, just run around the safe areas, avoiding the pictograms. If the paladin moves away from us, then he is preparing to release his main weapon. Depending on the orientation of the flight of the weapon, we jump or dodge to the side. Don't forget to use the Sword of the Abyss and the Claws of Chaos.
Gabriel Belmont was once a Knight of the Order of the Brotherhood of the Light. His journey began in the distant eleventh century. Having successfully defeated Satan, for a number of reasons, he became the immortal Dracula. Gabriel's beloved Maria gave birth to his son Trevor, who, under the auspices of the Brotherhood, went to destroy his traitor father. Gabriel did not know about the existence of his son, therefore, without hesitation, he killed him. Before his death, Trevor managed to tell who he really is. Gabriel desperately tried to save him by sharing his blood, but it was too late. He buried his son in the castle and promised to exterminate the human race. The blood of Dracula seething in Trevor's veins every year gave him boundless strength and the power of his father. And finally, having risen from the dead, he proclaimed himself Alucard and swore to end Dracula once and for all. At this time, Trevor's heir Simon grew up, who decided to follow in his father's footsteps. Going to the castle of the majestic vampire, he met Alucard and together they managed to send Dracula to a temporary rest.

Brotherhood paladin.
Awakening
A little less than a thousand years have passed. Outside the twenty-first century. Waking up from a long sleep, we go outside and follow the boy into the alley. There we will face a monster that we cannot resist. Someone in black armor comes to the rescue and cracks down on our offender. Once in the same cell with people, we immediately approach them. We kill a man and drink the blood of a woman.
Zobek, founder of the Brotherhood of Light and former comrade of Gabriel, did not take long. He promised to deprive Dracula of immortality if he did not allow the coming of Satan to earth. Zobek brings us up to date. We have to find and kill the servants of Satan before they complete preparations for the return of their ruler. Ministers hide among the people and occupy the highest positions in society. Zobek managed to get on the trail of one of the ministers. Using the portal, he sends us to the headquarters of the Bioquimec pharmaceutical corporation.
Bioquimec Corporation
Scientific area
We open the Travel Book, which contains four large sections - abilities, map, items and reference. We get acquainted with the new information marked with a question mark. Having finished, we turn around the corner and open the gate near the box. We will return here a little later, but for now we will go further, climb higher and, turning left, we will pick up the Memorial. We leave for the previously opened garage, select the Daggers of Shadows and throw them at the two highlighted mechanisms. We raise the gate and find ourselves in a corridor controlled by the Golgothian guard. Hiding in the darkness on the right side. At the back is a grate, behind which is a Box of Pain (available with the Mist ability). By controlling the rat, we bypass the guards and move to the other end of the corridor, where we stand on a similar shadow portal and again assume our familiar appearance. We sneak up on the enemy and take possession of his body. Time is limited, so we immediately head to the retinal scanner near the door, scan and go through the gateway. We start the disinfection process by pulling the lever on the left side.
We select a swarm of bats and release them into a constantly moving guard. When the guard near the stairs goes to check on his partner, we quickly run to the stairs and go upstairs. We grab the active point on the right side when the closure stops. Then quickly move to the left and jump to the next structure. We jump down, catch up with the guard and take possession of his body. Interact with the device to the right of the door, go into the room and use the Box of Pain. We get the Stone of Life - by collecting five of these stones, the health scale will increase. After leaving the room, we turn into a rat through the shadow portal on the left side. We move to the illuminated ventilation grate on the other side. Having penetrated inside, we run forward, jumping over obstacles. We collect the skulls and go forward at the fork. At the end, we gnaw through the wires, thereby stopping the blades, and, returning to the fork, turn right. Having collected skulls for 150 points, we acquire the first skill for the shadow whip - "Dodge".

Zobek's bodyguard.
We get out of the ventilation, get to the stairs, near which there is a guard, and penetrate into the next ventilation shaft. We move along the only path, bypassing the bare wires, and as a result we will find ourselves in a room with a Box of Pain. Having acquired the second Stone of Life, we return to the room from where we got into the room with the first Box. We hide in the shadows again and take on the appearance of Dracula when the guard passes us. We quickly release a swarm of bats into it and climb the stairs. To the left behind the bars is a Box of Pain (available with the Mist ability). On the top bridge is another Box of Pain (available with the Double Jump ability). Climbing up, on the left we will see three tanks. We cling to the active point on the nearest of them (available with the “Double Jump” ability) and slowly, avoiding getting damage from steam, we move to other active points. From the last far right tank, we jump to the stairs behind us and use the Pillar of Sacrifice.
We follow the mysterious guy and we are transported to the castle.
Bernhard wing
Behind is an abyss. We hit the mechanism with a Chaos Bomb (available with the “Chaos Bomb” ability) and move along the lowered structure to the left side. Use the Box of Pain, look to the right side and throw a Void Projectile at the waterfall (available with the Void Projectile ability). We cling to the wooden fortification behind our backs and quickly move along the active points towards the waterfall. Active points are best highlighted so as not to lose precious seconds. We rise along the waterfall and jump over to the next fortification on the right side. Climb even higher, use the Box of Pain and jump down. We select the Soldier's Diary and go into the room with the map. The last fork will lead to the City of the Damned.
On the right lies the illuminated body - examine it and pick up the Soldier's Diary. We follow the corridor and get to the statue of blood, completely restoring health. We go around the wreckage on the right side and interact with the Box of Pain. We cling to a wooden beam on the wall, climb up and, jumping over the dips, we get to the Box of Pain. Having gone down, we go to the destroyed illuminated stairs and climb on other active points.
We run along the balcony and get to the room, where we pull the lever and open the locked mechanism. We use shadow daggers to destroy blood clots. Once in the hall, we jump onto the structure and swing it, running back and forth. We jump over to the next structure, then to the structure on the right side and in this way we get to the balcony with the Box of Pain. Jump down and interact with another Box of Pain next to the wreckage. We freeze the waterfall (available with the ability "Projectile of the Abyss"), quickly climb up, move to the left and go up to the balcony. Use the Box of Pain and jump down. To the right of the waterfall is a drain leading to a grate, behind which is a Box of Pain (available with the Mist ability). We climb the stairs, cling to the wooden fortifications on the left side and climb onto the balcony. We move to the other side, jumping from one structure to another, previously swinging them.
Memories haunt Dracula. Trevor's ghost keeps reminding him of past mistakes and terrible deeds. We get to the destroyed tower, stand on the beam and cling to the active point on the central structure. Move to the right and climb up. We go to the left and select the Soldier's Diary. We rise along the wooden structure, jump onto the platform and, after swinging it, jump over to the other side. A little further behind the bars is a Box of Pain (available with the Mist ability). Also, if we jump down, we will find ourselves in Carmilla's Lair. Returning back, turn left and jump down, where behind the bars we will find the Pillar of Sacrifice (available with the Fog ability).

Ahead is the Sword of the Abyss. The forces of the castle will do everything possible to prevent us from reaching it. We run through safe areas and at the right time we cling to active points. The sword is pumped along with the whip, which allows you to open new and complex combinations. Abyss magic is not infinite, so when it runs out, the use of the sword will become impossible. However, you can get Abyssal Magic right during the battle. To do this, we continuously strike at the enemy and fill the concentration scale displayed in the central lower part of the screen. After filling the scale, each subsequent hit will provoke the fall of spheres from the enemy. The concentration gauge only fills up when using the main weapon - the shadow whip. We collect the spheres and thus fill the scale of the Magic of the Abyss. The stone golem can stomp its foot and bleed the ground. At this point, you need to jump. After dealing enough damage to the golem, it will begin to glow. Come closer and pierce the heart. At the second stage, damage to the enemy can only be applied to the upper part, i.e. in a jump. We dodge more often, because the enemy has become more aggressive. We pierce the heart of the golem again and finally deal with it.
We select the Primordial Stone of the Abyss. Switch to the Void Sword, throw Void Projectiles at the waterfall and quickly climb up until the freeze effect ends. In the absence of Abyss Magic, we go into a small room and fill the scale through the Statue of Magic. Nearby is the Statue of Blood - use it to fully restore health. Once at the top, we destroy the barrier and pick up the relic "Tears of the Saint", which completely restores health. Most relics can only be used once.
The passage on the right side will lead us to the ruined corridor. Along the way, on the wall we find a keyhole for the key to the dungeon. We cross a huge abyss and at the other end we interact with the Box of Pain. We go down the active points and, having finished our work, we go up along them. Returning to the fork, turn right and go forward at the next illuminated fork. Around the corner to the right is a Box of Pain - interact with it. Opposite, behind bars is another Box of Pain (available with the Mist ability). At the fork itself, if you look up, you will see active points. Climb up them (available with the Double Jump ability) and pick up the Soldier's Diary. We get out into the open. On the left, behind bars, is the Pillar of Sacrifice (available with the Mist ability). You can get to it by jumping from above. Ahead are waterfalls. We freeze them with abyss projectiles and quickly climb first on the left, then on the right. Having climbed to the very top of the right waterfall, we cling to the active point on the left side and continue to move in the same direction. Next to the waterfalls lies the body of a soldier - we pick up the Diary. To the right are wooden fortifications. Climbing up them, we jump over the gap on the left side and go down lower and lower to the Box of Pain. We jump on a small area from above (available with the “Double Jump” ability), climb on the active points and use the Pillar of Sacrifice. We go back and move on.

Trevor is in danger. The vampire grabbed him, but when he saw us, he immediately let go. These creatures must protect the castle from intruders. The cursed blood of Dracula took possession of their body and mind. We destroy enemies by blocking regular ones and dodging strong blows. Periodically we help Trevor to get rid of captures. Get the White Wolf Medallion from Trevor. From now on, we will be able to move between the real world and the castle through the Wolf Altars, which are marked on the map with the corresponding symbol. We climb up the active point on the column. Turn left, jump over the gap and get to the Box of Pain. We approach the Altar of the Wolf and call on the white wolf with the help of the medallion. We climb up, go to the right and follow the wolf (even more to the right, on a cut-off area with fences, there is a Pillar of Sacrifice, which can be reached with the “Double Jump” ability). Returning to the real world, we continue the search for the servant of Satan.
Scientific area
We jump down and replenish the Abyss Magic bar through the Statue of Magic. We go down even lower through the gap on the left side. Cursed blood haunts us here as well. We destroy the enemy, we approach the closed doors and we release the Abyssal Projectile into the waterfall on the right side. We climb on the ice, shift to the left and move to the other side. There is a statue of blood in the corner - we restore health if necessary. We freeze the fan with the Abyssal Projectile, quickly hide in the darkness on the left side and, dressed in a rat, we run into the ventilation system. In the future, it will be possible to climb up the airflow from the fan (available with the Mist ability) and get to the Pillar of Sacrifice by climbing up the hotspots and transforming into mist again. Then we go down through the grate and insert the key to the dungeon into the keyhole for additional experience points.
Driving a rat, we pass fire and electric traps and turn left at the first fork. In the future, the far right pipe will lead to a room with a Box of Pain. On both sides there is a trap in the form of a press. First, let's go along the left side, gnaw through the wires and, returning back, run along the right side. We get out into the room, take the form of Dracula and use the Box of Pain.
Having got out into the corridor, we turn right and penetrate into the next ventilation. We gnaw through the wires, go back and through the darkness behind the box we take on the appearance of Dracula. The guard called a technician for help. Being behind cover, we release a swarm of bats on guard, run up to the equipment and move into it. We interact with the device on the right side to get into the gateway. After disinfection, we will get into a cell with a secret development, where we will encounter a servant of Satan, Raisa Volkova. Guessing our presence, she will break the gas containers, which will lead to the immediate infection of scientists. We try to deal with the possessed, avoiding damage and thereby filling the concentration scale. We collect valuable orbs to fill the scale of Abyssal Magic.
The gas also had an effect on Raisa. We switch to the Sword of the Abyss and immediately after the appearance of the enemy, we release the Projectile of the Abyss into it. Having cooled the ardor of Raisa, we continue the fight, blocking the usual ones and dodging powerful blows. Periodically, small electric traps will appear on the floor. We avoid dangerous areas and try to stay away from Raisa. We use the arrived possessed to replenish the Magic of the Abyss, by gaining concentration and then collecting spheres. We repeat the same type of stages of the battle several times and, having won, we send the servant of Satan to Zobek through the opened portal.

Raisa Volkova.
Three Gorgons
City of the damned
Trevor reminds us that we have lost the Force of Chaos, which is now with the Gorgons - Euryale, Stheno and Medusa. Once in our possessions, we go forward a little and pick up the Soldier's Diary. We get to the round room, pull the lever on the left side and go down to the City of the Damned.
Evirala warns us of danger and informs us that Medusa owns the Force of Chaos. We jump even lower and find the Box of Pain. Behind the statue lies the body of a soldier - we take away the Diary. We pass into the next round room and find ourselves surrounded by the dungeon overseer and dungeon minions. A large representative has strong armor, so it is useless to attack him in the forehead. The weak point is the back, which is very easy to get to with the Dodge ability (roll over the enemy). Occasionally, the enemy uses a battering ram, and if you jump aside in time, you can force him to crash into a wall and unleash a flurry of combination blows on him. Having defeated the overseer, we take away the Dungeon Key, with the help of which the mechanisms and caches are unlocked. We insert the key into the indicated device, then we use this device and, by pressing the corresponding button in time, we open the door. To open other doors, we approach them and donate blood.
If you go through the door on the left and then on the right we will find the Soldier's Diary. We bring down the structure over the abyss (available with the Chaos Bomb ability) and move to the other side. We get to the lava, stand at the edge and look to the left. We jump to the island (available with the "Double Jump" ability), use the key to the dungeon and donate blood to get extra points. Returning back, we jump from the chains to the column and climb the topmost bridge using the active points on it. We go to the right, turn around and jump to the area on the right. We go all the way forward and jump even lower through the rift on the right side to the Box of Pain. Again, we jump from the chains to the column, but we do not climb to the end, but we descend on the intermediate bridge, where the Pillar of Sacrifice is located. After moving to the other side, we will get out to the center of the City of the Damned.
We go outside and turn right (if we go along the metal beam on the left side, we will find the Altar of the Wolf; we climb higher along the active points and get to the keyhole for the key to the dungeon). We jump onto the island, and then onto the chain. The longer we hang on it, the faster it goes down. Therefore, we climb up as quickly as possible and cling to the topmost active point on the column on the left side. If we do not have time, then we can temporarily grab onto other low points on the column and allow the chain to slow down. We shift to the left, jump over to the next chain and go down. We jump over to the broken column, move to the left and along the three chains we get to the very top. We move to the other side through safe pipes, from which steam and lava do not ooze.
We meet Stheno and, on her advice, we go to the dwarf in captivity, who should help us in exchange for freedom. We pass to the cliff and look to the left. Jump over to the Box of Pain and use it. We jump down, destroy the minions and climb up the active points on the wall. We select the Soldier's Diary and interact with the device, with which we pave the way to another similar device. Three times we press the "forward" button and go through the platforms to the island (three times "to the left" will lead to the keyhole for the key to the dungeon).

Chupacabra.
The captive was our old friend Chupacabra. We go down, use the device and press the "forward" button three times. We move to a small island, interact with the device and press the buttons "left" - "forward" - "forward". We activate the device on the wall to lower the cage with the Chupacabra. Re-pave the path to the previous island. We go there, use the device and click on the buttons "forward" - "forward" - "right". We pass further and pave the way to the Box of pain: "left" - "back" - "back". If you go through the bars (accessible with the ability "Fog"), then we get to the elevator - a short way to Carmilla's Lair. We go back and lay the platforms to the cage by pressing the "left" button three times. We go to the central island, use the device and press the buttons "left" - "left" - "back" and thereby bring the cage to the highlighted lockpicker. The Chupacabra kept his promise and showed the way to Medusa.
We approach the edge, donate blood and go to the other side. Having got out into the open space, we dodge the attack of the deep harpy by pressing the appropriate button in time. Having dealt with the enemies, we go up the active points on the wall and, returning to the place where the cut-scene began, we will find the Soldier's Diary in a dark corner. We descend back to the place of battle, climb up the active points on the columns and pick up the Soldier's Diary. Having moved to the other side, we exterminate the harpies. Then we approach the edge with the destroyed fence and jump over to the column. We go down, move all the way to the left and go up. Two guards will try to stop us at once. One thing pleases - both are without armor, so we can hit anywhere. The opponents are serious, so first we will kill one, then the other. One of them will most likely set fire to his hammer and become more dangerous than before - we'll start with him. Having defeated the guards, we select the key and insert it into the device. We lower the grate, take a couple of steps up the stairs, turn right and jump up. Use the Box of Pain and go back down. We pass into the round room, rise to the pedestal and activate the device. We go down and select the Soldier's Diary. If you go through the broken window and jump down, we will find a keyhole for the key to the dungeon.
We return the second main source of power - the Force of Chaos. Cursed blood took possession of the Gorgon sisters and united them into a single huge creature with three heads. We destroy the barrier by activating the Claws of Chaos and inflicting several powerful blows. The battle tactics are quite banal: we run up, jump up and attack the heads. We don’t get carried away too much, otherwise you may not have time to dodge to the side or step back, depending on the type of enemy’s blow. You can replenish your Abyss and Chaos Magic by destroying the tentacles in the foreground. Magic will come in handy anyway. After dealing enough damage to the Gorgon, she will lower her hand, which needs to be frozen with Void Projectile. Then climb on the active points on the hand, occasionally shifting to the right to avoid a collision with the other hand. After that, we move already horizontally, we get to the head and destroy it. At the next stage, we act according to a similar principle. When the other hand is stuck in the ground, freeze it with Void Projectile, activate the Chaos Claws and destroy the stone protection on the hand. We climb up, move horizontally and jump from one point to another so as not to be slammed. We follow the head of the Gorgon and, as soon as she gets out, we jump over to her. With the last head, everything is much simpler: when it starts to take in air, we shoot it with the Abyssal Projectile and end the fight by tearing the heart out of the monster's chest.

We select the Stone of Primordial Chaos and climb up along the active points on the Gorgon and the column. The rift leads to an air stream, rising (available with the Fog ability) along which we will return back. Before reaching the statue of magic, let's look into the room on the left side and use the Box of Pain. We bring down the ceiling with an orange glow with the Chaos Bomb. To do this, activate the Chaos Claws, select the Chaos Bomb and throw it at the flimsy structure on the ceiling. We climb even higher along the active points on the left side. We go down the stairs to the round platform, interact with the device and get to the open area, where we will face the overseer and the minions. Now that we have the Force of Chaos, we can break through the strong armor of enemies. Having dealt with everyone, we select the dungeon key, insert it into the device on the right side and open the door. We donate blood, cross the bridge and go straight to the Chupacabra store. The showcase contains a large number of relics, some rare items and very valuable keys to the dungeon. In addition, here you can buy one Crystal of Life, Chaos and the Abyss, which are not found on locations. Before leaving, we will receive the Dragon Talisman from the Chupacabra, which allows us to summon an assistant in the form of a huge Dragon during the battle. To reuse it, you need to collect scales that fall out of killed enemies, or buy them in the Chupacabra shop.
After going down the elevator, we go to the right and pick up the Soldier's Diary. On the left is the Pillar of Sacrifice. Spilling blood on him, we get a rune. After collecting four of these runes, a test will open. In total, there are sixteen runes in the game. It is possible to get to the Kleydos arena through the mirror in the Chupacabra shop. Pillars also drop improvements in the form of the ability to carry more relics. Ahead and slightly to the right is a room with a map. Thanks to it, you can instantly move around the already explored locations of the castle. Map rooms in the castle allow you to move only through the locations of the castle. The same rule applies to map rooms in the real world. To the left, on a small island (accessible with the Double Jump ability) is a Box of Pain and a Soldier's Diary.
Antidote: Part 1
Center
We call the wolf through the Altar and follow him. We move to the underground parking in the center. We get to the elevator and go up to Zobek's headquarters.
The virus is actively spreading throughout the city. During the interrogation, Raisa Volkova did not say anything worthwhile. Zobek tried to read her thoughts, but only stumbled upon an abyss of chaos and darkness. The only chance is to return Raisa to her human form. To do this, you need to get an antidote, which was probably created along with the virus to protect scientists, minions of Satan and other important people.
We get to the elevator and go down to the parking lot. On the left is a grate (available with the Fog ability), passing through which we will reach the keyhole for the key to the dungeon, and if we move even further, we will find the Box of Pain.
We go on the right side, destroy the possessed and approach the door on the left side. Destroy the passage with the Chaos Bomb. We block two fiery streams with Abyssal Projectiles. This is not enough, so we throw another projectile at the fire system on the ceiling on the right side. We pass to the elevator, go upstairs and go outside. We deal with the enemies, jump over the debris and head to the bridge. We destroy the possessed and move to the other side. We pass to the end, climb up the active points on the right side and use the Box of Pain. We jump down and go into the bookstore.

Soldier of Satan.
We hide in the darkness, turn into a rat and penetrate the ventilation, which is next to the exit. The shaft will lead us to another room. We take the usual form and climb to the next floor. After jumping down through the window, we pick up the Memorial in the corner on the right side. We leave the alley, kill the only obsessed and jump even lower. We pick up the Memorial, located on the right side. We destroy the enemies, jump over the gap and deal with many more possessed near the fountain. To the right of the fence is a generator. We throw a shadow dagger at its upper part. Climb up the active points on the pipe, move to the right and jump down. We pick up the Memorial, jump over the fence and again climb through the pipes to the window of the building.
After disinfection in the shower room, we follow the corridor and deal with the enemies. We pick up the Memorial, go back and go into the room on the left side. We destroy the door and climb up the active point on the wall. We move into the room, hide in the darkness and turn into a rat. We move through the bars, skip the room with the Box of Pain and go into the next one. We go down through the gap in the floor. We run a small room on the right side, where we turn to Dracula and deal with the enemies. In the room on the opposite side is the Magic Statue. We go down, destroy the shields of enemies with the Claws of Chaos and finish them off with a whip. We go around on the left side. We free the passage, stopping the fiery streams with Abyssal Projectiles. Use the Box of Pain and interact with the device. We go back, activate the lever and restore the power supply. We pass through the opened door. Top right - Memorial (available with the "Double Jump" ability). We climb up along the active points at the other end of the corridor and, turning around, we get to the Box of Pain. Having got out into the hall, we clear it from enemies. The fight may seem difficult, in this case we destroy the skeletons one by one. We rise to the second floor, then to the flight between the second and third floors, where we will find the Memorial. We jump from the stairs (available with the “Double Jump” ability) to the next floor, turn around and jump onto the stairs. The fourth floor contains the Box of Pain and the keyhole for the dungeon key. We pass into the already familiar corridors and do not forget to look into the ward with the Box of Pain. We use the elevator to go down to the lower floor.
castlevania
Scientific area
We jump down, destroy the possessed and face the city defenders - law enforcement fighters. We strike with the Claws of Chaos and, after the enemy moves away from us, it is very important to catch up with him and carry out finishing moves in a jump in order to finally destroy strong armor. After destroying everyone, we go through the gap in the fence and turn right. We run to the wall, climb the active points and interact with the Pillar of Sacrifice. Returning back, we go into the building and activate the switch on the wall.
We go outside, jump down and deal with opponents. We knock down the fire escape with a Chaos projectile. If you go to the end along the road and jump over a dilapidated barricade, then we will find a Memorial with a memory. We run in the opposite direction, we pass through a gap in the fence and find ourselves in an already familiar place. We turn right and get to the room with the hatch. We go down, destroy a couple of law enforcement officers, pick up the Memorial and go up the stairs. We replenish the scales of the Abyss and Chaos and get out to the landing. Having risen upward, we move along the yellow fence clockwise. From the place where the fault is formed, we cling to the active point on the central device. We shift to the left, make a jump back and, as far as possible from the center, we shift to the right and jump down to the Box of Pain. We kill enemies, we pass to the stairs and at once we turn to the left. We pass through the bars, turn into a rat and jump down through the crack in the floor. We assume the form of Dracula, use the Pillar of Sacrifice and soar up the air stream. We rise to the upper level and go to the door on the right side. Opposite it is an active point. We cling to it (available with the "Double Jump" ability), climb up and interact with the Pillar of Sacrifice.

Carmilla.
We release the Chaos Bomb into the icy area in the airlock. We pull the switch, wait for the completion of disinfection and exit the airlock. We jump down to one platform, then to another and use the Box of Pain. We jump over the gaps, follow the narrow path and turn left at the fork to get to the Box of Pain. We are afraid of possessed with firearms. The damage from them is quite heavy, so we dodge to the side in time or freeze them with the Abyssal Projectile. We get to the central system and carefully climb the active points, withstanding the time in front of the closing and spewing steam areas. Climbing the stairs, immediately turn around and look down. We jump down to the Box of Pain, use it and climb the stairs again.
We pass to the far column, climb the active points and, ignoring the possessed, head to the stronger fighters (if we go to the right, go through the grate (available with the “Fog” ability) and use the elevator, we will find ourselves in another part of the Science District, Where is the Box of Pain located? We continue to move along the bridge and clear it from enemies. We go up the stairs, use the Box of Pain and back down to the Statue of Magic. Having replenished both scales, we go through the passage on the right side. Grab the Memorial, jump down and throw Chaos Bombs at the glows on each side of the door. We pass to the freight elevator and go down.
We leave the elevator, climb the stairs on the left side and jump over to the container, which will pass from the right side. We immediately shift to the left and slide down below so as not to collide with structural elements and an electric trap. Approaching the tunnel, we jump down to the lower container and hang on it in the same way. After leaving the arch, we turn around and cling to the active point on the arch on the right side. Climb up and pick up the Memorial. We jump down to the container, and then to the area on the left side. We pick up the Memorial and go down through the open hatch. Before the passage to the hatch on the right side there are active points. We climb on them, wait for the arrival of the container and jump onto it. Hanging on the ledge, we bypass the trap and quickly jump (available with the "Double Jump" ability) to the area on the right side, where the keyhole for the key to the dungeon is located.
We jump down and down and soon we will face two guards. Behind the bars (accessible with the Fog ability) - an airflow leading up. We release bats at a motionless enemy. We quickly rush to another guard and take possession of his body. We interact with the scanner to the right of the door and go through the gateway to the platform.
We distract the guard with bats and quickly climb the stairs near the fence. We shift to the right, move along the pipes and cling to the stairs on the right side. Climb up, use the Box of Pain and return to the pipes. We follow the guard and, having guessed the moment, imperceptibly jump down. We take possession of the body of the guard and open the gate. We return to the door leading to the gateway, hide in the darkness on the left side and turn into a rat. We pass through the open gate to the car, run inside through a small fault and take on the familiar appearance through the darkness behind the tanks on the left. The noise attracted the attention of the guard, but Dracula managed to escape in time. The train started moving and disappeared into a dark tunnel. We are attacked by a soldier of Satan. The enemy is unremarkable, but it's not so easy to get rid of him. Having dealt enough damage, we capture and find ourselves thrown into the next car. We quickly get out of the window on the right side, move to the right along the active points and climb onto the roof. Ignoring the soldier of Satan, we set a swarm of bats on guard. At the last moment, we have time to jump onto the wagon and get rid of the guard. We shift to the right along the active points and climb onto the roof.

We go down the indicated stairs on the left side, move to the right and go down to the window. Without leaning out, we sit behind a shelter. The guard, before reaching us, will turn around and go in the opposite direction. We catch up with him, take possession of the body and interact with the scanner on the door. After a short confrontation with the soldier, we rush after him in pursuit. We cling to the damaged door, move to the right and climb to the roof. We move from side to side to avoid collisions with lighting fixtures. We carry out the final stage of the battle with the soldier of Satan and go to the station.
Suddenly, Zobek's bodyguard appears and insistently offers his help. There is nowhere to go, you will have to look for an antidote along with a companion. Through the tunnel we return to the station of the Scientific District. We will go along the narrow platform on the left side and find the keyhole for the dungeon key and the Memorial. Between them at the top is a Box of Pain (available with the "Double Jump" ability). Then we rise even higher and rush forward along the air stream (available with the Mist ability) to the Pillar of Sacrifice. At the very end of the right platform is another Box of Pain.
We approach the wall and climb up after the partner. We jump down, activate the switch on the wall and go through the opened door. The portcullis on the right (accessible with the Mist ability) leads to the upper bridge where the Box of Pain is located. We jump down, destroy the enemies and interact with the switch on the wall. Let's ask the bodyguard to hold him. Immediately after the tunnel there will be wires - we tear them off. Turn left and at the next fork turn right. After jumping down, we pass through the rift in the wall on the right and get extra points if you have the key to the dungeon. If we turn left at the fork, go through the grate (accessible with the Fog ability) and go up the airflow, we can quickly get to the station. Returning to the wires, we go to the right and jump down. We deal with the possessed and the soldier of Satan. We cling to the active point and, helping each other, throw the bodyguard behind bars. We pass into the next room, climb up the column and go over the metal beam. The bodyguard left us because Zobek needs him more at the moment. We rise higher and higher, not missing the Pillar of Sacrifice and two Boxes of Pain. We get out into the alley, approach the gate and meet Trevor, who reports on the danger of his mother Maria threatening him.
Blood Curse
Carmilla's lair
We move to the castle. Behind the bars (accessible with the Mist ability) is a Box of Pain and a statue that closes one door and opens another. We go to meet with Carmilla. After drinking her poisonous blood, the health bar turns purple, and now with the receipt of damage, its regenerating part will decrease. After the destruction of the skeleton, we destroy the remaining blood clot. To the left behind the bars is a staircase leading to the second floor, where there is a Box of Pain and a room with a map. Also, if you go up the stairs, turn right and approach the grate, you can jump even higher (available with the "Double Jump" ability). There we interact with the Pillar of Sacrifice and jump over to the other side. We pick up the Soldier's Diary next to the torch, climb up the active points and use the Box of Pain. We climb the stairs, turn around and jump to the Pillar of Sacrifice. Go left and jump down to the Box of Pain. From here you can climb higher, walk along the wall of the room with the map and find another Box of Pain. Climb the stairs again, go right and jump onto the structure. After swinging it, we jump down and insert the key to the dungeon into the keyhole.

Mary comes to the rescue. We drink her blood to restore lost strength. Carmilla starts hunting for us. You can not fall under the light of her lamp, otherwise you will have to fight against the inhabitants of the castle. Each room has a floor cross. Activate all four crosses to open the door. We try to move quickly and even jerkily, since Carmilla can deactivate the crosses. We pass further and activate another cross. To the left, behind bars (accessible with the Fog ability) is a Box of Pain and a passage leading to the Altar of the Wolf, the Pillar of Sacrifice, and the elevator that descends to the City of the Damned.
From the statue of blood we go all the way to the left and climb the wooden fortifications. We move along active points and get to the Pillar of Sacrifice. Going outside, immediately turn right and pick up the Soldier's Diary. Let's go after Carmilla. Before us will be two Mary. Obviously one of them is Carmilla. We approach the real Mary, who is on our left, and drink her blood.
Carmilla becomes even more furious, imprisoning Maria in a makeshift cage and building a shield around herself. This shield can only be destroyed with a Chaos Bomb. We get magic in the usual way: we increase concentration by striking enemies and preventing damage, and we collect spheres. Do not forget that a successfully placed block will give a noticeable increase to the concentration scale. We keep a distance from the main opponent so as not to receive damage from electricity, and occasionally dodge powerful attacks. Even after the destruction of the shields, the nimble Carmilla will not let her get close. We continue to collect spheres and use Chaos Bombs. After inflicting enough injuries on Carmilla, we will be surrounded by numerous clones. We destroy them all as soon as possible, while constantly jumping so as not to receive damage from electricity.
Having acquired a new ability, we turn into fog and break out of the tenacious paws of the creature. Now we can get to Maria by turning into a fog, and replenish health by drinking her blood. We dodge attacks, strike back and periodically restore health. Having won, we return back and are transferred to the real world.
Antidote: part 2
We turn into the fog and go through the gate. We stand on the ventilation on the right side and in the form of fog we rise along the air flow. We replenish the scales of Abyss Magic and Chaos Magic. We climb the active points, hang in front of the air flow and turn into fog. Having crossed to the other side, we hide in the darkness on the left and turn into a rat. We penetrate the drain and run to the end to the room with the Pillar of Sacrifice. On the way back along the same drain, we go down even lower through the crack in the grate and get out onto the balcony, where the Box of Pain is located. We jump into the alley and return to the building along the already done path.
A law enforcement officer set a mine. We pick up the Memorial and jump over the mine or bypass it, turning into fog. We destroy the enemies outside, go around the mines and climb on the active points on the wall of the building. We move to the right along the sign and jump down. In the building on the right we find the Box of Pain and the room with the map. We pass into the neighboring building, stand on the grate and turn into the fog. We use the switch, quickly run into the elevator and go up to the top floor.

Daughter of Satan.
Coming out of the elevator, we pass through the bars on the right side. We get to the Box of Pain, use it and go back. We rise to the stairs, use the Box of Pain and go to the other half of the hall through the grate on the right side. We kill a couple of enemies, pick up the Memorial and go down. We penetrate into the room next to the stairs through the bars. We restore the power supply and quickly rush to the elevator. Rising higher and higher, constantly turn left. We pass through the bars and get to the elevator. Once on the top floor, go right behind the Memorial. Returning back, we move in the other direction. We go down through the grate, climb up the active points and get to the next elevator. If you do not have time, you will have to go down again and resume the supply of energy. Climbing up, we jump over the dips and get to the stairs. We use the Box of Pain, we go down a little lower to the wreckage and jump to the Pillar of Sacrifice. We cling to the active point in the elevator shaft (available with the "Double Jump" ability) and jump to the Box of Pain.
After observing the scientists, we go along the narrow passage along the destroyed wall. There will be darkness on the right - we hide in it and turn into a rat. We pass through the grate, turn right and get to a dark area, where we take on the usual appearance. We wait for the scientist to appear and take possession of his body by attacking from the back. We go to the door, use the scanner and, once inside, we get the antidote.
Returning to Zobek's headquarters, we inject the antidote to Raisa Volkova. The vaccine did not work at all as we expected. Instead of positive results, Raisa gained even greater strength, smashed the building and broke free. Zobek created a dome that would not allow other servants to come to the aid of their ally. In close combat, we are not very fond of building complex combinations: we inflict two or three hits and bounce to the side. In ranged combat, the use of Chaos Projectiles will not be superfluous. And finally, our ace up our sleeve - the Dragon talisman. We'll definitely get it going. When Raisa moves away from us, without stopping, we run around the territory so as not to fall under a barrage of shells flying from above. We defeat the enemy and are transferred to the castle.
Parts of a mirror
Behind is a room with an icy door. Use the Chaos Bomb to destroy the ice. After activating the lever, we will get into the Bernhard Wing.
We go outside, jump over the gap and go down to the Box of Pain. Returning back, we jump to the tower and pass along the bridge. We climb the wooden fortifications, move to the right and be sure to highlight the active points so as not to miss the fork leading up to the place where we can use the dungeon key and get extra points.
Having crossed the gap, we jump to the destroyed tower on the right side (available with the "Double Jump" ability) and pick up the Soldier's Diary. We get to the dilapidated tower, climb up and, in the end, break down. Before climbing the tower, we can go to the left and find the Box of Pain and the room with the map. We use ordinary warriors to fill the concentration scale and then collect spheres in favor of the Chaos Force, and then with the Claws we destroy the strong armor of a heavy warrior. The main opponent is a churchman who uses magic. We attack him at every opportunity, especially when he empowers his wards.

Puppeteer.
We activate the device, climb up and go inside the building. If we turn left before entering, we will reach the Box of Pain, which can only be jumped with the “Double Jump” ability. Interact with the statue in the room and meet Trevor. He asks to bring him the Mirror of Destiny. On the right, in a dark corner, lies the body of a soldier - we pick up the Diary. We get out, following the pointer on the mini-map. At the fork, turn right (on the left is the Box of Pain (available with the "Double Jump" ability). We go up and in front of the bridge we select the Soldier's Diary. Having dealt with the enemies, we go into the building and interact with the statue on the right side. We go down and communicate with Agrus - the brother of the late Pan. Agrus wants to avenge us for the death of Pan, so he will not part with the mirror so easily.
It is necessary to get to the mechanism without catching the eyes of Agrus. We throw a shadow dagger at the bell on the far wall on the left side and, without waiting for Agrus to come running, we jump over the leaves on the right and grab the ledge of the flower bed. We move all the way to the right, make a jump to the next ledge and drop down to a safe area. We quickly run to the next flowerbed, cling to the ledge and move to the left. We go around the tree, turning into fog. We cling to the flowerbed with the monument, move to the right and hide around the corner. We become fog again and go around two flower beds on the right side. Being behind the flower bed, we wait for the ability to recover, and with the help of it we get to the mechanism. We are not in a hurry to activate the mechanism, but again we are waiting for the restoration of the ability. By pressing the button, Agrus will come running to us. We turn into the fog and go to the opened gate.
Having risen on the elevator, on the left we will find the Statue of Blood, and on the right - the Statue of Magic. We go out into the open space, freeze the bird with the Abyssal Projectile and take the fragment of the Mirror of Destiny. In the fight with Agrus, we try to dodge more often than to attack. We guess the moment and block simple blows of the enemy. Don't forget to use the Sword of the Abyss, Claws of Chaos and useful relics.
In the park where we hid from Agrus, there are several places that can only be reached with the "Double Jump" ability. There are Boxes of Pain and a Soldier's Diary. One of these places is on the far wall to the right of the gate, the other is not far from the mechanism that opens the gate. We go down to the water and pick up the Soldier's Diary next to the tree. Having practically risen up, on the top right we will see a ledge leading to the Box of Pain, which can only be jumped with the “Double Jump” ability. We pass inside and activate the statue on the left. Returning to Trevor, we give him the first fragment.
We go into the round room, activate the lever and, while the door opens, we throw shadow daggers at the targets that appear. For a successfully passed test, we will receive additional points. We go outside, deal with enemies and interact with the device with gold-colored inserts. We rotate it by quickly and often pressing the buttons shown. On the other side are the Box of Pain and an elevator leading to the City of the Damned.

Fur of law and order.
We go upstairs and go into the building. Climb the stairs to the right, use the Box of Pain and jump down. We kill the soldiers, select the Soldier's Diary and climb the active points. On the adjacent right balcony is the Pillar of Sacrifice. The balcony on the left side will lead to the Box of Pain (accessible with the "Double Jump" ability). Then jump over to the ruined floor on the left side and use another Box of Pain. We get to the scene and activate the device against the wall on the left side to gain access to the Statue of Magic. We rise to the stage, climb on the active points on the right side. Having moved to the balcony, we select the Soldier's Diary, lying on the right side. We go through the gap and jump down. We use the Box of Pain and turn into a rat in the darkness. We pass through the grate and move along the stage until we find the grate. We run under the stage, take the usual form and throw the Chaos Bomb into the mechanism. Again we turn into a rat, we rise along the right side and slowly overcome the traps. We gnaw through the rope and return to the place where we first turned into a rat. Having taken the form of Dracula, we climb up, go down to the stage and pull the lever marked on the mini-map.
We were honored to take part in the puppet show. We activate the lever on the platform and get down to business. We listen to part of the story and put the Puppeteer and the scenery - the workshop on the stage. After that, we continue the story. Next in order: Walter Bernhard, the castle, the demon, at the same time - the child and the theater. Having finished, we go up to the stage and take the heart from the hands of the child. We revive the Puppeteer, who tells a familiar story about our overthrow by his own son. The Mirror of Destiny shattered, and its fragments scattered throughout the castle. The puppeteer manages to demonstrate one of the fragments before the cursed blood takes possession of it.
Enemies are quite weak and their attacks are predictable. Dealing with Walter de Grey. We deal enough damage to the Puppeteer, periodically bouncing back so as not to fall under his hands. In a fight with the dragon Sargantorix, we are afraid of fiery breath and sparkling traps. It's best to stay away from the latter. We finish off the dragon by firing a Chaos Bomb at the indicated glow. When the Puppeteer reappears, he will use more serious tricks. When he crackles his fingers, without stopping, we run around the territory to avoid the sparkling trap. If the enemy grabs us with his hands, then we break out, taking the form of fog. At the last stage, when the Puppeteer gets up on his hands, we throw a Void Projectile or a Chaos Bomb at his head. Then we run up and inflict as many blows as possible. In the absence of magic, open the cache in the wall and replenish supplies through the Statue of Magic.
Having recovered, the Puppeteer will give a fragment of the Mirror and remember us. We return to Trevor and give him the second fragment. Another fragment of the Mirror is located outside the castle. Trevor will take us to Zobek's headquarters.

Victor Belmont.
Man in a raincoat
Center
Zobek reported that someone, possibly a ministerial messenger, had wandered into the Cathedral looking for us. Having gone down to the parking lot, we deal with new enemies. Before death, they explode with a large radius of destruction, so we run back as far as possible. We follow the pointer on the mini-map and, without going inside, we continue to move along the road. We pass through the bars and take the Memorial.
Returning back, we go up the elevator and deal with the obsessed. After jumping over the debris, we turn right and go through the grate (if we go left, we get to the room with the map). Moving forward, do not miss the gap on the right side, leading to the Box of Pain. We go down lower and lower, then climb onto the structure and, turning right, use the Box of Pain. We turn around and cross to the other side. We assume the form of fog to climb up the air stream. We climb the stairs and deal with law enforcement officers. In front of the abyss is a Box of Pain, which can only be reached with the "Double Jump" ability. In the corner there is another air stream - we rise along it, turning into fog. We climb up the stairs, open the door and jump down. We climb the active points on the wall and get out to the surface (on the left - the way back).
We climb up the active points on the wall on the left side (available with the "Double Jump" ability). We get out on the other side and jump onto a small area. Turn right 90 degrees and double jump to the next building. Jump onto another small area in the corner on the right side and drop down to the Memorial.
After jumping over the wall, we will face law enforcement officers and a larger multi-functional mech. Use Chaos Bombs to destroy the protective structure on the mech's head and then deal damage to the head itself. We finish the fallen fur with an ordinary whip. Next, disable the guns on his right arm and right shoulder with Void Projectiles. We finally deal with the fur, conducting combinations with a whip.
Following the sign, we run into the building. We rise to the very top, activate the switch and go to the next location.
Arts District
After jumping down, immediately turn right and pick up the Memorial. Behind there is a passage that will lead to another Memorial. If you go to the left, then next to the wall we will find a grate, behind which are the Altar of the Wolf and the Statue of Magic. Moving along the road, we will soon find the very person whose power Zobek felt. An unknown person in a hood is trying to hide from us and he succeeds, thanks to a huge monster that has appeared. We destroy the possessed, turn around and, approaching the gates of the Cathedral, turn left. We move along the wall of the cathedral until we find the Memorial. We pass into the tunnel and use the Box of Pain. We get to the hatch, go down and get out from the other side.
We destroy the enemies, go to the crossroads and knock out the fire escape on the wall of the left building with a Chaos Bomb (the road on the right leads to a wall with a breach, behind which is the Statue of Magic). We climb the stairs and active points. At the very top of the ruined stairs is a Box of Pain that can only be reached with the Double Jump ability. Having penetrated the building, we jump from one structure to another, swinging on them properly. We rise higher and move to the other side. We go down to the box of pain, use it and jump down. Having exterminated the enemies, we pick up the Memorial, climb up again and get out onto the roof. We kill the possessed and go to the far passage on the right side. After getting out into the elevator shaft, we jump down to the intermediate floor on the left side and use the Box of Pain. At the very bottom of the shaft is a keyhole for the key to the dungeon. Returning to the roof, we throw the Chaos Bomb into the glow and thereby lower the crossing, which still cannot be used.

We freeze the waterfall with the Void Projectile, quickly climb up the active points on the ice and penetrate the building. Having dealt with the enemies, we pass through the grate and release the Abyssal Shells into the pipes. We restore the power supply, go back and press the button. We rise along the air current, taking the form of fog. We throw a Chaos Bomb into a fuel tank, which breaks off and breaks through the wall of a neighboring building. We jump down and down through the gaps in the floor and eventually get out to the parking lot. We restore health through the Statue of Blood and go into the passage on the right side. We climb up the active points (available with the “Double Jump” ability) and move to the room where the keyhole for the key to the dungeon is located. We go outside and run to the end to the right - there we will find the Memorial. We go back, climb onto the balcony along the structure to the right of the parking gate and use the Pillar of Sacrifice. We rise even higher along the column, penetrate the building and go down two floors below. Activate the switch and go to the library.
We jump from the stairs (available with the “Double Jump” ability) upstairs and go to another part of the library, where we will find the Box of Pain. We also jump over to a remote area in the corner to pick up the Memorial. We go down and follow the sign, destroying enemies along the way. After a short meeting with a mysterious man in a hood, we enter into a fight with Satan's faithful assistant Abaddon. His weak point is his glowing heart. We strike at him in close combat or from a distance, throwing very effective Chaos Bombs. To replenish the scales of the Abyss and Chaos, we destroy the possessed and collect spheres. Abaddon is not as strong as it might seem at first glance, but some of his attacks can be dangerous. In particular, this is a sharp tail moving underground, from which you need to run away without stopping. You will also have to run away when the enemy goes into a rage, after causing him a certain amount of damage. We finish Abaddon in QTE mode. On the wall there is a section with a destroyed partition - we climb up there (available with the "Double Jump" ability) and use the Pillar of Sacrifice.
We go to the only passage. Ahead is an unlit room in which we activate the switch (on the right, behind the wall - a room with a map; if you climb higher, go into a small room and climb up the air flow, then we will return to the library). While the door is opening, take the Memorial behind the items to the right of the switch.
We go outside and deal with enemies. The tunnel on the right will lead to the room - a short way to the Holy Cathedral. If we go to the left, then we will get out into the alley with the Altar of the Wolf. Climb up the active points, jump to the sign, jump from it to the archway (available with the "Double Jump" ability) and use the Box of Pain. Returning back, we climb higher on the left side (where the glow is) and immediately cling to the active point on the left. We climb over the wall, climb up the building and use the Box of Pain. We return to the main road, we pass along it to the end and, after destroying the furs, we use the Box of Pain. We run back to the pillar, climb on it and move to the left to the building. After climbing up, we jump down from the right side and pick up the Memorial. We repeat the previously done path, jump onto the suspended structure, swing it and jump over to the statue.

Nergal Meslamsti.
Having penetrated inside, we get out to the stairs and go upstairs. We jump on active points, move along the wall and get to the Box of Pain. Going down lower and lower, we will soon find the Statue of Blood - we will use it if necessary. Slowly we go forward, we pass through the bars and overtake the man in the hood. A Brotherhood of Light warrior has stripped us of our powers. He knows how to block our attacks and his weapon is no different from our shadow whip, so we dodge to the side from directed attacks, and bounce from circular ones. Returning here later, we climb up the active points on the column. Go all the way to the left, jump over to the other side (accessible with the Double Jump ability) and use the Pillar of Sacrifice.
Having fallen down, the forces return to us. We often block the blows of the enemy and counterattack. We try to keep our distance to avoid powerful combo attacks of the warrior. At the last stage of the battle, it is necessary to destroy all the obelisks. We destroy the summoned demon by pressing the button in time after the reunion of the circles. Victor Belmont is the defender of humanity, the last of a famous family. He leads a group of people who have not been exposed to the virus. We give him the antidote. As a thank you, Victor decides to help us find the servants.
Following Victor, we jump down and activate the switch. We pass further, cling to the stairs on the right side and go upstairs. Standing in the middle, we assume the form of fog to fly over to the other side. On the left is an airflow that can be reached with the Dual Flow ability. We insert the key to the dungeon into the keyhole, donate blood and go up the air stream. Jump forward and use the Box of Pain.
Continuing to climb up, we get to the elevator. Outside we will meet Zobek's bodyguard. Enemies will soon appear - we destroy them by joint efforts. Victor, sacrificing himself, will summon a servant. This will allow us to track our target. We take a fragment of the Mirror of Fate from Victor and transfer to the castle.
Cursed blood absorbs Trevor and appears before us in the form of a creature that personifies all the vile that is in the soul of Dracula. In fact, we have to fight against two opponents. In both cases, in close combat, use the form of fog. Having defeated the first enemy, the second one will come out of it. We make a double jump to reach the head, and strike at it from the side in which it does not spew blood. We repeat the steps until complete destruction.
Second minister
Victory Square
We climb onto the balcony, clinging to the active point with a double jump. We pass to the other end and jump to the perpendicular balcony. We go inside and go down on the lift. We jump down, then even lower and, turning around, use the Box of Pain. We move to the other side of the bridge, climb the signboard and overcome the gaps with a double jump. We pick up the Memorial and return to Victory Square.
The second attendant is at the headquarters of the company - the world's leading arms manufacturer. Jump over the truck and the wall on the right side and use the Box of Pain. Returning back, jump over the wall, use the Box of Pain, located next to the left statue, and go down through the hatch next to the right statue. We get to the air flow and go up. In the future, a walled passage will be released in the next room, which will lead to an air flow. Climb halfway up it and use the Pillar of Sacrifice. We rise to the end to get to the hatch leading to the surface.

Guido Sandor.
We distract the guard moving and the most distant from us with bats. We quickly run across to the other side and go down through the far floor grating, turning into fog. We take the Memorial, hide in the darkness and turn into a rat. We run through a narrow passage, assume the form of Dracula and find a keyhole for the key to the dungeon. We return to the hall with the guards. Being behind the wall, we distract the guard moving and the most distant from us. We approach the stairs as close as possible, turn into the fog and, going upstairs, we pass by the guard and through the bars.
We will wait until three vertical laser installations pass and, without stopping, we run forward, because if we linger on the floor cell longer than it should be, then the protection system will detect us. With a double jump, we jump over the horizontal laser installations and, having moved to the other side, we rise along the air flow a little to the right of the middle. We fully restore health and replenish the Magic of the Abyss and Chaos through the corresponding statues. We go up the elevator and, ignoring Trevor, we pass into the room. The servant of Satan, Nergal Meslamsti, shocks us, which leads to almost complete exhaustion. We'll come back here later to use the Box of Pain, which is upstairs behind the back. We go out into the corridor and slowly pass along it to the end. We lure Nergal to the castle, where we will have a much better chance of confronting him. The enemy takes possession of the stone statues. All three have one life. Each statue has unique abilities. We often take the form of fog and destroy enemies one at a time, while causing damage to them in random order. The last to be left is the most massive statue, which has absorbed the abilities of the fallen statues. Having practically dealt with the enemy, we move towards him, dodging away from electrical impulses in time. We destroy the statue and Nergal hiding in it.
Mirror of Destiny
observation tower
We climb the active points on the right side. We make a double jump and move to the Pillar of Sacrifice. Returning back, go to the next room and jump down. There is a body next to the column - we pick up the Soldier's Diary. We go outside and get to Trevor. We get the Mirror of Fate and are transferred to Zobek's headquarters.
Center
There is one last servant who is much more powerful than his now deceased brother and sister. Together with Zobek's bodyguard, we set off in search of him. Following the sign, we go down and use the Mirror of Destiny. We put the fragments in their places. You can rotate them 360 degrees. Having done everything as it should, we pass on and grab the hook. You need to jump through the fire traps. The first spews fire once, followed by a long break - at this moment we move past it. The second trap is two eruptions with short breaks; the third - three eruptions, the fourth - four eruptions. In the next test, you must transport the bodyguard to the lever on the other side. We stand on the left cell and throw a shadow dagger into the platform in front of our partner. We stand on the right cell and throw the dagger into the platform to the left of the partner. We stand on the left cell and throw the dagger into the platform in front of our partner. We quickly get up on the right cell and throw the dagger into the platform in front of our partner. We quickly get up on the left cell and throw the dagger into the platform to the right of the partner. We can't let the fireball hit us or the bodyguard. If you stand on one of the cells for a long time, then, accordingly, fire will appear from this side. Therefore, we do not allow the fireball to appear at all from the side where the partner is located, since he will no longer be able to dodge. To the right, behind the bars is a keyhole for the key to the dungeon.

Revelations
Once in the courtyard, we try to destroy the dark monks as quickly as possible. They prefer to attack from long distances. From time to time, the monks unite and become a single being - the dark apostle. If you get close enough to the apostle, then he is able to create a shock wave around him for a second - we bounce back or become fog to avoid damage. To the right of the gate is the Statue of Blood - we replenish health if necessary.
Simultaneously push the levers and go inside. The servant Guido Shandor calls on Satan. When trying to stop him, the bodyguard stops our initiative, and we are transported to the castle. We use the Mirror of Fate and arrange the fragments in their places. We get to the throne room, where we have to find out the whole truth. Dracula and his son Alucard, a reborn vampire, made a deal: Dracula voluntarily agreed to fall into a dream in order to wake up in a thousand years and once and for all put an end to Satan, who would be called to Earth by his servants. Alucard will become Zobek's bodyguard and help him find Dracula. Everything went according to plan: let the attendant conduct the ritual. Guido disappears and Zobek appears, who is angry at us because of the betrayal. The enemy skillfully uses his weapon. It first performs a spinning attack, and then a directed attack, so we actively assume the form of a fog. During breaks, we deal with the dead and, collecting spheres, replenish the scales of the Magic of the Abyss and Chaos. Having gained strength, we destroy the creatures in the upper positions along the entire perimeter with Chaos Bombs. Having defeated the enemy, we turn into the fog and freely pass to Zobek in order to finally deal with him. Alucard go in search of a servant.
After leaving the place of battle, on the right side we find the Memorial and the Pillar of Sacrifice, and on the left - the keyhole for the key to the dungeon. We go outside, deal with the enemies and climb the active points at the other end on the left side. After some time, the search for Alucard will be successful, and he will notify us of this. We get to the alley, next to the Holy Cathedral in the Arts District. The main passage is blocked, so we go around on the right side. After meeting with Alucard, we go to the right, jump onto the containers and interact with the Pillar of Sacrifice. When we are ready, we climb up the active points and penetrate the building. There will be no turning back, so we buy everything we need in advance (especially the relics of the “Tears of the Saint” and dragon scales) in the Chupacabra shop, which is located in the castle.
call
We jump down, go into the room and use the Mirror of Destiny. Having placed the fragments in their places, we climb the stairs and observe the appearance of Satan. After killing the servant, he soars into the heavens on a huge Leviathan. We climb up the active points, avoiding energy surges. We get to the chains and, together with Alcurad, we pull for them. We continue to move along the active points and soon we will be able to climb onto the back of the Beast. We deal with enemies, pull the chain and destroy the monster.

Satan takes possession of Alucard and tries to turn us against his son. The enemy is strong, hardy and incredibly fast. He uses powerful attacks combined with simple strikes that can be blocked. Periodically, Satan unleashes an energy blow on us: we dodge to the side and jump up to avoid the shock wave. In the arsenal of the enemy, there are also long-range attacks using dark matter. We use the relic "Tears of the Saint" to restore health. After dealing enough damage to Satan, he will rise above us and begin to fire. We run around the territory and bounce off dangerous areas in time.
Gabriel Belmont saved the world from Satan for the second time. And this time, thanks in large part to his son. After completing the game, the Free Play mode will become available and a new difficulty level will open - Prince of Darkness.