Divinity original sin 2 kill everyone. Divinity: Original Sin. Walkthrough. Blessing is a very useful Source spell.
The whole chapter is final battle. Get ready because this fight can be long and hard.
Once you're in the real Lucian's tomb, your allies (Sickness, Gareth, Almira and Tarkin) will show up and start praying for you. Their prayer will reduce the cost of Source skills to 0, meaning you can use any Source spell without requiring Source points. Therefore, before the fight, remember the most powerful spells. Also, if you haven't already done so, don't forget to split the resurrection scrolls evenly among your companions so that they can resurrect each other if needed.
It turns out that Lucian is alive; he is waiting for you along with Dallis, Vredeman (King Brakk) and the masters. Lucian will explain his plan: why he killed the other Awakened, where the fiends of the Void came from, and what he is going to do - cleanse the whole world from the Source in order to restore the veil separating the world of the living from the Void.
Dallis will also reveal his true colors. She is an Eternal, and even more incredible, Fane is her father. The real Dallis found her tomb, after which the Eternal took on the appearance of Dallis to become a Master General.
After you know the goals of Lucian and Dallis, you need to make a decision: sacrifice yourself and give up your Source, or refuse and attack them. A little warning: if any of your companions die when you kill the last enemy (like King Brakk), they will end up dead and won't join you in the epilogue (only as spirits) - so make sure everyone your characters are alive before they strike.
Sacrifice your Source
If you decide to sacrifice yourself, then King Brakk will say that he stole the rod of obedience from Dallis and freed himself from the shackles. Lucian and Dallis will be at your side in the fight against Brakk, who will be joined by the Kraken, as well as all the enemies you fought before: Isbale, Lord Linder Kemm, Whiteface. However, the Kraken will not be able to summon them if you consumed Isbale's Origins, Lord Kemm, and Whiteface earlier. The Kraken will also constantly summon members of the Black Circle. To kill the Kraken, you need to use ranged skills and spells, although you only need to kill King Brakk to win this fight.
After Brakk is defeated, Dallis will say that she has failed and the fate of the world lies in your hands.
Refuse to sacrifice your Source
A battle will begin in which you have to fight against Lucian and Dallis. Don't waste time and spells on all enemies. Focus your attacks on Dallis to move the fight to the next stage. At some point, King Brakk will say that he stole the rod of obedience from Dallis and, with the help of the God King, will summon the Kraken. The same battle awaits you as if you decide to sacrifice your Source, except that in this battle Dallis and Lucian will be hostile to you.
As above, the easiest way to end the fight is to kill King Brakk, after which the Kraken and all summoned members of the Black Circle will disappear.

Choice
If you signed a contract with Dr. Deva earlier in the task "What the Doctor Ordered", then after defeating Brakk, the doctor will appear and kill Lucian and Dallis, if they are still alive. Then he will ask you to fulfill the contract, according to which, you will need to kill your companions. In this ending, the doctor will exorcise the God King, after which you and the demon will rule the world like gods. If you refuse, he will kill your main character, and you will have to fight the demon with your teammates.
If you didn't sign a contract with the doctor, and decide to accept Divinity, you will need to choose one of three options that will decide Rivellon's fate. Depending on the choice, you will see different ending stories:
You can fulfill your destiny to become the new Divine. Adored and loved by all. You will create an alliance to fight the God-King and his fiends, but the world will forever be threatened, due to the fact that the veil between the worlds is not closed. Vindego's fate depends on whether you freed her from her vow to the God King in Act IV.
You can distribute the Source among all the inhabitants of Rivellon. When everyone is divine, no one is divine. If you do this, then everyone will unite to fight the God King and banish him into the void. Even though a new Golden Age of the world will begin for a while, humans eventually use the power of the Source to wage wars and kill each other, in a desperate quest for more power. Like the choice above, Vindego's fate depends on whether you released her from her vow in Act IV.
You can cleanse the whole world from the Source and sacrifice yourself. If you choose this option, then you and all the other Awoken will go down in history as the great heroes who sacrificed their Source to restore the Veil, ending the threat of the God King forever. Vindego will be released from her vow to the God King, whether you helped her in Act IV or not.
With any choice in the epilogue, you find yourself on the restored "Lady of Vengeance" along with your companions or their spirits (if someone died in the final battle).
If in the finale you refuse Divinity, then the God-King will laugh at your stupidity, enslave the world, and you will become his servant. The ending will be dark, although in the epilogue you will also find yourself on the restored Lady Vengeance.
In the epilogue, you can talk to your companions and friends to find out what they plan to do next. When you're ready, talk to Lady Vengeance to end the game. One of the final endings described above awaits you.
Congratulations on completing Divinity: Original Sin s 2!
Job structure
We all gathered together and entered the tomb of Lucian the Divine.
Inside we found Lucian - alive and unharmed. And with him, and Dallis, and "Vredeman" - the resurrected King Brakk. Lucian said that in order to save the world from the fiends of the Void, we must voluntarily become deprived of the Source.
Choices:
- We refused to comply with Lucian's request. So we had to fight him, Dallis and Brakk.
- We obeyed the order of the God King and fought against everyone who stood in our way.
- One of the companions made a vow to the God King and betrayed us.
- We decided to bow to the will of Lucian and Dallis, but Brakk betrayed them. He offered himself to the God King as a host. We must stop him.
- When we were about to be deprived of the Source, Brakk betrayed Lucian and Dallis. He offered himself to the God King as a host. We must stop him.
- During the fight, Brakk betrayed Lucian and Dallis. He offered himself to the God King as a host. We must stop him.
Convince Brakk to renounce divinity:
- Through unheard-of miracles of persuasion, we were able to persuade Brakk to give up trying to acquire divinity.
If an agreement is made with Dr. Deva:
- We were about ready to be deprived of the Source, but then Dr. Deva appeared and killed Lucian and Dallis.
- Before we could deal with Lucian and Dallis, Dr. Deva appeared and killed them both.
We have slain all who stood in our way. Now we have to decide which of us will gain divinity ... and if anyone will gain it.
endings:
- One of us gained divinity and ascended.
- The source was divided equally among all the inhabitants of Rivellon.
- We submitted to Dallis and Lucian. Now there is no Source in Rivellon.
- No one can resist the God King. Now this world is at his feet: the king can do with him as he pleases.
- One of us gained divinity... on par with the archdemon Adramalich, so to speak.
Divinity: Original Sin 2 gives players a wide field for freedom of activity and does not put up artificial barriers. Do what you want, complete quests the way you like. Our new guide Divinity: Original Sin 2, will only tell you what you really should not do if you do not want to make the game extremely difficult or impassable.
1. Don't attack everyone you meet. It's understandable to want to feel all-powerful in an RPG, but squabbling with everyone you meet can easily leave you out of many missions because you've killed the characters you need to complete them. A short period of triumph is not worth the loss of a lot of loot and invaluable experience points.
2. Do not try to steal everything that is badly lying. And if you steal - do it so that you are not burned. Each attempt at theft spoils relationships with other characters. You will have to upgrade your Persuasion skill or pay your victims a lot of money in order to improve relations with them. So either steal for sure, or don't try.

3. Don't waste money on useless items. Gold is always needed, especially in the later stages of the game when items will cost a lot. If the goods offered by the merchant do not suit you, it is better to craft or wait until the merchant changes the range of goods.
4. Do not keep a year's supply of potions, scrolls and grenades "for a rainy day." Yes, these are valuable and useful items, but their number in your inventory will constantly grow. There is no point in storing all this wealth, otherwise in 20 hours you will have ⅔ of your inventory full of them.
5. Don't skip side quests. There are hundreds of quests in the game, the rewards for some of them seem insufficient for the time spent, but you should always try to complete them. It is impossible to fight with enemies all the time, their number is limited, and the lion's share of experience is obtained by completing side quests. By ignoring them, you can end up in a stupid situation where your characters are already too weak to continue the main story quest.

6. Don't underestimate the power of crafting. There are hundreds of recipes in the game, most of which are really useful: runes that enhance weapons, the ability to make arrows yourself, or mix weak potions to get stronger ones.
7. In combat, don't end your turn on oil or near explosive barrels. Almost all locations have been carefully worked out, they have many points where you can plant some kind of fireball in order to immediately send five or a dozen adversaries to better world. But the enemies are also not fools and will be happy to fry your fighters at the first opportunity or blow up the barrel.
8. Don't waste DOT (Damage over time) abilities on enemies with full magical/physical immunity. Throw DOTs - often The best way start the fight, but remember: there is a high degree of chance that the enemy with immunity will simply block them, and you will spend your action points for nothing.
One of the main advantages of the recently released creation of Larian Studios is the presence in it of a wide variety of additional tasks, and most of them are exciting adventures, and not banal puzzles like "come-bring". Some of them are intertwined with the main storyline, while others can be easily skipped if you want to concentrate all your attention on the main story. However, some of these missions are very difficult to complete, so we decided to write a detailed walkthrough of the side quests in Divinity: Original Sin 2.
We add that if you are interested in completing personal companion quests, then we advise you to read the corresponding guide. It describes the completion of all the tasks of the companions.
Fort Joy
Extortion
Once in a place called the ghetto of the fort "Joy", we pay attention to 3 characters who are quietly talking to each other. We intervene in their conversation and find out that an elf named Elodie was late with the payment that each resident is required to pay to the warden on a monthly basis. For this reason, he sent his henchmen to the girl to take money from her. Here we will find ourselves at a crossroads, as we can choose several ways to complete this quest at once.

We decide to support Elodie
If we decide to help the girl, the overseer's soldiers will attack our group. At first, they will try to damage the elf, and therefore you should act as quickly as possible. Before entering into a dialogue with the thugs, we approach them at a minimum distance - this will help us attack them at the beginning of the battle.
After defeating the overseer's henchmen, Elodie decides to take us to the Cave, where we can learn a lot interesting facts about this place. When the conversation stops, we will receive a severed head as a reward. If there is an elf in the party, you can use his talent "Corpse Eater" to enrich your skills.

Prize: a severed head and 480 experience points. In addition, you can go deeper into the cave and find some more useful little things there.
We decide to kill Elodie
We can help the thugs get money out of the elf. This young lady is quite dangerous, but is unlikely to become a significant threat to us. In addition, first she will try to kill the overseer's people.
Prize: 240 experience points per battle. Nothing else can be obtained, so the first option is still preferable.
We decide to stay away
We start a conversation, but then decide to choose a neutral side. In this case, Elodie will be able to negotiate with the bandits and run away. In the future, we will be able to meet her in the Caves, but she will not speak to us.
Prize: no.
We ignore the task
We can completely ignore the conversation of passers-by and continue to carry out the main storyline. In this case, after a certain period of time, we will be able to find the corpse of an elf in the place where she usually lives. Of course, it will no longer be possible to complete the task after this.
Prize: no.
mother's nightmare
Near the gates of Fort Joy we meet Faro, trying to find the child. We ask her if she needs our help. She will thank us and give the doll to her daughter so that it would be easier for us to find her.

Not far from her, we speak with Jet, who will inform us that the woman really needs help, but not with the search for her daughter. The fact is that she lost her mind after the loss of a child. Erma, according to him, has long gone to another world and has never been to the fortress.
We head to Farah and tell her that Erma is dead. The woman will understand that we talked with Jet and will say that he is lying. The task will be completed.
Prize: 480 experience points.
Geist killer
Near the entrance to Fort Joy, on the protective wall, we speak with Master Arnica. She will ask us if we have recently met with Migo, her companion. Then she will ask you to find him, and also advise you not to return to her without information about Migo. We will have two choices.


Killing Migo
We go in search of Migo and find him on the beach near the fort in a pool of blood. We learn that he has become a terrible monster devouring human bodies. He won't attack us until we decide to talk to him.
Migo is a very dangerous opponent who is not only capable of inflicting considerable damage in melee combat, but also using area-of-effect skills. The battle with him used up most of our supply of healing potions, but in the end we defeated him. A helmet and a ring fell from the monster.

We take the ring and take it to Arnika. We can lie to her or say that it was we who dealt with Migo. In any case, we will need to show her the jewelry (we put it on the protagonist). After the dialogue, the quest will go to the completed section.
Prize: 300 experience points and a helmet.
family reunion
This choice becomes available only if one of the companions has an Arnica flower. It can be found in the ruins near the turret, where, according to the plot, we must face Master Boris. We stand facing the tower, and then turn right and go into the ruins. Do not forget to press the Alt key to highlight all nearby objects.
Next, we talk with Migo, give him a flower. The monster will get confused and give us the ring. We return to Arnika and tell where her companion is now. Show her the ring and get the reward. The girl will go to the beach.

We follow the master, and then we speak with her again, but already on the beach area. She will give us a key designed to open one of the doors in the fort. This will complete the task.
Prize: 600 experience points and master's key.
Captive elf


We talk with Saheila, believing that she was able to withstand the meeting with Loshe. As a result, we find out that this young lady is able to see the future. We believe in her gift to open a dialogue in which you can ask her how to escape from the fort. She will tell us that to escape you need to talk with Amiro - this is her elf friend. He used to dwell in the Caverns, but was recently discovered by Griff, the commander of the camp. We agree to find her friend and get an additional clue - a lizard is connected with this.

We head to the camp kitchen and find out that Griff sent the elf to jail. When you try to chat with an elf, Griff will join the conversation. If we decide to bring him goods that Amiro may have stolen, then the commander will give us the opportunity to talk with the "long-eared". The elf will tell us that he did not steal anything, but was simply going to run away from Fort Joy. He will promise to show the way to freedom if we help him get out of the cage. Amiro will also say that the real criminal who stole the materials is coughing all the time.
Return of materials
To find the stolen things, we head to the Caves. Having reached them, we turn west and find a small cape with a camp of fishermen.
We learn that the theft was committed by a lizard, whose name is Stingtail. To return the materials, you need a character who has a well-developed conviction, and therefore you should not start a conversation without the necessary characteristics. A character with a high dexterity parameter is also suitable.

Note: If you have a Red Prince in your party, let him talk to the dreamer. This will advance the satellite's personal mission.
So, we wake up the lizard from sleep and ask him what he knows about the supplies stolen from the kitchen. We continue the conversation until an option with persuasion arises. We can also take an interest in this character and use dexterity to recover all the stolen materials.
Prize: 240 experience points.
We will now have the following options to choose from:
- We return supplies, betray the lizard and help with her murder.
- We return the supplies, talk about the lizard, but do not help in killing him.
- We return supplies and protect the lizard.
- We leave all the items to ourselves.
When talking with Griff, we tell him that we were able to find the stolen items. If we decide to return them to the commandant, he will immediately take things away and ask us who the real thief was. We decide to tell him the truth so that he will let the elf go. We speak with Amiro and find out where the secret exit from Fort Joy is located. He will also ask us to take the amulet and give it to Saheila. We agree and receive new quest, which can only be completed in the next chapter.
Prize: 840 experience points. Griff decides to send his people to kill the lizard. You can help them and get some gold coins for it.
If we deal with Stingtail, then we will not be able to go through two tasks at once. This NPC is needed to continue the personal tasks of the companions - the Red Prince and Sebilla. The latter, by the way, can be found next to the lizard camp. You should definitely talk to them about them to complete these quests.
Prize: 840 experience points and 50 gold units.
Saving the lizard
We talk with Griff and tell him that we were able to find the plant. We give it to the commandant, but do not reveal to him the name of the thief. After that, Griff will decide to take the main character into custody and as a result, a new battle will begin.
We place our fighters on the balcony above the opponents to get a bonus to damage and the opportunity to deal with the enemy archer. We defeat all opponents, take the key from the corpse of the commander and free the elf. Amiro will tell us about the hidden passage and give us an amulet that will need to be given to the clairvoyant.
Prize: 840 experience points
We leave everything to ourselves
We decide to keep everything for ourselves. In this case, the commandant will immediately attack us. We defeat him and free the elf. However, then the reward will be less than if we decided to hand over the lizard.
Prize: 840 experience points
teleport
Note: In no case do not skip this quest, because as a reward for completing it you will be given the "Teleportation" ability.
- Here is Gavin
- Here you can find teleportation gloves.
- Here is the entrance leading to the detention cells.
- Harbor


When exploring the ghetto Ford "Joy" will approach us a mysterious stranger who will ask us if we came here alone. We say yes, even if our satellites are nearby. If you choose another option, the quest will fail. However, you can cheat a little and take another character, and then talk to him again and answer positively to his question.
Considering that we agree to “leave” our team, Gavin will reveal to us his brilliant plan, for the implementation of which he will need our help. For low-level characters, this task will seem extremely difficult, so it is worth completing it when you reach at least level 4.
What is our help? It will be necessary to obtain a powerful artifact that makes it possible to teleport over considerable distances. You can find teleportation gloves on the beach guarded by 3 vicious crocodiles. If you have well-pumped characters, there will be no problems with them, but you still need to carefully consider their slowing down effects, because during an attack, the crocodile is able to slow down from two or more party members, so we place the characters far from each other.
We pay special attention to the crocodile, which has a magical barrier. It is to us that he wears teleportation gloves, allowing him to instantly move to our fighters. We dodge his fiery attacks and try not to accumulate negative statuses.
After defeating the monsters, take the gloves and return to Gavin. To start the desired conversation, we equip the artifact on the hero and send it to the desired NPC. Gavin will be glad that we were able to get the bracers and will ask you to help him escape. We follow him to a location called "Secret Alcove". There will be two choices here.

Teleport Gavin to the beach
We teleport Gavin to an open place on the beach. However, once he is in the right place, you will know that he will not be able to help us get out of the current place.
Prize: 960 experience points and teleportation gloves
Teleport Gavin to the rocks
In this case, Gavin will be able to reach the harbor. First, teleport him to the rock, located slightly below the final destination. Next, Gavin will teleport you to him and ask you to move him to the next rock. Then he just leaves.
Note: this method will give us the opportunity to go to the caves under the island and which are home to the queen of fire slugs. At one time, she did business with Brakk himself.
Prize: 960 experience points and teleportation gloves.
What happened to Gavin?
After teleporting, the task will end, but if you want to find out what happened to Gavin, then you can go after him using gloves. You just need to move all the members of the group to the desired point, and then transfer the artifact to another to teleport the last member of the party.

If you can follow this character, you will find out that the masters dealt with him, and this outcome awaits the boy in any case.
Pitcher of Withermoor's Souls
In the Caves, we can meet a child whose name is Modi. Finding him is quite easy, as he constantly plays near the entrance to the Caverns. After a conversation with him, we agree to play hide and seek.


During the first game we are looking for a boy on a wooden pedestal. He will praise us for our attentiveness, and then ask us to play again. We agree again and look for him in a niche next to the entrance. After that, Modi will want to introduce us to his friend. Be sure to stock up on a shovel (or lizard), otherwise the quest will not work.

The child will run into a small cave and offer us to dig in the ground to find a hatch. We find a mound and use the claws of a lizard or a shovel on it. As a result, we are looking for a hatch.
Conversation with Lord Withermoor
A hole in the floor will lead us to the Forgotten Chamber. We find a child next to a large statue. The boy will tell us that this is his best friend. We approach the statue and start a conversation with her. We learn that Lord Withermoor became a stone statue over a thousand years ago. He will ask us to find the spear of King Brakk in the chest, which will allow him to move again.

We can get the spear or destroy it. When choosing the first option, it will appear in our inventory. In any case, the lord will no longer be a statue, but he still won't be able to walk. There is something else that does not allow him to move. He will ask us to find his soul and release it from captivity.
Before leaving the location, we speak with the boy again. Then we inform him that he must somehow thank us for helping his friend. He will indicate on the map where his most valuable treasure is located.
We enter the fort
After leaving the Caverns, we head to the Sanctuary of the Seven, which Withermoor mentioned. We interact with him and notice a new dialogue option. Our hero will pull the lever behind the statue and open a passage a little ahead.

Then we go down. There are no enemies here, but there are many chests where treasures can lie. Next, we reach the nearest door, not far from which a shrine will be depicted. We can break open the door if one of the characters has the skill "Theft" of the 2nd level.
You can also get into this location by completing the "Captured Elf" quest. After the release, Amiro will inform us about a hidden passage. To use it, you just need to dig the ground with a shovel or lizard claws. After passing through the passage, we will find ourselves in one of the detention cells of Fort Joy.
We go to the end of the corridor and fight with several masters. If the wounded master survives, then we can spare him. Next, we need a key that opens access to the upper level of the fort. It lies right on the floor in the same room. Hold down the Alt key to make searching easier.
Finding jugs of souls


Once in the prison of the fort, we use the secret handle, which is shown in the picture above. As a result, we open the path leading to the "Ancient Passage".
Along the way, we will come across a couple of poison traps. They can be neutralized with a special tool. In its absence, we first go through one trap, wait until the negative status disappears, and then go through the second trap. Do not forget to heal all party members later. You can also get rid of the poison using the Pyromancy ability.
Then we enter a large room, in the center of which there are 5 jugs. One of them contains the soul of Withermoore. We go to the sarcophagus, standing nearby. In no case do not touch the jugs.
Above the room we find a statue of Brakka, available for interaction. If the hero has a low Perception parameter (or no Loremaster skill), then he will simply express his opinion about the statue. Otherwise, a list of dialogue options will appear and when choosing any of them, we will be able to get Brakk's leggings.
The screenshot below shows a jug that you need to touch to complete this quest. Under all the jugs there is a sign with the name of Withermoore. We need the one that says: Withermoore the Supplicant.

When you click on the wrong jugs, new opponents will appear on the location. We can call them if necessary to gain additional experience. After interacting with the desired jug, a dialog box will appear. After selecting the option associated with the action, we will start a conversation within the group to decide what to do with the jug.
Destroying the jug
Energy will be released from the jar, as a result of which Withermoore will finally be able to find the long-awaited peace.
Prize: 1400 experience points
Sucking out the energy
We select one of the characters and interact with the jug to suck all the energy out of it. This option will only be available after completing the mission "The Collar".
Prize: one Source Point.
Looking for Emmy
To start this quest, we need a character in the group that has the Animal Friend talent. Such satellites, for example, include Ifan ben Mezd. Then we head to the Caves and near the entrance we look for a dog, whose name is Druzhok. We talk with him and find out that the guards grabbed his friend - Emmy. We agree to help the four-legged and pick up the key next to the wreckage of the sea vessel, which the dog will point to us.


- Location of Druzhok
- Finding the entrance leading to the fort's prison
- Finding the entrance leading to the detention cells
Emmy can be found in the prison of Fort Joy - she will sit in the kennel. We can reach it in two ways.
Use the secret entrance to Fort Joy
We are looking for a passage to the prison near the gate, which is guarded by Master Borriss and his minions. Those who have not been here before will have to get the key to open the gate - for this we defeat the guards. We find the key on the dead body of the master.
We go to the fort through the caves
This method becomes available only after completing the task "Teleport". We head to the "Secret Alcove" and move the entire party to the shore. Next, we go to the prison, passing through the passage into the cave. Here we stumble upon the Master Houndmaster, beating one of the masters (most likely, he betrayed them). We talk with the villain, and then we enter into battle with him.
Do not place members of your party near the entrance to the chamber, as there are barrels of oil not far from it, which your enemies can blow up. During the battle, we try not to let Delorus die, because in this case he will tell us the password, thanks to which we can avoid the battle with two dangerous masters. Having defeated all the enemies, we pick up the key to the prison, lying on the nearest chair.

Emmy manages to save
After going to the prison, we go straight to the kennel's premises. You can recognize this place by 4 dogs walking here. We open the room with the key found at the prompt of Druzhka. After entering the room, a conversation starts with the character who previously chatted with Druzhok. We mention in the conversation the name of a friendly dog and say that he wants to bring Emmy home. In this case, the dogs will not attack us. One of the dogs, by the way, is the same Emmy.
Prize: 2200 experience points.
Emmy can't be saved
If you do not name Druzhka, then the dogs will instantly attack us. In this case, special attention must be paid to animals with crossbows that cause great damage. We use the door in the form of an obstacle for opponents.
After completing the battle, we go into the bedroom and find a couple of valuable things, including the kennel's crossbow.
Prize: 120 experience points per battle.
We return to Druzhok and inform him about the death of Emmy. Of course, we will not receive any reward for this, and very few experience points will be issued.
Cornered
This quest can be completed in two ways. In the first of them, we will need to talk to at least one seeker located in the sanctuary of Amadia. We find out from him that Gareth, their head, went to look for weapons that could help them escape from Fort Joy, but he still has not returned. We agree to help them in search of Gareth.

- Location of the Sanctuary of Amadia
- Location of Gareth
We are looking for Gareth in the Old Ruins - he will fight with several masters. If we have not previously talked with his companions, then the task starts by finding the location of this NPC. We pass along the path along the wall so as not to collide with Shriker (Screamer). Then we go inside and start a conversation with the masters. If we have a companion with a well-developed persuasion skill, we can convince them to leave by pretending to be a secret master. Further, we continue to go forward and encounter Gareth, who is fighting with a group of enemies. The quest can end with one of three endings.
Saving Gareth
We help Gareth in the battle with the masters and do not let him die during the battle. Then we talk to him. He will say that he can help us in removing the collars, and will mention his plan to escape from the fort with the help of the Magisters' boat. In the latter case, you will need a weapon that can damage Alexander. As a result, the task "Call to Arms" will open.
Prize: 1800 experience points.
Killing Gareth
We stand on the side of the masters and easily kill the boy. However, in the event of his death, we will not be able to complete the "Call to Arms" task.
Prize: 2240 experience points.
Letting Gareth Die
We just take no action and let Gareth die at the hands of the masters. In this case, the mission "Call to Arms" will be blocked and we will not get any experience.
Prize: no.
Not childish game
While in the prison of Fort Joy, you can stumble upon the masters of Goa and Karin, who caught Khan when he tried to pick the lock. If we failed to save Delorus' life earlier and, therefore, we did not find out the secret password, then we cannot do without a fight in this case. Having defeated the masters, we talk with Khan. He will report that he climbed here in search of a friend whose name is Verdas. To express his gratitude to us, he will offer to use his boat and leave the fort ghetto.

As a result, Khan will be able to get to the coast, located near the Sanctuary of Amadia, in which other seekers live. They can tell us an interesting plan to escape from the fort, involving the theft of the magisters' ship.
Treasury of King Brakk
This task can be started in two ways. The first one involves reading a magazine that we can find next to Magilla's corpse. The second way is connected with finding a hidden passage leading straight to the shelter.

Entering the cave, we immediately encounter Trompdoy, who will start to mock us, but we cannot do anything to him. When the dialogue is completed, we approach the 3rd boxes. Behind them is a bridge, which can only be seen if you get very close to it. We pass over the bridge and get into a dead end. At the end we find a reptile that helps to get to the ledge. In no case do we pass between the two ledges, since in this case we will need to engage in battle with other copies of Trompdoy. They will use attacks that hit the area and our team, standing in a small corridor, will be an excellent target for them.
We head straight to the room with the statue located in the center. We can go further by giving two correct answers to the questions asked by the stone figure. Answers can be found.
After a conversation with the statue, we pass through the opened door. Here we will again have to fight Trompdoy. The battle with him will end only after defeating the real version of the enemy. However, it does not stand out against the background of copies. However, the true Trompdoy will attack you among the first wave, and therefore it is worth focusing your attention on it.
We finish the fight and head to the vault, where there are jugs of souls. We find the one in which the soul of Trompdoy is hidden and after a short conversation we decide what to do with it.

Destroying the jug
As a result, we will release the energy that was locked in the vessel, and thereby free Trompdoy.
Prize: 4200 experience points.
Absorbing energy
We interact with one of the heroes with a jug, drinking all the energy. This action will become available to us only when completing the "Collar" task.
Prize: one Source Point.
Healing Touch
While in the Sanctuary of Amadia, we will be able to meet several seekers in serious condition. A short period of time will be allotted for their healing. If we do not have time to cure them within the time limit, they will die. You can heal the poor fellow with the help of various spells. When curing all 3 wounded, you can count on a valuable item from Simone.
Prize: 300 experience points and one of the artifacts to choose from if all seekers are cured.
Armory
- The location of the passage leading to the ruined ruins.
- The location of the passage leading to the lunatic enclave.

When visiting the Old Ruins, we can find a gate that leads straight to the Ruined Ruins. In this location we find the master, who is on the verge of death. We talk to him and find out exactly where we got.
Our main target will be located right outside the gate. We pull the lever near the master to open the barrier. The lever will be cursed, so first we use a blessing spell on it. Then we open the gate and go inside.
Here we find a chest that can only be opened if we have King Brakk's ring or one Source Point. In the absence of these things, we head to the treasury of Brakk, located in the enclave of madmen. The quest will end after we get a very valuable little thing from the chest.
Prize: 1800 experience points and the Shrine of Braccus Rex.
flaming pigs
- Location of flaming pigs
- Location of Feder
- Location of the Sanctuary of Amadia

When exploring the island, we can stumble upon an area where several traps are placed and burnt pigs lie. We use the spell "Blessing" on all the pigs located at the location. After healing the first pig, you will have to fight a little.
After healing the poor animals, we head to the beach where the dragon lives. There we find another pig - Feder. We talk with her and find out that she used to be a man. We go to the Sanctuary of Amadia.

Again we speak with her, having reached the sanctuary. We suggest that Federa go to the place of healing, located next to the statue of Amadia. As a result, she will become a human again and will be able to offer us many interesting things for sale.
Prize: 3600 experience points.
Sourceless Dragon
- Location of Slane
- Location of the passage leading to the skull cave

On the territory of the labyrinth we find a beach that is covered with ice. A caged dragon lives here. We destroy the totems located around magical creature and start a conversation with him. The dragon's name is Slane and he was locked up here by the terrible witch Radek. Only her cleansing wand can help him in breaking the spell. We agree to find the artifact and free Slane.
Radek can be found in the skull cave, which is located next to the beach, and therefore it will be quite easy to find it, but it will be much more difficult to go through the cave, since there are traps at every step. In the absence of a special tool, we will have to personally experience all the negative statuses from traps. At the very end of the dungeon, we meet with a witch. She will not agree with our arguments, and therefore the battle with her cannot be avoided.
Having defeated the sorceress, we search her body and find the wand. We return to Slane and choose one of the two finals.
Give the dragon a wand
In this case, the magical beast will destroy the spell that restrains it. He promises to help us in our time of dire peril.
Prize: 4 good artifacts and a few more to choose from (depending on the class of the hero).
Refusing to give the dragon a rod
Then we have to fight with the reptile. The battle will be very difficult and bloody, so we advise you to prepare for it in advance.
Prize: a large number of experience points
A fate worse than death
The task starts after hitting the tower located at the end of the gargoyle maze. Here we will meet 3 talking dead.

During a conversation with the undead, we find out that all three are separated from reality. We can agree with their point of view or prove that they are wrong. However, here you need to carefully choose words, because if a dispute starts, then the undead will attack us. In the latter case, we move away from the enemies as quickly as possible, since it is completely impossible to kill them.
The main goal of the quest is to find the vessels of the souls of the three walking dead. They can be found in the vault, which is opened during the mission "King Brakk's Treasury". The jugs are shown in the image below.

We destroy the vessels
In this case, the dead will be able to find eternal rest.
Prize: a large number of experience points.
Absorbing energy
We suck out the energy of the vessels by one of the characters. This option will only be available after completing the quest "The Collar".
Prize: one Source Point for each jar.
Gargoyle maze
At the entrance to the Sanctuary of Amadia, we will find a tower that has an entrance to the labyrinth. This quest starts immediately after we open the door that leads to this location.
Dozens of traps are placed on the territory of the entire labyrinth, and to open the doors you will have to use them, which can be found on hidden altars and after using the portals. If you don't feel like wasting time looking for skulls, you can navigate the maze using teleportation.
The most convenient and safe route through the source room is shown in the image below. At the entrance, the gargoyle will unleash the dead on us, using fire strikes. In this battle, it is worth using the Blessing spell, which turns a simple flame into a sacred one, causing increased damage to the undead. Having won the battle, we go to the Historian and save him from the curse. To do this, you need to use a blessing on a pool filled with blood (created by the Blood Rain spell).
The road to the tower leads through the door, located under the gargoyle. The quest will be considered completed when your heroes enter the ladder leading to the tower.
Important: If you have already completed the quest related to the treasury of Brakk, and you have his ring, then you can show him to the gargoyles. In this case, the statue will recognize you as its owner and immediately teleport to the tower.
Eternal admirer
While in the Sanctuary of Amadia, we talk with Gratsiana. She will ask us to get a vessel with her soul. We agree and head to the treasury of King Brakk, which we managed to find earlier. The required jug is marked in the image below. When we take it in our hands, we will immediately understand that it contains the soul of Graziana.
We return to the girl and pass the jug. She will tell us the story of her life and in the end the task will be considered completed.
Prize: 2 valuable items and 4 more to choose from (you should choose depending on the classes of your heroes.
Fort Joy Arena
Here we will need to deal with all the enemies in the arena, and at least one member of the team must remain on their feet. We talk with a character standing near the arena to start the task.
We get to the arena, using the hatch located in the camp kitchen. We are looking for the following coordinates: X: 215 Y: 131. Then we talk with the organizer of the battles and defeat all opponents. After the victory, we choose our reward.
All members of our group will be automatically cured if at least one of them survived. We do not waste resurrection scrolls, knowing that we can win even with an incomplete squad. This guide details the passage of the Arena of the One.
After completing the quest, we head to Nebora. She will be able to remove the collar from the main character when she finds out that he was able to become the champion of the arena.
Reaper's Coast - Mastering the Power of the Source
They won't get through
Once on the coast of the Reaper, we talk with a child who calls himself Barin - he is on a broken bridge. You can also start this quest by talking to Mary, the guardian of the bridge.

We go to the house of the defender of the bridge (we pass through the castle of the paladins and the cemetery) to deal with the monsters there. To open the gate, we need master keys and a well-pumped hacking skill.
If Mary survives the battle, she will give us a reward. In her house, we can also find a key that opens Mary's hatch.
Plundered caravan
We can take this task after finding the caravan of masters located near the starting point of the location. We enter into a dialogue with the boy and the dwarfs who went crazy and find out that the fiends of the void grabbed the magician and took him to the Wrecker Cave dungeon.
Then we speak with Raymond, who is in Driftwood, and then we tell Julian, the local master, about what happened.
hide and seek
While in Driftwood, we talk with two kids who play next to the docks - Harriet and Ben. We find out that their best friend tried to swim to Fort Joy, but then disappeared. They are worried about him and want to know what happened to him.

We go to the point at the following coordinates (X: 450, Y: - 46) and find on the beach (located near the starting point of the location) a shark that has washed ashore. We speak with her and find out that she does not want to be in the water again, as some monsters live in it. We kill her, and then we search the corpse and find someone's leg. Let the elf eat it to find out that it belonged to Joe.
Note: If there are no elves in your party, then you can choose Fane, put on a mask of reincarnations and make him an elf. As a result, he will be able to view the memories of dead people.
We return to the kids and tell them what happened to their friend. As a result, the task will go to the section completed.
Prize: 3000 experience points if we know the fate of the boy.
When to count chickens
We find a chicken coop on the coast of the Reaper, in which several chickens live. If there is a character with the Animal Friend talent in the group, we speak with one of the chickens (Big Marge). She will tell us that someone stole their eggs and ask us to find these priceless items for them.
We head to the point indicated on the map and located a little north of the chicken coop, and then we deal with all the fiends of the Void. Almost all the eggs will be spoiled, but one of them still survived - it is located on the edge of the coast. We pick it up and return to the chickens.
Big Marge will tell us where to find the treasure. To do this, you need to go to the back of the chicken coop and dig out the chest.
Then we return to the chicken coop a little later (after completing two or three quests) and find a black Piskun chicken in it. We see that he killed all the chickens, but at the same time he treats us quite friendly. Moreover, he will start following us just like the black cat in the previous location.
Use ghost vision to spawn the spirit of Big Marge. She will ask us to find the father of the chicken. We head to the point indicated on the map (X: 437, Y: 304) and find there the Magic Rooster, Piskun's father.
He will tell us that it is necessary to deal with Piskun, since he is an ordinary killer. We can agree to kill the chicken or refuse it. In any case, we will have to fight him, as he will turn into an evil monster and will cause a dozen deadly chicks. After the victory, a chest will appear near the Magic Rooster, in which you can find several epic and legendary items.
Prize: 5000 experience points and not bad things.
Scientist Grebb
Once in the fishing area of Driftwood, we find a scientist named Grebb, who studies fish that are infected with the Void. We agree to eat 3 fish for the sake of the experiment.

He will offer to eat brown, yellow or red fish. After that, the character will receive the "poisoned" status for several turns. But the researcher will give us a mixture of herbs, depending on the fish we have eaten. He will also advise us to mix the resulting plants with poisoned fish to enhance the effects of potions.
One party member can only eat one fish, meaning you need 3 characters to eat all the fish. When talking to a scientist last hero who has not eaten anything, the quest will automatically end and you will receive a small amount of experience points.
Note: Even hired companions can participate in this quest if you don't have a full party.
Losses in the ledger
In the Driftwood tavern, we can stumble upon a man whose name is Garvan. He will ask you to investigate a case related to missing supplies that were supposed to come along a trade route located in the western part of this area. We head to the indicated point and find a troll guarding the bridge there. We can send him to another world or help by completing the task "Competitors in business".
We follow the trails of blood and meet a group of gnomes and their beast named Pasha. We can tell Garvan that his supplies have been destroyed or return the remaining wooden box to him. Or continue the investigation.
We dig up the remains in a shallow grave and give them to the elf - he will find out that the merchant was killed not by the fiends of the void, but by his business colleague (you can also transform Fein into an elf using a mask of reincarnation and then he will be able to see exactly how the merchant died). Activate ghostly vision and talk to the merchant's ghost. We agree to avenge him in order to start the Aggressive Capture quest.
As for Garvan, he only needs a box and the reward for it will directly depend on the contents of the box (what we decide to leave inside).
Business competitors
Trolls Marg and Gorg are trying to do the same business, and therefore are direct competitors. Everyone will ask us to deal with his competitor. We can help one of them, but we immediately note that trolls are extremely dangerous opponents, for example, Gorg can knock out a weak character with one blow. Therefore, it is worthwhile to properly prepare for the battle with these monsters.

With the help of fire, you can remove the effect of blood regeneration from Gorg, and with the help of poisoning - from Marg.
Aggressive grip
So, after talking with the ghost of Liam (merchant) in the mission "Losses in the ledger", we find out exactly how the merchant died and agree to deal with his killer. You can also kill Garvan unnoticed - for this we feed him poisoned meat stew, which we craft from fish infected with the Void, and a simple stew. After that, he will head to the infirmary, located behind the tavern. If he sees us, he will immediately attack. We kill him and search the body. As a result, we get the severed head of Garvan. We pass it to Liam and find out the location of the treasure, which will become our reward.

However, you can give the head to an elf and let him eat it to get the unique talent "Trader's Secrets", which increases the "Exchange" parameter by one point. However, in this case, Liam won't tell us where the treasure is.
We can try to kill Garven right in the tavern. So that he does not become our enemy, we do not warn anyone about the attack. We pick up a poisonous weapon, cast rain next to it, and then infect a puddle with a poisonous weapon. Then we leave the tavern, stand on the street for a couple of minutes and quietly return to the building. We wait until Garvan dies - as a result, no one will know that we did it.
It is also necessary to keep 1 thousand coins in reserve in order to bribe the most curious individuals who decide to interrogate you (we can simply convince them). Then we do not approach the tavern for a certain period of time, until everyone calms down and returns to their duties. After that, we can easily cut off Garvan's head.
By the way, Liam's treasures can be found by yourself, so it's better to feed the elf's head.
Web of carnal desires
We head to the lower part of the location and look for an eccentric woman under Driftwood, whose name is Dorothea. We agree to look at her ring and choose one of the visions (they will all cause different reactions). Then she will ask us to talk to her alone around the corner, so we separate the squad and keep our companions away from the main character. Then we meet with a woman and watch how she becomes a giant spider. Here you will need to decide: let her kiss the protagonist or pick up a weapon and attack the monster.
Attacking the giant spider
We fight with the monster and defeat him. As a result, all members of our group will receive 4,000 experience points. We examine the body of the spider and find a couple of good daggers, a key and an idol of rebirth (automatically revives the hero upon death, if it is in the inventory).
Let the spider kiss the hero
The spider will immediately bite the protagonist in the neck, giving him the unique talent "Spider Bite". Its effect will depend on the previously chosen vision:
- Towering Oak (increases Strength by 2 but decreases Constitution by 2).
- Curved Feather (Increases Intelligence by 2 but decreases Constitution by 2).
- Golden chest (adds 2000 gold to inventory, but reduces constitution by 2).
- Dragon (increases intelligence by 2, but reduces constitution by 2).
- Cocoon (Adds one Respawn Idol to Inventory, but reduces Constitution by 2).
After the bite, we can let the spider leave or attack it. Note that although Dorothea will tell us to meet her alone, however, we can use the help of other heroes under our control, so the battle will be quite easy. To maximize the experience, it is worth kissing the spider with all the characters in the group, and the last to attack the monster.
Grief will not flood
We go to the Driftwood tavern and go up to the 2nd floor. There we find Captain Ableweather, who will give us the task to save her from the painful ringing. We use the ghostly vision skill and find a ghost in the room, torturing the girl. We convince the ghost to leave, thereby relieving the captain of the torment.
Ableweather will then indicate the location of his compass on the map. We head to the right place and teleport one of the characters to open the hatch. Inside we find a compass, which is surrounded by fog. In order to get this item, we need Undead or a teleportation spell.
strange cargo
Having found Higba in a barrel of fish located in the fishing room (Missing Masters task), we can return him back or help him escape.
When choosing the second option, we will need to take this NPC outside the Driftwood location, and it is necessary to avoid meeting with the masters. Using the mini-map, we track the location of the masters and do not forget to use stealth. However, you can do it easier and simply take Higb to the west of the port and, using teleportation, move him to the opposite shore.
As a result, we get a small amount of experience points and a hint about who exactly is the real criminal (the cook who works in the tavern). We will also be able to find out where to look for Master Hanang. Among other things, we can teleport the NPC to the point indicated by the marker, and receive a reward for this. Even if you choose to escape, you can turn in Higba to the masters at any time.
Love has a price
We head to the Driftwood tavern and talk there with a man whose name is Lovrik. He will promise us to try something exotic. We give him a certain amount and get the key to the upper room.
We go there alone and spend one night in the apartment. In the morning, bandits will break into us and begin to threaten us, demanding to give all the money. If the hero is Ifan ben Mezd, then the criminals will recognize him and quickly leave the room. Otherwise, we will either go to another world, or lose a considerable amount of money. Was the Red Prince left in the room? In this case, the lizard we met will become the Red Princess.
We return to Lovrik and find out that he was forced to do this for the sake of his daughter. We ask the cook and find out that he was lying, but Lovrik will already run away from the tavern.
Driftwood Arena
Being in the Driftwood tavern, we go down to the basement and find an arena there where illegal fights are held. We agree to take part in them. In the first battle, we will have to fight with a blindfold, which will significantly reduce the accuracy and range of the hero, so we need to prepare well for the battle.
In the second battle, you will need to fight with Murga, who fights like a villain. When she makes her second move, the fiends of the Void will appear on the arena. We defeat the monsters and kill Murga. As a result, we will get the title of the championship.
In both battles, it is worth casting shields and various buffs on the characters in advance. We are not fond of transformations, since the bandage will still prevent most of these skills from being used. In the first battle, it is worth summoning creatures that may not be limited by bandages.
If Murga cannot reach our characters before the fiends arise, then she will begin to fight with our common enemy. In this case, it is better to move away from her. Although the Worm does not pose the same danger as in the battle with Alexander, it can still ruin our lives, for example, it will impose fetters of pain. Sebilla is able to destroy them, but in this case a Source point will be spent.
Level 3 geomancers should definitely purchase an artillery mount on the market (one Source point and a lot of gold). With her help, we managed to quickly deal with Murga.
Blazing Prophet
We head to the Driftwood cliff and find a strange statue there, near which torches are installed. It is necessary to light them all at the same time, but they quickly go out. Therefore, we first create a surface from oil and use a fire spell on it. As a result, all torches will light up.

A rainbow will appear and enter into a dialogue with us. After the conversation, we will be able to indicate our reward.
ugly duck
We go to the farm, located north of Driftwood. There we find a sick chicken. With the "Scientist" tag and the "Animal Friend" talent, we convince the chicken that she is a hidden phoenix. To turn it into a fire bird, you just need to use some kind of fire spell on it.
After that, the chicken will become a phoenix egg. We can either eat it or just leave it on the ground.
bestial treatment
On the same farm where we were when completing the previous quest, we find two cows that are actually people. We find out that they were turned into animals by a mysterious witch. To talk to cows, you need the Animal Friend talent. Of course, they would like to become human again, and therefore they will ask us to help them. To start the quest, simply select the key to the witch's house, located on the left side of the building, on the rock.
The witch's house is opposite the cows. We go inside, using the previously found key, and find the witch's eye, which is necessary to turn the cows back into people. Next, open the hatch that leads to the dungeon (you need the skill of theft of the 4th level). In the absence of the appropriate skill, we look for a witch in the monastery forest and take the key to the basement from her. However, we will immediately warn you that the battle with her will be extremely difficult.
In the dungeon, many explosive rats will attack us. We hit the holes in the walls to stop the kamikaze rats. We can also find a lever that opens the door. It can also be unlocked with the thievery skill or simply teleported inside.
Here we look for the elixir of witches (we do not drink it, otherwise we will also become a cow) and her book, lying on a huge frog (we kill it). Thanks to the tags "Mystic" and "Scientist" we will be able to easily decipher the book. If you do not have them, then use the following recipe: boletus mushroom + growth stimulator + witch's eye.
If we drink a witch's potion to turn into an animal, the task will automatically end and we will be given almost 11 thousand experience points. However, we advise you not to do this, because you can only craft one elixir, and you need to turn two cows into people.
We create a potion and in the end we have two elixirs. We return to the cows and give them potions. As a result, for both cows we get almost 27 thousand experience points.
Test of all seasons
We go to the altar of wandering Driftwood, and then turn east and find the building of the elves, standing behind the river. Inside we find 4 statues that surround the brazier (the exact coordinates are X: 450, Y: 340).

To pass the test, we attack the statues with various elemental skills, namely:
- The spells "Hail Strike" or "Winter Blast" are suitable for the Hero of Winter.
- The Static Cloud Arrow is suitable for the Hero of Autumn. We can also use a fire spell on the pool, and then wait for the steam to appear and shoot it with an electric spell.
- The spell "Laser Beam" is suitable for the Hero of Summer.
- The Blood Rain spell or the Flesh Sacrifice skill will work for the Hero of Spring.
Note: You can summon a fiery slug (using the magician's ring) to activate the statue of Summer, because it can also use a beam. You can light the totem of Spring by attacking your companion, who must be placed near the statue (his blood must fall on it).
We advise you to prepare for battle before lighting the totems, because after that we will be attacked by 4 enemies that are immune to a certain element. This is extremely strong enemies, especially if you are equal in level to them. Having defeated the heroes, we talk with the brazier and get the heart of the phoenix as a reward.
Prize: 83k experience points for killing heroes, 52k experience points for completing a quest, a heart of a phoenix (give it to an elf so that he eats it and gets the Flaming Tongues skill) and a chest.
Stranger in a foreign land
Near the northern entrance of the cemetery we find the spirit of the lizard Willanx Kriva, who will ask us to dig up her corpse and throw it into the fire in order to bury her according to the traditions of her race. We take a shovel in our hands, dig out the body and raise the leg. Then we just throw it into the flame between the dragon statues. As a result, we take one of the four items as a reward.
family business
We head to the churchyard and find Tarkin next to the northern entrance to the Stonegarden cemetery. He will ask us to go to the cemetery, find the crypt of Joanna Surrey, located in the southern part of the location, and find an ancient artifact in it.

To enter the tomb, we need to break the lock that hangs on the Door of the Shadow Tomb. This can be done with the help of a hero whose Theft is pumped to level 4 and above. We will also need lockpicks (if they are not available, then you can use the finger of the Undead character). There are no pumped thieves in the group? It doesn't matter, because in this case we can find the key to the crypt at Kvanna - we head to the center of the graveyard and look for the tomb, next to which the dog runs. We kill the dog, open the hatch and find the key and note we need.

You can now enter the Surrey Crypt. We begin the study of the first room. We find a couple of buttons on the wall: one is on the right side of the entrance to the tomb, in a small niche, and the second is on the left side, on the opposite wall. We press each button and thereby open a secret passage.
Lever puzzle solution
In the new room we will see a sarcophagus and a locked gate. We choose our most living hero and use it to go to the next room, and then stand on the pressure plate. Unfortunately, simple items on this plate won't work.

Then we activate the skill "Ghostly Vision" to gain access to the 3rd levers on the wall. All levers correspond to certain magical effects. First, we press the middle lever and wait until water appears in the room where the pressure plate and our hero are located. Then we pull the left lever and wait for the appearance of electricity. At the end, pull the right lever to create a sacred fire.
As a result, the sarcophagus will move and open a hatch on the floor. We get down into it and make our way to a new room. First, we examine chests and mountains of gold coins in it, and then we raise the lid on the sarcophagus standing in the middle of the room.

In this sarcophagus there will be a Mysterious artifact, which we had to find for the quest giver. However, as soon as we try to get out of the tomb with this item, clay warriors will immediately attack us. The battle can be avoided by destroying all the statues before opening the sarcophagus. Besides, we can always just run away.
Let's go to the Island of the Blood Moon
We get out of the crypt and find Tarkin. We pass the artifact to him and learn from him that on the Island of the Blood Moon you can find another ancient thing. To get to this location, you must first go through the hidden bridge. We use ghostly vision in order to see the right road, and then we use teleportation to cross the bridge.
We are also opening a new travel point located in the south of the island. This will help us move faster between locations in the future. Then we head to the northeast of the island. Here we find the hatch, which is hidden under the embankment. To find it, you need a hero with a well-pumped Perception. You can use the Peace of Mind spell to increase this parameter to its maximum value for a while.

We go inside and find the forgotten library. We search the room, and then examine the back wall - we find a hidden passage in it. We go inside and find ourselves in a secret room. Next, we select an Unusual blade from the altar.
We return to Tarkin at the graveyard and give him the second part of the artifact, thereby completing the mission.
If you can't find Tarkin in the graveyard, then you should move to the marker "Lady Vengeance" by using the boat on the shore. Then use the boat again, but already on the ship. Tarkin will most likely spawn right next to the boat.
You can get into the crypt in another rather interesting way:
- Stand facing the ladder that leads to the crypt.
- Turn left and go forward.
- After descending from the hillock in front of the gate, take a look at the tomb, near which there are statues of knights with shields.
- Destroy or unlock the gate (the lever is on the right).
- Enter the tomb.
- Once in the tomb, do not touch anything, otherwise you will turn into stone.
- Use the Ice Armor or Bless spell.
snake language
We head to the cemetery and find the chest of the lizard, standing next to two statues spewing fire. Using telekinesis, we transfer it to a safe place and find out that a password is required to gain access to the contents of the chest. Unfortunately, turning Fane into a lizard will not work in this case, but the Red Prince can convince the chest to open if he asks well for it.
We go to Riker's mansion and talk to the salamander who knows the password. To do this, we need a lizard character with the Animal Friend talent. After that, we return to the chest and say the code word.
Note: By the way, if you try to teleport the chest out of the fire and break it, you can get treasures, but the quest will remain unsolved.
existential crisis
Walking along the northeastern slope of the cemetery, we hear a voice that asks for help (the desired place is located at coordinates X: 625; Y: 153). We approach and agree to dig up the remains. Having dug them out, we watch how a skeleton rises from the ground, whose name is Crispin and who dreams of becoming the best philosopher in the world. To do this, he will challenge us to a philosophical battle. If the hero who is talking to him does not belong to the undead, then we will need to prepare for the battle with him. Otherwise, we can immediately enter the battle with the skeleton.
He prepared for us 3 tricky questions. If we answer incorrectly at least one of them, then our hero will immediately die. The easiest way to defeat a failed philosopher is to read the 3 volumes of The Essence of Being (we are talking about characters that are not undead).
If we are talking with a skeleton, playing for another walking dead, then we simply select phrases in the dialogues marked with [undead] tags. This will automatically lead us to victory. We can also try to answer all questions correctly using tags such as [jester], [mystic] and [scientist]. However, if we take into account the fact that one character cannot have all 3 tags, then we still have to use at least one book of The Essence of Being: the first volume gives an answer to the first question, the second to the second, and so on.
You can find these books in Riker's mansion. The first volume is in the personal account of the owner of the house. The next one can be found in the living room on the first floor, and the last one in the master bedroom on the second floor. However, we immediately note that taking these books is theft. In addition, we have to break open the door to get into the bedroom.
If you answer the first question correctly, the skeleton should tremble. The second time he will scream, and the third time he will simply explode. As a result, we will complete the task and get more than 21 thousand experience points and a skill book "Corpse Explosion: Massive".
Note: Fane, being an undead, is able to give the correct answers to all questions, and Lohse can correctly answer the first two questions, as he is a mystic and a jester.
Shelter of heroes
In the central part of the cemetery we find a lattice, behind which are the coffins of 4 famous heroes. We examine their graves to find out exactly where the 4 buried treasures are located. Without any problems, only 3 graves can be studied, however, if we try to study the fourth coffin, then dead heroes will immediately attack us. It is worth dealing with them one at a time, because after death they will begin to revive, and in a stronger form, that is, first we kill one skeleton twice, then the second, and so on.

Then we go to the places marked on the map and look for the equipment of the dead heroes, thereby completing the tasks.
Servants involuntarily
Wandering around the cemetery, we find a watchman named Farima, who will tell us a terrible story about Riker. It turns out that he keeps all his servants with the help of magic, preventing them from leaving for another world. Therefore, the girl will ask us to kill Riker (can be found in his private office in his mansion).

generous offer
We get to the mansion in the cemetery where Riker lives. He will ask us to bring him a tablet in the caves located in the Black Mines. As a reward, he will be able to show us how to control the source. At the sawmill in the room owned by Rust, we can find a contract that says that Riker is a hired killer who received an order to destroy all believers.
We leave for the Black Mines, located in the southeast of the Reaper's coast, and find the gate there, which is guarded by masters. With a travel pass issued by Raymond, we will be able to pass through this passage without any problems. Otherwise, you have to fight the guards.
Going further, we find a magician in a white cassock interrogating a bricklayer (he is a student of Hannag and will be needed to complete the quest "On the last gasp"). We deal with the master, and then we fight with fiends.
We pass to the opposite side of the harbor, where Anna guards the entrance to the mine. We deal with it and get inside the dungeon. This shaft will be full of oil pipes and traps. We use boxes to block pipes. You can also go through this location using teleportation. If there are two teleportation pyramids found by us in the secret room of Dallis, located on the ship "Lady Revenge", we leave one of them with one hero, and the second with another. Thus, we can easily transfer our entire group.
Almost at the very end of the cave, the Screaming One will be waiting for us, who guards the altar of wanderings. We use the Purification skill (previously called Source Vampirism) to destroy it (a dead body lies on the destroyed bridge - if we teleport to it, we can find a note and a key).
Note: If we have a special Wand of Purification, which can be found in Fort Joy, use its power and destroy the Screaming. Otherwise, you must definitely get rid of the Collar, master the Source and go through the ritual in the mission "Abrupt Awakening" in order to eventually get the desired skill.

We continue to move forward and notice several masters in front who are fighting with the fiends of the Void. We deal with the monsters, and then we convince the surviving people that we are just walking around here. If the persuasion does not work, then we enter the battle with the masters. From the body of one of the opponents we take the key leading to the room nearby. Inside it we find a secret stone door (you can only see it from a very close distance). We open the door and find an unusual tool with which we will understand how to create masks (we will have to spend one source point).
We get out of the excavation site and head to the workshop, in which we stumble upon a group of masters. We deal with them and destroy the gate (we use fire spells on barrels of oil), thereby opening the way to the Ancient Temple. Click on the device in the temple to get new information. We can find a clue to this puzzle in a book that lies on a dead body nearby. On the second page there is information that all the gods personify a certain element or attributes:
- Ralik personifies the Earth.
- Duna represents Air.
- Tyr represents Blood.
- Zorl represents Fire.
- Vrogir personifies Fire.
- Xantessa personifies Reason.
- Amadia personifies Magic.
The correct sequence is as follows: Amadia, Tyr, Duna, Zorl, Xantessa, Vrogir and Ralik.

Hitting all the pillars in the right sequence, we observe the disappearance of the magical barrier. The thing we need lies in one of the boxes near the sarcophagus. We get it and return to Riker. If we touch the sarcophagus, then we have to fight a dangerous enemy.

We head to Riker and give him the tablet. He uses a few souls of farmers to give us more source points (you can't get more than 3 pieces). After we enter the battle with Riker. Use the skill "Ghostly Vision" to see the souls of the defenders and immediately deal with them with the spell "Cleansing".
On one's last legs
Once in the Black Mines, we find masters planning to carry out the execution of a family consisting of several people. In this situation, you can prevent the masters from carrying out their plans in order to save all the peasants, or start watching the execution so as not to fight five masters of the 13th level.
Having chosen the first option and saving the whole family, the mother will speak to us and say that her nephew was captured and sent to the oil rig. Ahead will be closed gates, near which there will be several more masters. We do not attack them, as they will be useful to us a little later. We pass through them using the underground tunnel located in the neighboring house, or by showing them a pass.
We rise to the tower and speak with the master in white robes. When deciding to save Gvidane Rins, we attack the master after the first phrase. However, we will immediately warn you that this battle will become a real hell. If we refuse to fight, then the prisoner will die, but we will be able to avoid a difficult battle and kill the master later.

In the event of a battle on the tower, the prisoner will decide to help us with the magic of the Source. 4 masters will resist us. However, after a certain period of time, oil fiends will appear on the battlefield and everything around will catch fire. There will be fiery fiends that restore life in the fire. As a result, the entire site will burn with a terrible necroflame. We immediately send one of the heroes to the gates of the fortress in order to force five more masters to join the brawl. They will stand on our side and begin to fight with fiends. Do not forget to also prepare a lot of scrolls and spells that restore the magic shield, otherwise your characters will burn alive.
If we decide not to get involved in the battle, then the next meeting with Jonathan may take place in one of the lower corners of the location. In the same place is Anna, who sells good things.
After the liberation of Gwydain, we go to the monastery forest and tell Hannag about everything. As a result, she will teach us the knowledge of the origin.
three altars
We head to the Monastery Forest and go to the first altar, which can be found at the following coordinates X: 115, Y: 269. Here you will encounter a monster called the Weeping Abomination, to which 5 black wolves will come to help. We advise you to constantly stun the werewolf, otherwise he will quickly kill all your heroes thanks to endless OD. Having dealt with opponents, we interact with the altar and move on.

The next altar is on the river. Go to the point: X: 414, Y: 301. Here we will have to fight the undead deer.

We find the last altar at the following coordinates X: 482, Y: 260. As soon as we get close to it, we are immediately attacked by fiends of the Void.

Valuable loot
- Location of the Saheila.
- The location of the elf camp.

In case of successful persuasion of the elves to let us into the place where the ritual is being held, we wait until it is completed, and then we again talk with the sharp-eared ones. We find out that Saheila was kidnapped by the lone wolf Rust, who is holding her captive at the sawmill. With a high level of persuasion, we can convince the elves to leave the elf there.
Next, we will need to go to the sawmill and penetrate it. Saheila is located on the second floor of one of the buildings. This location is patrolled by a lot of Rust's people, so we will either need to spend a lot of money or fight a lot of serious opponents.
Another battle will be waiting for us on the second floor, where we have to fight Rust and his faithful bodyguards (wolves and crossbowmen). We try to be in a small room all the time in order to greatly simplify our battle. Having dealt with all the enemies, we free Saheila and agree to escort her to her fellow tribesmen. If we have already dealt with Rust's guys, then we will have no problems with this.
Then we speak with the elf in the camp and learn how to collect an additional Source Point.
Prize: 4 valuable items and 1 more item to choose from (depending on the class).
Lost and found
- Location of the gnome Lagan

Near Driftwood, you can stumble upon a fisherman's hut, where a dwarf lives, whose name is Lagan. He will ask us to find his ring, which he lost recently.
Fortunately, we will not need to scour the whole location in search of a small trinket. The jewelry lies nearby at the point marked in the screenshot below. It will be found automatically as soon as our party approaches it at a minimum distance. As soon as we pick up the ring, fiends will immediately attack us.
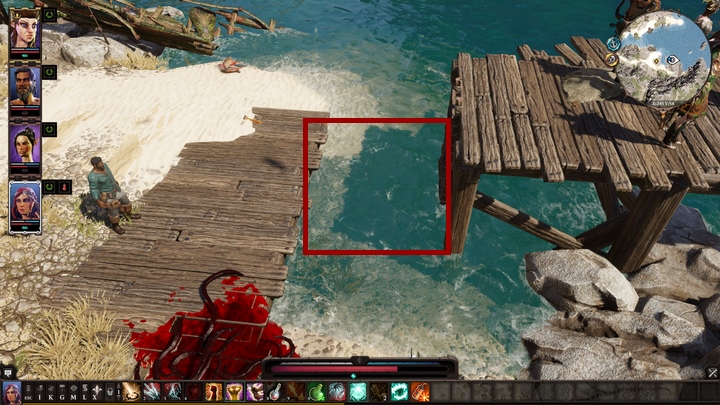
If Lagan stays alive, then we will have two options for completing this mission.
We give the ring
We talk with the gnome and in a conversation with him we confirm our desire to give him a ring. If we have a well-pumped conviction, we can ask for more gold.
Prize: 5 thousand experience points and gold.
We keep the ring
We just keep the ring. Apparently, it is absolutely useless and costs relatively little.
Prize: copper ring.
Saheila tribe
- Elf camp location

If we managed to help Amiro in Fort Joy, he will ask us to tell the rest of the elves living on the Reaper's Coast about what happened to Saheila. To do this, we will need to go to the elven camp.

Once in the right place, we find an elf performing a mysterious ritual. We try to get closer, and then we start a conversation with the guard. This conversation can end in two endings.
Getting permission
With a high level of persuasion, we pass through the guard to the place where the ritual is being performed. This will give us the opportunity to go through two new tasks in the future: "Funeral Rites" and "Valuable Prey". In addition, we will get 5800 experience points.
Getting rejected
In this case, the elves will not even listen to us and will ask us to leave their camp, and the sooner the better. Of course, we will not receive any reward in this case.
Funeral rites
Having gained access to the sacred land of the elves, we allow one of the members of the group to participate in the ritual. He will need to raise one of the Pointy-Eared tribe (Sebilla will handle this best). It is also necessary to choose answer options in the dialogue that can impress the elves. Usually these are the topmost phrases.
Prize: it directly depends on how much we were able to impress the elves, however, we are guaranteed to be given 4 valuable things and 1 powerful artifact to choose from (depending on the class).
empty dreams
- Genie Lamp Location

On the southern coast of the Reaper's Coast we look for a mysterious lamp, half buried in the sand. We interact with her, thereby calling the Genie. We learn that someone threw away the artifact, so its owner will behave very hostilely. This quest has two endings.

Make a wish
With a high persuasion parameter, we ask the Genie to fulfill our desire, and then peacefully disperse. We will be able to make a certain wish and the Genie will gladly fulfill it.
Prize: 9750 experience points and a hidden little thing.
Fighting the Genie
If we fail to convince the Genie, we will have to fight him. The fight with this creature is quite simple. However, in the end, we will kill the Genie, and, therefore, we will not be able to receive a reward.
Log like log
Being at the sawmill, we approach the right building and activate the ghostly vision. We notice that one of the logs has a soul - we are talking about an elven living tree. It will ask us to deal with the foreman from the sawmill. We can find his soul in the southwest of the bridge located on the territory of the sawmill (the soul is indicated on the map).

We use the spell associated with the absorption of souls (“Cleansing”) on this spirit, and again go to the log to receive our reward. By the way, this skill can be obtained during the passage of the plot task "Abrupt Awakening".
Prize: 25950 experience points and a great shield.
Persistent Spirit
While at the sawmill, we activate a ghostly vision and find a mute spirit named Sirus Oates there.
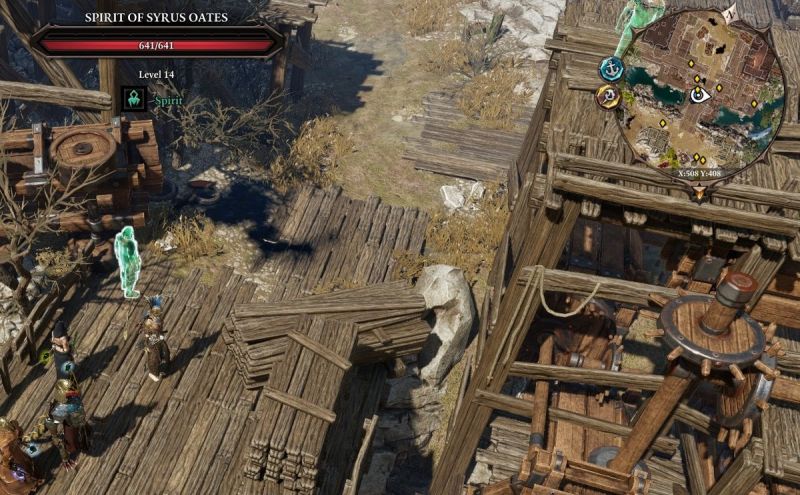
We find out that it was burned by the lone wolf Pigsbane, who is still defiling the earth with his existence. The Spirit will ask us to avenge our death. We kill Pigsbane (its location is indicated on the map), return to the customer and collect our reward.
former lovers
While at the sawmill, we activate the ghostly vision and find the ghost of a girl there, whose name is Edie Engrim.

We find out that she was killed by a former lover who calls himself Firewater. He went to this terrible crime in order to undergo his initiation and join a group of lone wolves. She wants us to make him say her name again. Only in this way can she calm down and go to another world. We force the boy to tell Edie, and then we return to the girl for a reward.
Not by washing, so by skating
Popam to the camp of lone wolves, we are looking for a character whose name is Corbin Day. We talk with him and learn his sad story.

It turns out that Rust Anlon forcibly brought him to the coast and now makes him work as a laborer for wolves. We deal with Rust according to the plot, and then we talk with Corbin again, telling him that he is now free. We can invite him to board the Lady Vengeance.
Kill Reward
With the help of a ghostly vision, we find the soul of a deer and agree to help her find a wreath woven from wild flowers. We dig out the place where the deer and the poacher who killed the animal were buried, and we find the necessary item there.
An eye for an eye
We use the “Ghostly Vision” skill, being at the sawmill (which is the location of the Lone Wolves group) and look for the soul of the magician. She will ask us to kill the archer named True Eye in order to take revenge on him. We kill the criminal, and then return to the spirit for a reward.

We can get different rewards from him:
- We tell him that we like the air to get the Airturgy skill.
- We tell him that we like water to get the Hydrosophist skill.
- We tell him that we like the land to get the Geomancy skill.
- We tell him that we need the power of the Source and absorb the soul of the master.
Bitters
Being at the sawmill, we use the “Ghostly Vision” skill and look for the spirit of the lizard, who calls himself the Black Widowmaker, who was a famous sender of lone wolves.

We learn that another member of the gang, Snake Root, killed him. He will ask us to kill her. We can either help him and kill the poisoner (her location is marked on the map), or refuse and absorb the soul of the lizard.
No laughing matter
Once at the sawmill, we activate the ghostly vision and look for the spirit of the gravedigger, who was recently dealt with by Dremoseka. He will ask us to find out where she hid the gold after killing him.
We head to the target, talk to it and click on the phrase marked with the tag [mystic] in the dialogue. As a result, she will see the Gravedigger in a dream and tell where the treasure is buried. We head to the west coast, dig out the treasure chest and tell the employer about everything. If we deal with all the wolves before we take this quest, then it will no longer be possible to complete it.
reward to the finder
We use "Ghostly Vision" at the flayer's sawmill and find a ghost belonging to the paladin.

We talk with the paladin and find out what he needs. Next, we take the head of the mummy and pass it to the quest giver. The mission is quite simple, as all places are marked with signs. After handing over the head, the quest will end.
Dangerous to yourself and others
We head northeast from the cemetery and find the healer's house there. In it we find a doctor named Swann. We convince him to trust us and tell us about his problem. We find out that he has an infected seeker in his basement, whose name is Natalie.

We follow the doctor to the basement (we can just hack it) and find a sick girl. Here we will have two ways: send the patient to another world or try to cope with her illness. If we approach her with a hero that does not have the "Scientist" tag, then we will not be able to cure her. In this case, we will need to deal with all the enemies that appear nearby.
If our character has the “Scientist” tag, then he will be able to find out that the seeker received a trepanation wound. The healer will ask us to spare the girl during the battle so that he can heal her later. We enter the fight with Natalie's nightmares. We will be able to beat the girl, but this should be done carefully so as not to inadvertently kill.
For each monster killed, we will get almost 11 thousand experience points. When deciding to help Natalie, first you need to weaken her by lowering the scale of her life to a minimum. But once we do that, all the monsters will be gone. Therefore, to get the maximum amount of experience, you should first deal with the monsters, and only then attack the girl.
As a result, we will cure Natalie and get about 13.5 thousand more experience points. We speak with the healer and receive as a reward one valuable artifact to choose from. In addition, our relationship with this character will improve and he will decide to sell us health elixirs at a 50 percent discount. As a result, the task will be completed.
If the patient dies during the operation, then we will not receive any experience points. In addition, the relationship with the doctor will seriously deteriorate. As a result, we will only have experience from killed monsters.
Buried past
To start this quest, we go south from Driftwood and reach the house located at the following coordinates X: 380, Y: 274. We are looking for Gareth here, who stands above Master Jonathan. After a short conversation, we can convince Gareth (you need high Intelligence or Memory) to release or kill Jonathan. Regardless of the choice made, we will still be able to attack and kill the master on our own if we wish.

Otherwise, Gareth will decide to spare his enemy and head to the Paradise Hills. Then, when the inscription "We were able to convince Gareth of ..." appears in the journal in the above task, we will be able to continue the quest.
We find Gareth in the Paradise Hills. He will bury the corpses of his parents. Near the house are a couple of paladins. On the right side of the boy are gloves belonging to the killer of his father and mother. The paladins won't let us in. You must either convince them or kill them.
In the house we find four silent killers. We activate the ghostly vision and look for the souls of Gareth's parents. They will tell us that they do not want their son to start revenge, but to remain a hero. Gareth will then enter and ask us to deal with the silent ones personally. We can allow him and then he will go on the road of revenge or dissuade him so that he continues to do good in the form of a hero.
Then the ghosts will tell us that Jonathan sent the killers. Gareth will ask us to deal with him. We head to the Black Mines and find the master near the oil rig. We kill him and take the ring as evidence. We take it to Gareth to complete the task.
Opposites attract
We head to Riker's house and go into the basement. There we find a turtle named Betty and Rory the rat. If you have the “Animal Friend” talent, we talk with the animals and find out that the turtle is in love with the rat.
We use various food and lure the rodent to the turtle. Then we observe how a new pair is formed.
Blood Moon Island
monster hunter
We head to the Monastic Forest and go to the eastern part of the location. There we find a small house, near which there is a cage with two demons. We learn that they were able to catch the master of the Source named Jaan (we met him in the first Original Sin). We approach him and immediately get almost 15 thousand experience points.
During a conversation with the hunter, we agree to his request to go to the island of the Blood Moon and deal with a dangerous demon called Lawyer. If there is Louse in our group, we allow her to talk with Jaan to increase her reputation by 10 units. He will agree to help the girl if our party deals with the demon. As a result, we will get another 7.5 thousand experience points.
In the hunter's house, be sure to look for a book called "Decorated Psalter". We will need it to complete one of the above tasks. It is worth reading it with a hero with the tag "Scientist" for an additional 14.5 thousand points (he must do this first).
We head to the island of the Blood Moon, using a ghostly vision next to a broken bridge, located near the altar of wandering (Driftwood fields) or going to the port (Monastery Forest). We can easily teleport to the desired location by passing through the ghostly bridge. Once on the island, we head to the demon camp and talk there with the Lawyer. Next, we agree to complete his personal mission to gain additional experience points.
If you wish, you can deal with the demon in the first meeting. However, we do not recommend doing this, because in this case the opportunity to complete the Lawyer quest, which will turn out to be quite profitable, will be lost.
Having dealt with the masters of the Black Ring, who surrounded the tree, we can then do away with the Advocate himself. A dog and 3 characters will help him in the battle (the second dog will sit on the beach - we can deal with it separately and earn about 7 thousand more points). Before you attack the demon, you should deal with the pickpocket Basatana. Unfortunately, the monster will give relatively little experience (7 thousand), but it will be possible to take good loot from its corpse.
For killing the dog and three of the Lawyer's henchmen, we will get about 36,000 more experience points. After their destruction, be sure to search the body of Basatan and find a scroll. Do not forget to also clear the location of all kinds of monsters in order to gain additional experience and items.
After killing the demon, you will need to find out his name. We report to the hunter Jaan, and then we approach the Ancestral Tree and activate the "Ghostly Vision". We speak with the spirit of the tree and find out the name of the arch-demon.
To talk with the Tree, you need to reveal its name, recorded in the journal of the archivist, located in the Archives, which are located on the island (its location is indicated in the screenshot below). We call the name and get more than 66 thousand experience points. Then we find out the name of the arch-demon that settled in Dr. Daeva.
To detect the entrance to the Archives, a very high Intelligence parameter is required. We go inside (50.5 thousand experience points) and find out the necessary information. At the end, we go to Jaan and tell him about the death of the Lawyer, receiving another 36 thousand. When talking with him, you can get the same amount of experience points a second time. Having revealed the name to the hunter, we complete this task and receive a reward. If there is Lowse in the group, Jaan will try to help her, but will not be able to. Afterwards, he will head towards the "Lady of Vengeance" to face the arch-demon later.
Secrets of the Blood Moon Island
This quest appears in the journal after the revelation that the Black Ring is trying to get through the fog of death that surrounds the island. Once in this location, go to the place shown in the screenshot below - this is the passage leading to the Archives.
Just for getting inside this structure, we will get more than 50 thousand experience points. We will also be able to use the "Ghostly Vision" and talk with the ghost of the Archivist. Regardless of the phrases we choose, we will get another 14.5 thousand. In the Archives we find a journal belonging to the archivist and read it. This will help us figure out the name of the Ancestral Tree - Eleaness.
We go a little further and determine that the wall is an illusion that hides the door (this will require a high Intelligence parameter). We select a strange blade to get 50 thousand experience points. We interact with the lizard hero (the Red Prince will do) to make out the inscriptions on the blade. There is also a closed Tenebrium chest that consumes one Source point on interaction. We use the master key and open it. It contains a green pyramid of teleportation. The blue pyramids can be found in Dallis' quarters on the galley.
The tree is located in the central part of the island. The Masters of the Black Ring crowded around him. They will attack us as soon as they see us if we fail the conversation test. We approach the tree and attack the opponents. We advise you to take the task "Lawyer" first of all to get additional experience points for killing masters.
If we have not yet dealt with the Lawyer, then he will not let us chat with the Tree, and therefore we will have to kill him. His death is also required to complete the previous task. Then we speak with the Tree and call its name in order to learn all the secrets and get more than 66 thousand experience points. We learn that a powerful arch-demon, whose name is Adramalich, penetrated Dr. Daeva (we are talking about the quest "Doctor's Prescriptions"). This will complete the task.
Advocate
We head to the island of the Blood Moon, using the port located in the Monastery Forest (preparing to spend a small amount of gold coins), or the "Ghostly Vision" spell near the destroyed bridge, located near the altar of wanderings (fields of Driftwood). Choosing the second option, we step onto the spiritual bridge and teleport to the island. We can also use Spread Your Wings to move between supports.
Having reached the desired location, we head to the demon camp, located in the western part of the island near the beach, and talk with the Lawyer there. We agree to deal with the masters of the Black Ring, who are standing next to the Ancestral Tree. We call him the king of fiends of the Void, so that the battle begins. The demon and his allies will take our side.
Note: Taking advantage of the chaos on the battlefield, we can quickly deal with the Lawyer. However, in this case, we will not receive experience points for completing his quest.
For helping the demon, we will get an additional Source point. If we already have 3 slots, then he will simply give us a book with a random skill. Near the tree, we will have to fight with four masters, some of which are able to summon golems (29 thousand points are given for killing them).
After the massacre of the masters, a Lawyer will appear who will show us where the Nameless Island is located. The task will end on this, however, we can still attack the demon and thereby complete the previous tasks.
Forgotten and damned
We head to the island and near the entrance to the bridge, consisting of fragments, we find a map lying near the fire. It shows the location of the archive, three statues and a forge. Near the Advocate's camp, we find a statue that holds some secret, but it will not be possible to move it.
To activate these statues, you will need the book "Taming the Sacred Fire". It is also called the "Decorated Psalter" (this name it bears until it is studied by a hero with the tag "Scientist"). We can find this book in one of 3 places:
- In Jaan's house (we talked about how to find the book in the Monster Hunter quest).
- In the archives located in the northeast of the location.
- One of the masters of the Black Ring, who can be fought near the Ancestral Tree.
To decipher this book, you will need a character with the "Scientist" tag. After reading it, we will receive 14.5 thousand experience points. Now we can open the dungeons under the statues. However, before heading to the first of them, we go to the north of the island and look for an ancient forge (coordinates - X: 317, Y: 479). There we create silver levers from silver ingots. You will need two handles for the second and third dungeons. The ingots lie not far from the forge and on the corpse of the Black Ring, lying in an unfinished crypt.
In the south of the location, not far from the demon squad, there are 3 dungeons. We use the book to destroy the statues and get inside. Each of the dungeons is associated with its own separate task. By the way, the quests “Bound by Pain” and “Uplifting Deception” will require us to have silver levers in our inventory.
In the Archives, you can find out that living beings are imprisoned in dungeons, in which powerful demons have moved. Unfortunately, the healers were unable to cure them. As a result, they were simply locked in the dungeons so that they would not get out.
The screenshot above shows an unfinished dungeon with nothing of value except a silver ingot. But it's still worth studying to complete. this quest. Next, we will consider 3 tasks, without which you will not be able to complete the current mission.
Uplifting deceit
After entering the dungeon, the entrance to which is indicated in the screenshot below, you will see a mechanism with a broken lever. When we try to use the previously created handle, nothing will happen. Therefore, we turn on the "Ghostly Vision" and find the spirit of Robert, who stands near the statue. We talk with him and convince him to open the door for us to kill the demon.
We enter the room and go forward a little. If one of our heroes absorbs the energy of the Source, which is in a puddle, then the lizard will immediately speak to him. Therefore, we proceed with caution. If we agree to release Rajarima, then she will suck out all the Source points from the character and get out, which will immediately lead to a battle. She will then unleash a storm of arrows capable of causing significant damage to our group. It will be necessary to deal with the obsessed as soon as possible.
If we don't release the demoness, then we'll need to defeat her in an argument. If successful, Rajarima will not be able to take the Source points from our heroes and get out to freedom. Next, you just need to kill her with ranged spells or arrows.
However, it's easiest to just attack the enemy from high ground before talking to him. We rise somewhere higher and begin to fire at the lizard. After her death, we receive a reward in the form of 58 thousand experience points. Then we speak with the spirit and tell him about what happened in the dungeon.
Bound by pain
The entrance to the second dungeon is listed below. We make our way into it and turn on the “Ghostly Vision” skill to chat with the ghost of brother Calvin. Then we go forward and repair the destroyed mechanism using the silver handle. Then again we talk with the spirit and persuade him to open the door. To do this, you will need to perform a speech test, which requires a high Intelligence parameter. If we choose Memory, we can pass the test even with 5 units of persuasion.

Having opened the door, we will come across a possessed gnome who will ask us to destroy all the pillars. After the destruction of these structures, the dwarf, of course, will become free, and therefore the battle will start. Unlike the previous opponent, the dwarf will be much weaker. For defeating him, we will receive almost 29 thousand experience points.
When the dwarf dies, a demon named Morr Rottenmaw will arise. Without further ado, he will immediately attack our group. Of course, he will be more dangerous than a gnome, but still should not pose any serious problems for us. True, he has one dirty ability - there is a small chance that when hitting him, our character will become possessed and attack his own comrades. In this case, we beat our friend until he comes to his senses or dies (you can then resurrect). When the enemy leaves the body of our character, we attack him again in a crowd. For killing him, they give about 22 thousand experience points.
There is a bug in this fight where the hero that deals the final blow to the demon gets the Demon Invasion debuff, but does not become Possessed. The battle will end, but the debuff will not go anywhere. It will disappear only after we deal fatal damage to the character. But in the end, a demon will get out of it and the battle will begin again.
There is an alternative way to complete the quest that allows you to save the gnome. To do this, we just need to beat the dwarf with the same hero without killing him. Most likely, you will have to impose healing on him so that he does not die. We continue to attack him until he falls, and then we destroy the pillars.
When the pillars collapse, the demon will exit the dwarf's body without killing him. Then we act as before - we kill the demon, trying not to touch it too often. We receive a reward in the form of experience, and then we talk with the gnome. A conversation with him will allow us to get about 36 thousand more experience points. Don't forget to also talk to Calvin for an additional reward. This will complete the task.
Silent
The entrance to the last dungeon is marked below. We enter it and use the "Ghostly Vision" to talk with brother Morgan. He will ask us to save a little girl who is imprisoned in this dungeon. We agree or just lie to him so that he opens the door.

Once inside, before talking with the child, we will need to talk with the cat (requires the Animal Friend talent) and pass a speech test. In case of failure, we will have to deal with the fluffy. If we pass the test, we can approach the girl. Next, we destroy the Source chains that fetter the child and talk to him (if the speech test is not passed, the girl will not wake up). It will not be possible to kill the girl, since she is invulnerable to any blows and spells. So the death of a cat will lead to the failure of the task.
After talking with the child, we will receive 14.5 thousand experience points and will be able to move her to the ship, where she can be saved from obsession. We speak with Morgan and receive a reward for our actions. This will complete the quest.
In addition, we will be able to complete the "Forgotten and Damned" task, which required us to explore all 3 dungeons and destroy the demons.
Druid
We study the journal of the archivist, which we can find in the Archives located in the northeastern part of the location. As a result, we will find out the name of the Ancestor Tree.
Then we head to the ruins located in the west of the island (several demons live here) and use the “Ghostly Vision” skill. Find the ghost of the druid and talk to him. He will ask us to save the Tree from suffering. This object is located in the central part of the level. However, in order to reach it, we will have to deal with the members of the Black Circle.
Next, we talk with the Tree, using the spell to talk with the spirits. As a result, we ease his suffering. Here we, most likely, will also have to deal with the demons, the battle with which is necessary to advance along the Louse quest chain.
Then the Tree will tell us that we need to deal with a doctor possessed by an arch-demon. To complete this quest and receive a reward, we again speak with the druid's ghost.
Just what the doctor ordered
After talking with the Ancestral Tree and revealing the name of the supreme demon, we head to Jaan and find out from him where the doctor is hiding. It turns out that the prince of darkness is in the city of Arx and pretends to be a local doctor. Once in the desired location, we first study the place where the wedding celebration takes place (task "Secrets of the Dwarves"). We find out that this demon sent a wedding cake with explosives to the gnomes.
Then we leave the school of the city and enter into a dialogue with the unfortunate citizen. He will give us a message that the doctor is grateful for the service rendered to him on the island of the Blood Moon (in case we helped the Lawyer). Then we kill Lord Kemm (mission "Vault of Linder Kemm") or Isbale (task "Secrets of the Dwarves") to receive an invitation from the doctor.
Next, we head to the Black House, located in the northeastern part of Arks. Near it we will meet Ailment. We speak with her and she will transfer our group to the reality of the demon. Here we will see a lot of candles. We smell them and make a difficult moral choice - this will increase our characteristics. Then we go to the room where the demon is located.
We note right away that the supreme demon has a level 20, so it will be extremely difficult to fight him. In addition, at the beginning we will have a little talk with him. He will offer us a deal - help in the battle with Dallis for half of the divinity that we can get at the end of the game. If we agree, then the contract will have to be sealed with blood (this decision seriously affects the ending). In case of refusal, the demon will immediately attack us. We recommend that you first deal with the nurses restoring the life of the arch-demon. We used physical attacks against them, as they had powerful magic armor.

After killing the nurses, we again speak with the doctor, who will turn into a huge demon. We immediately spend all the Source points so that the enemy cannot suck them out of us. We kill the enemy, and then we talk with Louse.
Note: You can throw a box containing death mist at an enemy to instantly kill them.
We go down to the basement of the demon and find Jaan there, locked in a cage. In addition, there will be many rooms closed with magic. They can be easily unlocked with a simple master key. We found Quinn's armor here, giving the character levitation.
Nameless Island
Familiar face
If we managed to save Delorus in the prison of Fort Joy, then we will be able to meet him on a small hill, located not far from the beginning of the location. He will ask us for permission to join our group, and in return he will tell useful information about Alexander and the Black Circle.
We accompany the poor fellow of the 9th level to the temple of the elves and leave him there with friends. This character is rather frail, so you should not count on him to help in battles. Moreover, we will have to constantly protect him from various monsters.
Looking for revenge
The warriors will tell us that Alexander is already on the island and has set up camp in the north. You can find it at the top of the elf temple. There we will also meet Gareth, who will fight with the bishop. If we manage to calm him down, he will return to the ship and await our arrival. The easiest way to convince him is with Intelligence, since the requirements for Memory or Strength will be much higher. In addition, it will be much easier for us to convey our point of view to him if we were able to stop him from killing the silent monks earlier.
If we decide to kill Alexander, then later we will be able to give his stump to the leader of the Black Circle, who will happily explain to us how to get to the Academy. However, you can go there directly, using the southern entrance.
If we spare Alexander, then we still have to fight him in the Arena. Therefore, it is best to side with the Black Circle and deal with the bishop, and you can do this together with Gareth for the maximum reward. Don't forget to take the enemy's head later.
- About 70 thousand experience points if we convince Gareth not to attack Alexander.
- Over 200 thousand points and a divine artifact if we kill Alexander paired with Gareth (we will get another 100 points if Delorus remains alive).
- A little over 40 thousand points if we defend Alexander and kill Gareth.
Invaders
At this location, we can encounter a large number of members of the Black Circle. We can convince all of them that lone wolves are traveling with you so that they remain neutral for us. As a result, we will be able to complete their quests and trade with them. If the persuasion does not work, then we will either need to bypass their parking lot, or kill all members of this cult.
To complete this quest, you must complete two quests related to the leader of the Black Circle: "The reduction of the herd" and "An unusual visitor."
Unusual visitor
We head to the temple of Ralik (people) and see how the masters are fighting the Black Circle. If we decide to help the masters, then the survivors will tell us that Alexander is on top of the elven temple. We find the bishop there and talk with him. If we agree to help him deal with the leader of the Black Circle, then he will give us a hood that can dispel enemy illusions.
We go east from the temple of people and find a cave of trolls there (the entrance is indicated in the screenshot below). We go inside and use the artifact of Alexander to remove the illusory cobblestone standing behind the altar. Thus, we will be able to get to the White-faced.


We kill the leader of the cult and tell Alexander about it. He will tell us how to get into the Academy.
Note: In one of Whiteface's chests, you can find a handle for the scythe of the Redeemer, which Almira will ask you to get.
herd reduction
We will receive this task only when we decide to side with the Black Circle. In this case, the brotherhood will tell us how to get into the Academy, if we agree to kill all our companions and clean their corpses from the "filth". There can be no bloodshed if we convince them to kneel before the God King. After that, White-faced will give us the necessary capacitor.
mother tree
Once in the temple of the elves, we talk with the local priestess. She will ask us to find an important descendant of the elves. Let's go to the top of the Tree.
Note: This quest can also be obtained from the Raptor Prince of Shadows, which is located in the lava area in the southern part of the location.

The offspring of the Tree will ask us to deal with the Prince of Shadows and bring his heart. At the exit, Saheila will talk to us, who will offer to destroy the heart of the Mother Tree. We deal with the Prince and bring the heart, receiving for this the talent "Deep Roots", which increases Memory by 3 units.
The Tree will then want to talk to Sebilla (if she is in the group). She will tell us that Sebilla is to become the new Mother Tree. If we refuse, the elves will attack us, but our companion will remain alive. We kill the Tree, thereby freeing the elves and getting out of the temple.
Mercy of the Watcher
We find an undead observer in the north of the Dune Temple (gnomes). He will ask us to deal with the awakened dwarf knight, who, in his opinion, was swallowed up by the void.
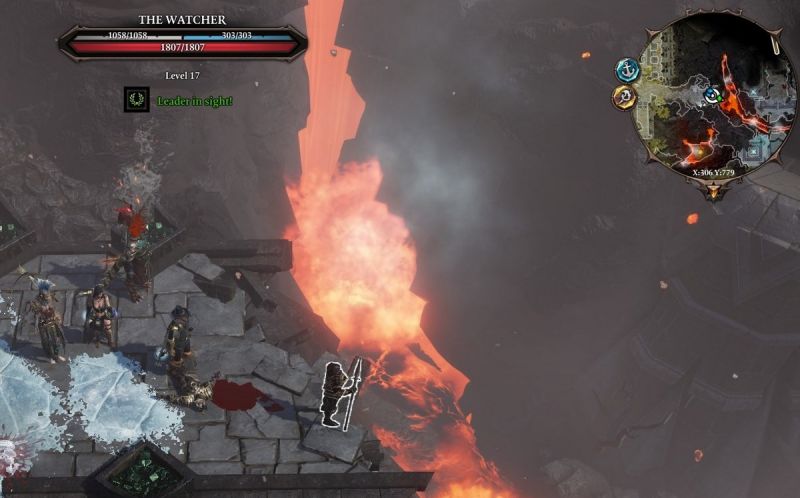
You can find the Knight of Dune inside the above temple. we will have to go through a large number of traps and deal with the defender. It's safer to send one hero and then teleport all the rest to him with the help of teleportation pyramids.
After killing the knight, we activate the "Ghostly Vision" and find out what exactly happened here. We interact with the altar in order to find out more information about Dune. Then we return to the observer and talk about the completion of the quest. As a reward, we receive from him an amulet with the Guardian Angel skill.
In the clouds
We learn that the Temple of Amadia flies high in the sky. We can get there only by using the teleportation skill in the southwest of the island. Then we will need to climb up using the vines.


Once in the temple, we find a statue near the starting point. We pray near her for a random buff.
Note: Being in the cloud temple, after applying the first movement in the north of the location, we find a small floating island, on which there is a Stone with an engraving. We put it in inventory, as we will need it in the future to open the door with a face.
We use teleportation to explore the temple of wizards and overcome many barriers. We are faced with a follower of Amadia, who will ask us to activate 3 runes in order to free ourselves from captivity. After activating the first rune, the barrier will disappear, but you still cannot do without teleportation. After freeing the follower, we get the gloves of the goddess from him if there is Fein in the group, who is actually the avatar of Amadia.
scientific pursuit
Once in the library of the Academy, we use the "Ghostly Vision" skill and talk with the ghost of Taryan. She will ask you to find the soul of his mistress. We can find it in the forbidden section of the library. We teleport one of our satellites to this part with the help of a puddle of the Source. Then we tell Rayalade about her soulmate and return to Taryan to collect the reward.
test site
Having found the teacher's office in the Academy, which can be accessed with the help of an ordinary master key, we find a portal located behind this room. It leads to a hidden arena. We pass through it, turn on the "Ghostly Vision" and talk to the ghost of the bird. We agree with her request and start the battle with the Great Defender.
First, we activate the capacitor behind the Defender to create a powerful beam, and then with the help of mirrors we change the direction of the laser so that it hits the boss directly. As a result, he will be stunned. We advise you to use the elixir of invisibility to pull off this whole operation without being noticed.

We search the body of the Defender and find the blade of the scythe, which will be needed in the future to free Vindego. We speak with the bird again, and then we teleport to the upper room, where you can find a good rune.
The power of mercy
We head to the camp of the Black Circle and find the witch Vindego in the side rooms, who sank our ship at the very beginning. We deal with her, but it will not work to absorb her soul, since she will immediately disappear.
Arks
Battle at the gate
Once near the bridge leading to Arx, we notice how the paladins are fighting with the vampires of the void of the 18th level. We defeat the monsters, and then we talk with the captain. He will thank us and let us into the city without question.
execution
We pass into the city and notice that the paladins are cracking down on all the masters who have contacted the Black Circle. We go to the courtyard of the barracks and meet a girl who will ask us not to let her wife be executed - a paladin named de Selby, who did not follow the order (killing defenseless masters). We are trying to convince Lord Kemm to forgive the paladin, or we are conducting an appropriate investigation.
If we manage to save the paladin, then we will be able to meet her in the dungeon of the masters. She will tell us interesting information about the lord.
Linder Kemm vault
After saving the paladin from execution in the previous quest, we meet with her in prison. She will inform us that the lord hides dirty secrets in his vault. If we free Vindego during the passage of the task "The Power of Mercy", then we will find out that Kemm is a minion of the god-king at all.
We head to the city square of Arks and find an artist there who draws bloody pictures. We use the "Ghostly Vision" and notice the spirit belonging to the painter's father. We talk with him and find out that the local lord keeps in his hiding place a rare painting called "The Second Passion of Lucian". We note right away that it was stolen. It can be purchased from the kids in the local thieves guild, but this requires a character with a high Persuasion parameter. We can find out where the entrance to the guild is from the girl at the local school.

As for the entrance to Linder Kemm's vault, it is located right in his garden. Pull the lever to open the hatch. Then we pass through the hole that appears and find ourselves in a small dungeon.


Here we have to face several automatons that patrol the area. We can either sneak past them (in the presence of a small party), or engage in a fight with them (they can be killed with a spell that drains the Source). We get to the end of the vault, use the "Ghostly Vision" and put the picture bought from the children in the guild in an empty frame. As a result, a passage to the secret room will open.

Here we find another picture, which is connected in a certain way with responsibility. We take it and leave the room. Next, click on the book that is on the shelf on the right. A stone door will open, behind which there is a hatch.

We pass through the hatch and get into the temple of the king-god. We talk with him, and then click on the sign located on the ground. It will say that only the god-king knows the burden of responsibility. We recall that earlier we found a painting with a similar name - we take it and put it on the altar. As a result, we will be able to open the hatch, with which you can get into the Arhu prison.

Lord Arhu was closed here by Linder Kemm. To free him, you need to activate the "Ghostly Vision", and then use the skill of draining the source to defeat the two tormentors of the lord.

Note: On a statue located nearby, you can find a scythe Redeemer, which we may need to complete certain quests.
After the release of Lord Arhu, four warriors of the Black Circle will appear and attack us. Later, Kemm himself will come, with whom he also has to fight. If we want to keep Arch alive, then we keep him as far away from other enemies as possible by using the teleportation skill. However, even if he goes to another world, we can still talk to him using the "Ghostly Vision". As soon as we defeat all the enemies, Lord Arhu will tell us how the puzzle located in the cathedral is being solved.
Quest for Lord Arhu
Lord Arhu is in Linder Kemm's vault. Above, we talked in detail about how to get into it. In the end, we will be able to reach the prison, in which there is a prisoner held by two ghosts. We destroy them by sucking out the Source, and then we fight with Lord Kemm and his henchmen.
After that, Lord Arhu will be free, and we can chat with him to find out how to get past the puzzle located in the cathedral. By the way, in order for Arhu to survive in battle, it is necessary to teleport him away from enemies and help him if necessary.
Master of Dreams and Nightmares
Being in the storehouse of the masters, which is located directly under their barracks, we can find a book called "Report on the Toy Dealer". As a result, we will learn a lot of interesting things about this character and get the corresponding quest. There is an alternative way to get this task - we talk with Lord Arhu and learn from him about Jefferson, who can help us get into the cathedral. We go to the toy store and convince the seller to cooperate with us. He will give our hero an amulet capable of storing the Source. We fill it and return to Zanders.
Then again we communicate with the merchant. Again we try to convince him. If successful, he will tell us that to get into the divine tomb, you need a special scroll of atonement. Luckily for us, this magical piece of paper is right in the shop on the 2nd floor. The password to the box with the scroll will be revealed to us by Zanders himself.
We don’t hang our heads if we didn’t manage to convince the puppeteer, because we can just get to the 2nd floor and open the box where the scroll lies. We will need this item and the amulet to open the hatch located in the cathedral.
The last stronghold of the masters
Having reached the barracks belonging to the masters, we see that the paladins are trying to find the secret entrance to the secret room. The hatch they can't find is in a room with a lot of traps underneath a couple of crates.

To the south of the kitchen, we can find the ghost of Marvell, who knows the correct password for the hatch, but it will be extremely difficult to get this combination from him, so we try to open the hatch ourselves. To do this, you need to specify 4 phrases in a specific order. In the bedroom nearby there are signs on which these phrases are written, but only 2 of them can be seen. The correct combination looks like this:
- Purity of thought.
- Body discipline.
- order in society.
- Loyalty to the Divine.
After solving the riddle, we will gain experience, and the ghost will disappear, so if we need a source, then we should suck out their spirit before entering the password. We pass into the basement and near the southern wall we find a button that opens the entrance to the treasury of the masters. We go down and find another closed hatch.


In the basement we find large paintings hanging on the walls. We move them aside, but do not put them in inventory and do not remove them from the walls. Behind them we find 4 buttons that must be pressed in a certain sequence (the names of the paintings):
- Intelligence.
- Society.
- Body.
- Divinity.
As a result, we will gain access to another secret room where the ghost of Hux lives. Next to him we find the White Master's Key, with which we will be able to go to the lower level.
At the bottom we encounter Master Raymond and three Geist bodyguards. Before the battle, he will set fire to everything, so you have to fight him on fire. Having defeated this enemy, we search the room and find the diaries of Raymond and Dallis, in which all the plans of the main villains are revealed. At the same time, a new quest "Revival of the King" will begin.
The rebirth of the king
On the lower level, we can also find a book lying near the table and informing about who Dallis is going to resurrect. We return to the echo hall and talk there with the necromancer Tarkin, who will report that he really helped Dallis, but only under the threat of death. In order to somehow atone for his sins, he will give us the Anathema - this is one of the best two-handed weapons in the game.
Missing prisoners
We enter the prison and talk with the paladins. We find out from them that earlier the masters tried to find out where several prisoners disappeared. Now the paladins have taken up this matter, but they cannot advance on it.
When we deal with Isbale in the "Secrets of the Dwarves" task, we will be able to find these prisoners in the girl's laboratory. They will all end up dead, as the life was sucked out of them to get the Source.
The power of mercy
On the Nameless Island in the Black Circle camp, we can find a letter that talks about Vindego. We will be able to meet her again in the underground prison of the masters, located in their barracks. To get into this part of the location, we convince two paladins that we will be able to overcome it.
If we decide to release the woman, then first of all we give her a certain amount of coins to improve relations with her. Then we press the switch and thereby open the cage. As a result, she will teach us the skill "Charm Netherfiend" and inform that Linder Kemm is now the new general of the god king and is helping him in advancing the interests of demons. Dwarf Isbale also serves the demons.
With the Redeemer scythe, we can release the witch from her oath to the god-king. However, if we have only one of the two scythes (the first can be collected on the Nameless Island, and the second can be found in Kemm's vault), then we will not be able to help the Red Princess when completing the Red Prince's personal quest.
Mistakes of the past
We will need to get into the master's prison, which we can get into with the help of sewers. First, we use the "Ghostly Vision" in the barracks, and then we talk with Winslow. We agree to help him in search of Banne. The body of this character lies near the sewer. Apply the vision again and talk to his ghost. Now we can go inside the sewers.

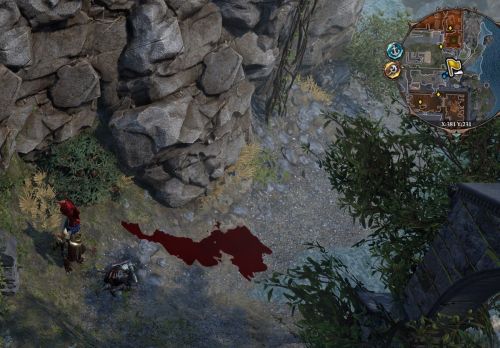
In a boarded up room in a small cage, we notice a boy whose name is Karon. He is awakened, raised by the order, but ultimately determined to go against them. We turn on the "Ghostly Vision" and find dead seekers who want to leave the boy in a cage forever. If we break the cage, then the boy will attack us and he will have to be killed.
If we decide to spare the boy and leave the room, then we will definitely return to it again. We will see that the cell is empty. Climb up and head to the western quarter. Here, the maddened Karon will attack everyone he meets on his way. We enter into battle with him and kill him. This will complete the quest.
Old means golden
We head to the western part of the city and find, not far from the house of Lord Kemm, a merchant selling antiques and waiting for Appraiser Kat. We go into the mansion and talk to the girl. We convince her to reveal her secrets and she will ask us to find 3 expensive artifacts that lie in Linder Kemm's vault. We talked about how to get into it in the task of the same name. Inside we have to fight with several automatons.


After finding all the relics, we return to the Appraiser and receive our well-deserved reward.
Lessons are over
We go to the southeast of the city and find a school there, which was occupied by outcasts and excommunicated monks. We talk with the girl and convince her to show us where the thieves guild is located. Then we speak with Beryl Griff and tell him about Griff, who lived in Fort Joy, in order to get additional experience points.
This Griff will ask us for a favor - he wants to restore the school, and for this he first needs to drive out all the outcasts. We go to Sister Skori and convince her to leave (you can use force). Then we return to Griff and take away his well-deserved reward.
Secrets of the Dwarves
There are several methods for activating this quest, but all of them are related to getting into the dwarf wedding, which is held in the northeast of the location. We head to the right place and look for a drunken dwarf near the building, from whom you can bargain for an invitation and get to the wedding. We can also go to this celebration of life through the sewers (beware of fog spiders) or the backyard. In the latter case, we approach the mansion of the wisest, move to the northern balcony of the building and find pebbles on the left wall, along which we can climb the wall.


Once in the courtyard, we find many corpses killed by the fiends of the void. We study the statues to search for traces of monsters near the pipes. We use the "Ghostly Vision" and talk with the spirits of the dead guests. Next, click on the wedding cake, which will immediately explode and enemies will come out of it. We destroy them, and then we find out from the guard who sent the sweet treat. This donor will turn out to be a mysterious doctor, whom we have already heard about from the Ancestral Tree. It is under his guise that the supreme demon is hiding. For more information, see the quest "Just what the doctor ordered".
Next we head to the sewers. To do this, we find the key to it on a dead body lying on the northern balcony of the dwarf courtyard, and then we go down to the basement of the house where the surviving daughter-in-law is located, and take a bottle called “Lulabelle Honey Wine” from the counter. As a result, a secret ladder will go down and we will be able to open the sewer hatch.

We head to the second level of the sewer and go east. There we find a strange hole in the wall. We destroy it and thus get into the courthouse. There we meet the queen, who was constantly manipulated by her adviser named Isbeil. If earlier we managed to talk with the witch Vindego, then we tell the queen that Isbale works for the Black Circle. As a result, Justinia will not fight us. Next, we fight with the gnome and members of the Black Circle. The battle will prove to be tough as all the enemies will be at the top. We use the skill of fast movement in order to quickly get out of the pit.

After the fight, use "Ghostly Vision" and talk with Isbale's ghost to find out her motives. Then we find a secret door in the left corner of the hall and find the queen. We speak with Justinia and decide what to do with her. We can attack her, as she tried to poison all the inhabitants of Arx, or spare her, because in fact she was simply manipulated. Next, we study the room for experiments conducted on the awakened ones, and go outside.

Consulate
To complete this task, we need a special scythe Redeemer. It can either be found in Lord Arhu's dungeon, or assembled from two parts lying on the Nameless Isle. Without this weapon, it will not be possible to save the Red Princess. As for the consulate building, it is located in the northwest of Arks. To get inside, you need a hero with well-pumped Hack and Theft parameters. We get them to the fountain, and then we go to the door, which can either be cracked or opened with the key lying nearby.
Then, with the help of teleportation pyramids, we reunite our team. We use the "Ghostly Vision" and look for the portal. We pass through it and get into the arena. Here we fight with the reflections of the villains that we could meet earlier. We destroy all the mirrors from afar, thereby avoiding the battle.
After we head to the door and move to another location. We talk with the seeker near the portal and find out where the Red Princess can be found. With the help of a scythe, we release her from the oath made to the god-king. We use the fiery breath of the Red Prince to create a dragon, and then we leave the dream.
Get the teleportation gloves
Shortly after arriving at Fort Joy, you will find a man named Gavin walking through the ghetto area in the western part of the city, carrying a staff. Whether you help him or not, the subject in question is of paramount importance. So how do you get teleportation gloves?
They are located to the west of the city if you move along the beach. There will be three salamanders here. Kill them and search the area to collect useful items, including teleportation gloves. These gloves are a VERY useful tool in the early stages of the game as they give you access to the Teleportation spell. This skill is useful both in general exploration of a location and in combat, allowing you to move enemies around the battlefield, throw them into the fire, or bring ranged enemy magicians closer to your melee fighters.
Outside of combat, gloves are even more useful. They will allow you to cross chasms that you cannot pass through and other obstacles, as long as they are not located outside the line of sight. For example, you will not be able to teleport a character outside the walls of a closed room. You can move various objects and even teleport traps that prevent you from moving forward.
Give less and get more
One of the understated trade options in Divinity is the ability to gift merchants with your items. I know this may sound crazy, especially if you don't know about this mechanic at all, but you will benefit from doing so.
When you find a merchant with good goods and you know that you will have to deal with him more than once, then start giving him items. You can take gold for only a part of the items, and give the rest for free. The more valuable the items you give him, the greater the reputation gain with that merchant will be. Although this will make it impossible for you to sell these items and earn money, in the long run you will be able to sell other items for a much higher price, as well as receive discounts on goods available in the merchant’s backpack.
This is very difficult to pull off early on due to limited resources, but over time you will be able to buy valuable loot from your favorite merchants. By increasing your reputation with them, you will earn several times more gold in the long run than you originally spent. A few hundred at an early stage will turn into thousands at a later stage.
The "Summoning" magic is good... even very good
There are no bad skills in Divinity. Each has an opportunity to benefit your squad, and sometimes they are useful in several ways. When it comes to combat, the magic of "Summoning" should come to the fore.
The reason for this is that the Evocation skill summons an ally into battle - a totem whose projectiles are based on the surface on which it is installed. See the fire? On it you can build a fire totem. Poison puddles on the field? Then the "Incarnation" will create a totem that shoots poisonous projectiles.
Elements are not the strongest tool for dealing damage, but still allow you to inflict additional damage to the enemy in addition to the main one. Divinity: Original Sin 2 is designed and based on the balance of power of your four companions in your squad. By using more allies, you increase your chances of survival. Incarnated will allow you to distract opponents, inflict additional damage on them. They can be summoned multiple times per battle. Even if someone in your squad has the Summoning skill of the first level, it will still be reasonable to summon a totem and divert the attention of opponents.
Theft - rewards
Of course, it doesn’t sound so nice and cultured, but still, in Divinity: Original Sin 2, stealing is one of the surest ways to get gold. House theft, pickpocketing, and even killing wealthy characters will result in your team being fully stocked with both equipment and finances. You can then take these stolen goods and take them to your favorite merchant with a high reputation in order to sell the items for the highest possible prices.
Of course, there are unpleasant consequences of such actions. The constant theft of people will quickly raise their suspicions in your direction, after which some characters will want to search you. And it can even be guards. Killing an NPC can also be dangerous because other characters will be able to locate the body and alert the guards. Or they will even notice how you kill the character. Greed is good, but it ruined the fraera. Don't forget about it!
Characters of a particular race cause different reactions of NPCs
Depending on the character you are talking to, the racial affiliation of your companion conducting the dialogue will matter. If you make a mistake when choosing a race, you can even interrupt entire quests, or simply not be able to ever start them. Any time you encounter an NPC who seems dodgy or evasive in his responses, try talking to him with another party member and see how they react.
Changing your companion for dialogue also allows you to converse with other characters. Each of your companions has their own unique interaction with NPCs, so if you've finished talking to one character and benefited from it, be sure to switch to another and start a dialogue with him to check for an alternative dialogue thread.
Combination of skills and abilities
Traditionally, RPG games reward you if you stick to a certain talent tree. You often choose only magic or only melee, agree to this and become a great master by the end of the game.
Instead, Divinity: Original Sin 2 rewards you for diversity. This does not mean that you have to level up every skill on the list. However, by dividing your ability points between two or three skills, you will get a significant boost to your character's power. For example, the presence of hydrosophistics implies the use of aerotheurgy and invocation - this will be a powerful combination of skills! Guerrilla pairs well with warfare and necromancy, making it almost impossible to kill you. The transformation also looks great with unusual and strange skills.
You can never have too much hydrosophistry
The hydrosophist ability tree has a few useful spells, but none of them are as useful as HP regeneration. This is your primary healing spell and will be your primary source of survival in the game.
You can take damage in a variety of ways in the game, there are a lot of additional sources of damage, so it makes sense to get access to several methods of treatment. And it will be critical if you want to be successful. Also, since regeneration in combat takes quite a long time, having two characters with access to healing spells will greatly simplify your task.
But hydrosophistics also brings one more benefit - it extinguishes the fire.
"Animal Friend" is a required skill
Technically, this is not a required skill. But if you do not take it, you will not be able to select several additional dialogue branches, chat with animals to take on new quests, advance in current ones, or simply learn useful information.
This does not mean that you should choose a talent for your main character. If you have Ifan as one of your companions, then you should know that this skill is available to him by default. There are so many opportunities to communicate with animals for various quests and other bonuses that a trip without Animal Friend will simply become incomplete.
Always carry a bed with you
At the start of the game, you come across a couch. You can get some sunbeds from the boat you come here on. The bed is one of the mandatory and most useful items in the game. When you are out of combat, simply click on the bed on the hotbar to rest the entire squad. This, firstly, will allow you to restore health, remove negative effects (but, of course, not all) and get a small bonus in the near future. This is much faster than sending characters to bed in turn.
Craft - amazing
Craft is very useful activity, which will not only allow you to acquire one or another item, but is also a great way to build capital.
There are several perks associated with food that can be useful in combat. Firstly, most items heal your characters, so they will be useful throughout the game. It is also desirable to learn how to independently produce healing potions. so as not to spend too much gold on them.
Food also provides many other bonuses, including increases in stats and resistances. There is a lot of food in the game, so it will be easy for you to distribute it among all the companions of the party. This is a great option to use even outside of combat.
Multiplayer
At first glance, the multiplayer might seem a bit confusing. There are two ways to use it.
First, there is a server browser. In the main menu, you can select "Multiplayer", which will open the list of lobbies. This method is for starting a campaign. Anyone who joins will be able to create a character and travel with you from the very beginning of the game.
After you start the game together, you will no longer need to select a lobby. Just load up your game, open the main menu and select Connect Menu. From here you can choose who can join you or invite other people. Gamers who join this way will control one of your companions.
Stealing though rewards, but once per character
Being a thief is one of the finest and quick ways grow rich. By robbing houses or stealing directly from the pockets of the characters, you will make a profit. But on the other hand? If you are caught stealing (anything), the guards will warn you, and, most likely, nearby NPCs will become hostile towards you. If you don't get caught pickpocketing, but the person notices that their items are missing, then if you're near that NPC, he may request you to be searched.
It should be noted that you can only rob someone once per party character. How profitable stealing will be depends on the level of the corresponding skill, but regardless of it, you can only steal from an NPC once. Moral of this fable? If you plan to steal items and generally make money on pickpocketing, then pump the theft skill for a higher income, and also immediately leave the location after theft before the robbed character gets suspicious.
You have a free opportunity to redistribute stats and skills
As we mentioned in the Companion Leveling Guide, you will get free stat distribution at the start of Chapter 3. This happens after you find yourself on the "Lady Vengeance". There is a magic mirror in the hold. And if you talk to him, you can completely redistribute the character's stats while maintaining his level. This means that if you make the wrong decision or use squad members with the same skills, you can redesign them so that they bring maximum benefit to the squad.
Each race has unique skills
This is barely touched upon in the game, but the different races have their own unique abilities that will be quite useful. For example, the race of lizards can dig holes without using a shovel, and the undead can unlock locks without using master keys, using their bone fingers. Elves eat body parts and get the memories of dead people.
Dwarves and humans, unfortunately, are deprived and do not have special abilities.
Blessing is a very useful Source spell.
After a few hours in the game, you will unlock the Blessing spell. It is strange, and at first it may not seem very useful. The blessing has several applications, but most of them are hidden. The following are examples of using the Blessing spell:
- Remove the curse from an object. Some objects, including levers and switches, will be cursed. Usually you can tell by the presence of black haze around the subject. Bless it to remove the curse and make the object useful.
- Cleansing Holy Fire - Some creatures will be subjected to a debuff called holy fire. This form of fire cannot be extinguished with ordinary water. Try to use "Bless" on such a character, and in most cases the fire will go out. At other times, it may be necessary for the burning character to stand in a pool of blood, and it will be necessary to bless it.
- Cleansing the earth, turning a puddle of water into a healing pond. If there is a cursed surface on the ground, using Bless will clear it. In addition, you can bless an ordinary body of water and turn it into a pond that restores the health of characters that enter it.
In secret: "Chicken paw" is the best spell
Divinity has a lot of useful status effects. For example, knockdown and stun are powerful spells with which you can sort of buy time in combat.
"Chicken paw" is a real treat, but only if you use it, and not against you. Once the enemy has no physical armor, then you can cast a spell to turn him into a chicken. Now he is easy to attack, and he misses a few rounds and cannot do anything. And the good thing is that this skill works on a lot of bosses that are immune or resistant to other status effects.
Set traps with barrels
A character with high strength can pick up barrels and carry them around. If you have to take part in a difficult battle, then run through the neighborhood and collect a few barrels. Create a giant trap out of them, then lure your opponents into it and detonate it for massive damage. Almost all objects in Divinity can be moved if the character has enough power. Experiment!
When combining elements, you get different effects
This is something that you will learn about quite early, but, nevertheless, the game is in no hurry to tell you more about it. Different elements of the game can cause certain effects depending on the combination:
- Fire and poison - by mixing them together, you will cause a massive explosion in a chain reaction. The target will be set on fire and poisoned.
- Fire and water - creates clouds of steam (smoke), which makes it impossible to attack the character with remote attacks.
- Water and Lightning - Electrifies water, dealing electrical damage, shocking and stunning the target.
- Blessing and Water - Creates a blessed pool of water, healing everyone in it.
Over time, goods from merchants are updated
You may have noticed that some merchants sell new items that appear over time when you revisit. This is due to the fact that the assortment of goods is updated after you level up. Keep in mind that this doesn't always mean they'll get new items, as vendors seem to eventually stop stocking items far from their range.
Did you know that merchants will keep all the items you have ever sold them? Regardless of the amount and time that has passed since then! If you ever need a sold item, be sure to check nearby merchants to find it.
If a companion dies
Sometimes bad things happen and your companions die. Do not worry! If you finish the fight but can't revive your allies, you can leave them dead for as long as you want. Just mark the place and return to it after you acquire the scroll of resurrection.
After landing on the shore, go north towards the city located in the center of the map. On the stone bridge, you can take the quest "They Shall Not Pass" from the boy. Also along the way you will come across a looted caravan and a chicken coop. There you can take quests: "Plundered Caravan" in the first case and When to count chickens- in the second.
Near the chicken coop you can meet a boy named Pidge. If you play as Ifan, or he is in your squad, then this guy is needed for his personal quest. If he did not survive the attack on Lady Vengeance, then tell the boy about it.
To the north of the chicken coop there will be executioners and suspended magicians, incl. Master Siva. Talk to Executioner Ninyan. You can ask her to release the prisoner by convincing her or with the help of a skill or by paying money. After that, talk to Maester Siwa and free her. Now let's go to the city of Driftwood, located to the west. The road across the bridge will be guarded by masters. Tell them you've seen a looted caravan and want to report back. You will be missed. We go through the bridge, and then to the north, where the house of Meister Siva is located. Talk to her and then remove the painting in the northeast corner from the wall and press the button below it.
Open the hatch that appears with the Meistre combination. Climb down and talk to Meister Siwa. Behind her, take the ingredients. Read the recipe in the southwestern part of the room. Now proceed to create the necessary substance. First, open inventory and use the obsidian lancet in the miscellaneous section, as a result of which you will get a bloody version of it. Now open the crafting panel or use the stove. Combine the Ritual Chalice, Blackroot, and Bloodied Obsidian Lancet. Place the finished bowl with the red contents on the grate in the northeast corner of the room, and then turn the faucet. Interact with smoke. You will again find yourself in the Halls of Echoes. Go forward along the only path and talk to your deity or demon in the case of Louse. Acquire the "Spiritism" skill. Use it, and then talk to the deity/demon again. After that, use the cloud of smoke on the right to go back. Talk to Maester Siwa. Now you need to improve your Source skills, and more specifically, unlock the second Source cell.

There are the following teachers who can help you:
- Mordus (quest "Shadow over Driftwood"): you will need to eat the heart of the fiend of the Void
- Hannag (quest "Window of Opportunity"): the she-bear and her children will die (you will also lose the "Animal Friend" tag)
- Jaan (quest "Monster Hunter"): it will be necessary to kill the demon that he keeps in a cage
- Lawyer (quest "Lawyer"): you have to sacrifice the soul of a stranger
- Saheila (quest "Elven seer"): just save her
- Riker (quest "Generous offer"): you will have to sacrifice the souls of three buried in the cemetery
- Almira (quest "Sudden Lovers"): just complete her quest
When you get the second available Source cell in one of the possible ways, return to Maester Siva. Talk to her and perform the ritual again, like the last time you got the "Spiritism" skill. Take the ritual bowl, bloody lancet (you need to sprinkle it with blood again before this) and blackroot (you can find it in the northwestern part of the island, near the shelter of Eithne (quest "Trader Eithne") and Liam's stash (quest "Aggressive Takeover"). Combine them in the crafting menu, then place the ritual chalice on the grate and set it on fire with the faucet.

Enter the hallucinogenic cloud and talk to the deity/demon, depending on the hero. You will receive the "Drawing Source" skill. Use it on a deity/demon and return to the physical world with the cloud nearby. Talk to Meister Siva, after which you will have to study another available Source point from one of the teachers from the list above.
After you get the third Source point, perform the ritual again. There, if you perform the ritual not in the basement of Meister Siva, you will be met by the Void Eater, practically invulnerable to physical damage, the Void Flayer, invulnerable to magic, with which you and your deity will have to fight. After the fight, talk to the deity/demon and use the cloud to go back. If performing the ritual in Siwa's basement, then just talk to your deity/demon. After that, talk to Maester Siva, however, the Flayer and Void Eater will appear and kill her.

After the fight, use spiritism and talk to her spirit, she will tell you what to do next. When you're done with Reaper's Coast, return to the Lady Vengeance and speak with Ailment to travel to the Nameless Isle.
They Shall Not Pass / The Plundered Caravan / The Law of the Order / The Blazing Prophet / The Shadow Over Driftwood
They won't get through
On the bridge you can meet a boy named Barrin Pruitt. He asks to find and save his mother on the other side. To get there, go to the edge of the bridge and teleport to the boat below. From it, climb the stairs to the house. There, talk to the bridge guard Maria Pruitt, the boy's mother. After that, you will have to deal with the Fiends of the Void with or without it, depending on your decision. There are three of them, but when you kill one, a new one will appear. Also note that after death, damage is applied to the ground around.

After the victory, a new heroic replica will be available to you, as well as bonuses after the victory. If Maria is alive, talk to her and lower the bridge using a helm-like mechanism. When the mother meets the boy, talk to her again and she will put in a good word for you in front of the head of the guard. If she died, talk to the boy, but you will not receive a bonus that helps in completing the main quest.
Plundered Caravan / Law of the Order / Blazing Prophet / Shadow over Driftwood
This is a series of quests that will lead to one of the options for obtaining the second Source cell and, accordingly, progressing through the story quest.
Near the bridge where the boy was met, you can meet the caravan that was attacked. Talk to the only survivor - the dwarven warrior. Use the most pumped characteristic to convince her to calm down. Then she will point to a certain cave of shipwreckers. Near the corpse of the master inquisitor, you can pick up the key to a locked chest nearby.

Go to the pier, where you will have a talk with Magister Raymond. Even if they saved Maria Pruitt on the quest "They won't get through", this will not help you much, and you will have to use the pumped skill to convince the hostile character. He will give you the task "The Law of the Order", and also give you a paper ("Podorozhnaya"), which will enable you to safely travel around the area without fear of the guards.
After that, talk to Master Julian left on the pier. You will learn the details of the task, and the quest will also close. "Plundered Caravan".
It is necessary to talk with Lohar, who is suspected of spying on Queen Justinia. Go to the Black Bull Tavern. On the ground floor there is a separate room with a Bouncer and a door to the basement. This is the hideout of the gnomes. The guard must either pay, or engage in battle with him. Once in the shelter, go straight to the wooden structures, and then left up the stairs. There in the room you will meet Lohar. He will agree to help us, but only in exchange for a favor. You will have to complete his task "Shadow over Driftwood".

We follow to the house of Mordus, located west of the tavern. The main door is locked, but the side door will be open. Inside you will find a sleeping Glenna Grammy. Tell her that you are from Lohar, and she will free the hatch to the basement. We go down there. Near the stairs on the column there will be a hidden lever - pull it and you will free the gnomes stuck in the next room.
In the far corner from the opened door on the wall, with sufficient perception, an unusual lock in the form of a skull can be seen. Interact with him and the quest will begin. "Taste of Freedom".
Go to the room where the stuck gnomes were. Go downstairs, touch the trap, and the door will close. To go back, use the sculpture on the pedestal near the door. In the dialogue, select "press the button" and the door will open. Approach the chests. Move the two chests next to them on top of each other to access the books. Scour them. Read the letter to Mordus and take it with you. Return to Lohar and show him the letter. As a result, he will direct you to the Cave of the Shipbreakers in the western part of the map.

Cross the western bridge of Driftwood and show the pass received from Master Raymond to the masters guarding it in order to freely cross to the other side. Follow the path due west. After passing through the gorge, you will stumble upon an ambush of possessed gnomes. If you are playing as a mystic, then use the appropriate line in the dialogue to avoid the battle. Go further and you will come across another plundered caravan. There will be another trap here, but you will have to fight anyway. Enemies will be mostly mages and will be on high ground. Keep this in mind and try to redistribute forces along the flanks and quickly get out of the lowland. Also try not to group your fighters together. After winning, use spiritism to talk to the spirits.

A little to the south on a hill there will be a statue with an altar. Approach her and the quest will start. "Burning Prophet" Use a fire spell that hits the area or an earth spell that leaves a puddle of oil that you can then set on fire. The bottom line is that all five torches are lit at the same time. After that, talk to the statue and take the reward, and also read the book of prophecies on the altar and take it with you.

Go further west along the bridges. Be careful - there are many traps and spilled cursed oil and poison. Use various abilities that allow you to jump over long distances, as well as teleportation to safely overcome obstacles. Then you can go straight to the ruined castle - here you will find yourself in a rather advantageous position. However, at first it is better to climb with the help of the same abilities even higher, to a huge fire. There, use spiritism to talk to the spirit of the slain dwarf. Next, decide how to deal with the fire, which imitated the lighthouse, breaking ships on the rocks - to put it out or not.

Go back to the southern part of the ruins, where the cursed poison is spilled. Spread out and join the fight. After that, go down and follow the path west to the Shipbreaker Cave.
Inside, use spiritism to talk to the spirits. To the north of the entrance, you can find a survivor. Get down further. On the site near the cliff, you will be attacked by fiends of the Void. If you cannot kill them, then you and your party members will be dragged into the basement, and your squad will be divided. First things first, you need to gather the squad together. In order to do this quickly, use the teleportation pyramids. If they are not there, and also the characters cannot break open the doors, then just destroy them. In the southwestern part, you can talk to the scientist Zanishima, who, if she is convinced, will tell you about the Fog of Death and the plans of Mordus. Also read the book "Jackals of Justinia" on the table near the scientist, and also read and take with you the letter with a blot lying on the floor near the scientist. Also go to the opposite side, pushing the barrel of oil that interferes with the passage, and there read the book "Declaration of the "Peacemaker"" lying on the table.
If the fiends did not appear, just teleport down (you can get into the dungeon later, with the help of a hole and a hatch).
Once on the level with Mordus, you will have to fight him. Before the battle, it is better to save - it will be quite difficult. Be careful, as soon as your party member or enemy warrior dies, Mordus will drain his source on his turn and reincarnate into a fiend of the Void with a huge amount of health. It is not necessary to fight other gnomes. As soon as you deal with Mordus, the rest of the enemies will also be defeated. If the level of your characters is not high enough, and the battle is difficult for you, then you can cheat. In stealth mode, block the way up with crates. Go to the wreckage of the ship yourself, located a little at a height (with a hatch to the basement where your squad was divided). With one character with maximum health/armor, move closer to Mordus and teleport him to the shipwreck with the other squad members there. Next is the matter of technology. Try to keep him constantly knocked out.

After the victory, you can ask him a little about how he came to such a life, but do not insist on telling him about the leader, otherwise he will die and you will not get anything. Mordus can be asked to teach you how to better master the Source and thereby get the second available cell. To do this, you will have to eat the heart of the fiend of the Void - this is one of the possibilities for further advancement in the plot with a minimum price. Next, decide what to do with Mordus - kill him or spare him. You will also receive an amulet as a reward.
Go to the northern part. Cross the bridge to the ruins. Find the letter of the dwarf queen on the table - read it and take it with you. There will also be a hatch and a hole in the floor. With the help of the second one, you can get into the dungeon where the heroes were separated. The hatch can also be opened using the amulet that was donated by Mordus. Inside you can find the corpse of a dwarf on the altar. He will have a purse with an eye, which is needed as a key to the skull-lock in the basement of Mordus's house for the quest "A Taste of Freedom". On the way back, you will be attacked by the wreckage of the ship, and with a high degree of probability you will be cut off from your party members, and you will also be attacked by sharks and crabs. Teleport to a small area of land, and the shark will not reach you and immediately die. To get out, destroy the walls of the ship on both sides so that both your party members and you yourself get out.

When you have explored everything you want, return to Driftwood to Lohar. Tell him about Mordus, in return, in addition to weapons, he will also give you the key to the masters' chest (on the second floor of the barracks), as well as information about three important characters that can help in the investigation: the demonologist Jaana, the head of the cemetery Riker, and the elf Saheila.
Next, decide what to do with Queen Justinia's letter found in Mordus' vault. You can give it to Lohar and then the quest "Law of the Order" close, or give it to Magister Julian. In the second case, you will have to kill Lohar and then report back to Master Julian. However, remember that in this case, everyone in the dungeon where Lohar's hideout is located will become hostile.
Dark Deeds in the Dark Mines / Midnight Oil
This quest on its own will not increase your Source abilities, but is required for several other quests.
The quest is taken from the paladin Tom Hardwin, who commands a squad of paladins who have occupied the bridge north of Driftwood. Take the War Owl Whistle and cross the bridge to the east. Immediately, as soon as you find yourself on the other side, turn onto the east road going up the hill.

Approaching the Black Mines, you will meet the masters fighting with the fiends of the Void. Help them, and then you can either peacefully part with them, or kill them too. Walk a little further to the gate. There, if you use spiritism, talk to the spirit of the cook. If in the dialogue you stand between her and the attacker, then the spirit will tell about a certain master Stanley. We pass through the gate. On the porch of the house below, the masters want to execute civilians. This is part of the quest "On one's last legs". Read the passage of this moment in the appropriate section. In short, it requires a 5 persuasion not to execute any of the Crossby family, or to start a fight before the conversation with the magisters begins.
In the southwestern part of the Black Mines there is a hut in which the masters hold the bound robbers of the Black Circle, incl. Nikora. However, two screamers block the entrance there. Use any skill or weapon that allows you to absorb the Source, while the skill "Draining the Source" is not long-range enough so that you will not be attacked. Therefore, if there is no other way, just sneak up on the screamers from behind and use this skill.

Inside you will have a small conversation with two masters - Vorrkh and Raymond, after which the battle will begin. In addition to being quite strong, Magister Vorrh will use massive Chains of Pain on at least three members of the Black Circle, who will take the same damage as the caster. If you want to save them, you will have to somehow neutralize the effect of the spell. You can break the spell if someone from your squad uses the "Shackles of Pain" on the captives, thereby "stealing" them from Master Vorrha. The second moment - Master Raymond will try to run through the back door to the ship. If you do not have time, he will leave this place, but you will meet him later, but at a higher level.
Therefore, there are small tricks in this battle, so that the master does not run away, and save all the robbers of the Black Circle. Before entering the house, so that the conversation and, accordingly, the battle has not yet begun, go around it from behind. Teleport, standing close to the door, the robbers of the Black Circle to the pier, close to the ship (this will not bother the masters in any way). Close this door and block it with drawers to prevent Magister Raymond from escaping. The silent watcher guarding this place can be killed immediately, for some reason the fight does not start. Leave with bound prisoners from the Black Circle a character with the Chain of Pain skill. With any luck, this character will not engage in combat and the skill will recharge quickly, allowing them to free their captives from Magister Worrch's Chains of Pain in one turn.

Pass the rest of the characters to the main entrance. You can also break the oil barrels near the exit to slow down the enemies. The silent observer-archer at the entrance can also be painlessly killed right away. Go inside with a teleportable character and talk to the masters. The fight will start. Try to quickly teleport outside and teleport Magister Vorrh, who used Massive Chains of Pain, somewhere far away to play for time and not damage him while his spell is in effect. But Raymond should be the focus. Attack him by all means, try to slow him down, stun him, knock him out, etc., delay him by any means. Try to teleport Magister Vorrha away all the time, but do not damage him while his Chains of Pain is active. If, nevertheless, he fell under the distribution, treat the connected robbers of the Black Circle. If you are lucky and the character left with the captives did not join the battle, then immediately switch to him and destroy the Mass Chains of Pain spell, casting your own Chains of Pain on each of them in turn. If he is in combat, then take your time and do not damage Vorrh until you free all the captives while the skill is on cooldown.
After the fight, talk to the robbers from the Black Circle and Nikor. You will learn that the masters are looking for a certain artifact "Eteran" (the quest "Midnight Oil"). Also search the bodies, you can take the keys to the side room with a rat and a large number of corpses from Master Raymond. You can ask the rat what happened here, and also use spiritism to talk with the spirits. Also in the house, read the parchment with instructions lying on the table in the southwest corner.
The entrance to the necessary caves, where the masters carried out excavations, is located in the northeastern part of the Black Mines. Inside you will find many traps with poison and cursed oil. Use teleportation to get past them safely, or cover them with crates. However, be very careful with the "Phoenix Leap" skill, because fire on landing can touch the oil. At the dead end to the right of the entrance, you can use spiritism to find the spirit of the blind guide and get information about the area.

When you reach the wounded Master Ranger, prepare to fight the Flickering Fiends. Despite their several types, they are extremely susceptible to fire, but you should not use earth skills and attack with poison. After the fight, enter the wooden passage.
You will find yourself near the tracks for the trolleys. A canary roams here, from which you can learn about some local monster. If you turn left, teleport to another wooden passage and go inside, then inside you can interact with the mysterious column. If you have a Source point, then in return for it you will receive a recipe for the armor of the Eternals.
Exit back to the tracks and go straight. There will be a screamer ahead. In stealth mode, with one character, get as close as possible so that he does not notice you, and then teleport behind him. Use the Siphon Source skill to finish off the screamer. To the right of the paths just below there is a broken bridge, on which lies the skeleton of a worker and a leaflet "Rebuking Memorandum", giving new information on the quest "Midnight Oil". You have to teleport to access it. Take the old key from the skeleton.

Go past the altar of wandering further. Below, near the tower, you can see a chest - the key from the skeleton is just from it. The easiest way is to teleport the chest itself to you. Next we get to developed. If you go south, you will see masters fighting with fiends. If Magister Gregory survives, a conversation will begin. Even if you successfully pass the persuasion level check, he will still attack. Take the key to the armory from his body (located here), and also read his excavation log. Use spiritism and talk to the master's spirit. Interact with the glowing device in the center. In the southeastern part there will be terrible tablets of the Eternals, as well as a part for creating the armor of the Eternals. In the armory, read the diary on the bed. There will also be a secret door that leads to another mysterious column, which, if activated, will not give you anything. If you go to the cliff, then when you turn on spiritism, look for the spirit of the master swordsman. Teleport and talk to him, and get more information on the tasks. You can pick up a rusty key from his body. Return back to the mysterious column and go from it to the north, into the ruins. Turn on spiritism, and you will see the spirit of the canary. The rusty key will fit into the overseer's chest in the corner here. Now you can safely go down, where there was a battle of masters and fiends.

Head back to the cart tracks and head east. There will be several masters and a broken oil pump. If the white magistrate could be persuaded, the fight could be avoided for the time being. Read the book on the body of the Black Circle scientist lying near the Magisters. The device reboot sequence is as follows: amber, sapphire, emerald, which hints at the colors of the levers that should be pressed. Approach the broken oil pump and pull the levers in the following sequence: yellow, blue, green. They will attack anyway if you want to go further into the temple (you need to blow up the barrels of oil against the crumbling wall in the northern part). After the battle, you can talk with the spirit of the white master, then we destroy the wall and go into the temple of the Eternals. In front of the stairs to the top, on the right, there will be a chest with an artifact of the Eternals - it is necessary to create the armor of the Eternals.
After reaching the huge luminous sphere, check the skeleton near the device in the form of an inverted pyramid. Read his diary and then use the device to find out the riddle. It is necessary to activate the columns in a certain sequence. Comparing the descriptions of the years and the clues in the diary, we get the following order: Amadia, Tir-Cendelius, Dune, Zorl-Stissa, Zantezza, Vrogir, Ralik. If everything is done correctly, then the glowing ball will disappear. Go down to the center of the room and interact with the ancient sarcophagus. Before that, to facilitate the subsequent fight, separate the heroes and disperse them far from each other. Several beings materialize. If you have Fein in your team, then he will want to talk to the Eternal Ether.

After the conversation, the battle will begin. Enemies are immune to poison, but earth and air magic works well on them. Eternal Etera is easier to attack with physical attacks and piercings, you can constantly knock down, however, after leaving it, each time she will recover a little physical armor. Against eternal hunters, magic attacks are more suitable. If you quickly deal with the Eternal Aether, then her summoned creatures will dematerialize, but the original eternal hunters will remain. After the fight, take loot from the bodies of enemies, and also check the energy chests near the sarcophagus in the center of the room. One of them will contain an ancient stone tablet. Read it and you will learn the recipe for creating the Scythe of Deliverance. Take the tablet with you, because. it is needed for the recipe, as well as for quests "Generous Offer" and "Almira's Request".

Go outside and send a war owl with a message to the paladins by activating the whistle in your inventory. Return to the bridge controlled by the paladins. As soon as you arrive to them, the battle with twilight skeletons will begin. After the fight, talk to paladin Tom Hardwin to complete the quest and receive your reward.
Window of Opportunity / On the Last Gasp
In the northwestern part of the island there is a monastery forest. There are ruins there, it is better to enter them from the east side, where the cache of the lich of the Source is located (quest "Taste of Freedom") and Jaan (quest "Monster Hunter").
Talk to masters. You can immediately deal with them (in this case, you will make it much easier for yourself to complete this quest) or say that you will talk to the sorceress Hannag. In this case, go up to the second floor with north side, then use one character to teleport to Hannag. A conversation will begin, after which she will open a portal and quickly find herself at the top, next to your comrades. Masters will also be waiting there. Teleport back. Here you will need a persuasion level of at least 5 so that Hannag does not attack you. If you decide to deal with her and help the masters, or you simply do not have enough persuasion, then a rather difficult battle awaits you. Hannag will sacrifice himself and several portals will open. And each turn will get out the fiend of the Void. The portal is invulnerable to physical attacks, after 3 rounds it turns into a Nether Flayer. Also, after the three portals are destroyed, Hannag will appear, which will already fully participate in the battle. If you want to receive a reward, then do not let the captain die.

If you want Hannag to teach you how to better handle the Source (another Source cell will open), the best thing to do would be to attack the masters right away, while they are sitting in ambush at the very beginning, below. After that, talk to Hannag and ask about learning the skill of the Source, and then in return she will ask for one favor - to save her student Gwydane Rins. So get the quest "On one's last legs".
Once in the Black Mines and passing through the first gate, the porch of the house below, the masters want to execute civilians. If you go down there, a conversation will begin, and the sentence will be put into effect. Requires 5 persuasion not to execute anyone. Otherwise, in order for the Crossby family to survive, the fight must start before that - just talk to the master brute patrolling the area near the gate you just passed through and remind him of the cook he killed (ask if his name is Stamley) or just attack. If you decide everything peacefully, you will get experience points, but you can immediately deal with the masters to get additional experience, anyway, they will attack later when you return. After resolving the situation, release the prisoners and talk to the mother of the family - Idonia Crossley.

Follow further into the next part of the Black Mines behind the second gate. There, climb the tower to the suspended Guidane Rins. Speak to Whitemaster Jonathan and use persuasion to stall while the prisoner tries to escape. As soon as he gets out, the fight will begin. In addition to the masters, many fiends will appear here. First, there will be oily small ones, it is enough to attack with fire with them, extensive oil stains will especially help you, which will ignite and cause severe damage to fiends. In the second stage, in addition to small ones, several large fiends - ancient ones - will appear. Tactics are similar. But the third stage will be fiery, which from the widespread fire will only be treated. The trick is that the fire around will very quickly turn into corrupted, and your task is to destroy the physical armor as quickly as possible, thereby imposing a spoilage effect on these fiends, and now they will receive damage from fire instead of healing. The fight will still be extremely difficult, because. Gvidane will receive in addition to direct damage, he will also spend health when he runs through fire. Your task is for him to survive at any cost. Constantly heal him and restore armor.

There is also one little trick. If before you climb the tower to the White Master Jonathan (that is, before starting a conversation with him) you teleport Gwydain directly from the rope to the ground somewhere far away, then the fiends will not participate in the battle.

After the fight, talk to Gwydain near his family's house (Crossby) and get a reward.
Generous Offer / Reluctant Servants / Weaver
Follow the cemetery (Pogost) on the east coast. Inside you can talk to the cemetery watchman Farima. She will ask you to kill Riker (the quest will start "Servants involuntarily"). Go to his house (located in the northwestern part of the cemetery). The door is locked. To get inside, interact with the door and tell the truth.

Riker will be sitting in his office on the first floor to the right of the entrance. He will ask you to find the tablet (the quest starts "Generous Offer"). It is located in the Black Mines, in a cave where excavations are being carried out. For a more detailed walkthrough, read the section with the passage of the task. "Dark Deeds in the Black Mines". Get to ancient temple and remove the ancient tablet from one of the chests in the center of the room after you remove the huge luminous sphere blocking the path.
If you already have a tablet, you can immediately give it away, but you will get less experience (teleport somewhere and go back to the house to get maximum experience points). If you go on another trip, then when you revisit Riker's house, you will receive a note that he decided to prepare for our arrival. The entrance in the form of a hidden hatch is located in Riker's office, where we met him when we first got into the house, near the north wall. So you will find yourself in the basement.
As a reward for the tablet, Riker will help us improve the possession of the Source (add one more cell). However, you will have to pay for this with the souls of the dead, whose bodies are in the cemetery. If this is against your principles, then stop the ritual and fight Riker. You can also attack Riker after he teaches you. It is recommended to kill him first, because. as soon as he dies, then his servants too. To get more experience, then deal with the servants first, and try to keep Riker in a knockout or other state that does not allow him to act all the time.

After the victory, take valuable items from Riker's body, incl. the keys to the basement and his work desk. Also note that there is a mirror near where Riker stood, and next to it is a lever. Use it, and open the door without a keyhole to get into the room opposite the vertical stairs to the basement, through which we got here. Also take the strange metal key from the fireplace. Now you can go into that room and open the glowing chest. This will require the same key and a Source point. Inside will be the third yellow pyramid of teleportation.
Return to the first floor. Behind the stairs in the corridor there will be a hatch to the dungeon. The key to it can be taken from Riker's body. You can do the quest there. "Opposites Attract".
Also on the ground floor in the hall in the southern part of the building you can read the book "The Exploits of Four", lying on a cabinet near the dining table. The quest will start "Shelter of Heroes". Also in the corners of the room there are stairs to the second floor in a closed room. To get there, you need a hero with pumped power. Also, if you try to climb through the southeast stairs, then the hero must also have the "Animal Friend" skill. A spider will come out there and, if you have any part of the body with you, you can try to negotiate with it. The quest will start "Weaver". First, get experience, and if you agree and then bring three more body parts, then she will give spider silk gloves. The quest will be completed. If desired, you can then attack the spider.

Elven seer / Tribe of Saheila / Funeral rites and other sawmill quests
Saheila tribe
This quest comes from Fort Joy and can be obtained after rescuing Amiro on a quest "Captured Elf". It's enough just to find the elves' camp and talk to them. This camp is located in the northeast of the map, east of the destroyed bridge to the island of the Blood Moon and south of the sawmill. It takes a high level of persuasion.
Funeral rites
It is necessary to participate in the burial rite, optimally - as an elf. To get the maximum amount of experience, choose the top answers.
Vengeance for the fallen
If Saheila was killed in Fort Joy, then you will receive this quest, and not "Elven Seer". The task, in fact, is the same - to find and kill Rust (read the passage further in the section "Elven Seer"), and then take his hand to Tova in the elven camp.
Elven seer
Main Quest "Elven Seer" you can take it in two ways: or visit the elven camp in the forest and talk to Tova, if you do not engage in battle with them, of course. She will ask you to find Saheila at the sawmill. The second option is to immediately go to the sawmill and find Saheila there.

Northeast of the altar where the quest was "Test of all seasons" There is a territory separated by a high fence. This is a sawmill. You can get into it either from the flank, passing along a huge root thrown over a cliff on the western side, but then the battle cannot be avoided, or you can go through traps from the southern part. It is better to use teleportation abilities so that the traps do not work. If you pass from the south side, then the guard Pigboy will automatically start a conversation. If you manage to convince him, then there will be no fight. We go to the leader of the Lone Wolves, Rust Anlon. On the way, it's better to turn on "Spiritism" and take the following quests: "Flame of Old Love", "Not for Laughing", "Commissions", "A Log Like a Log", "Bitter Medicine", "An Eye for an Eye", "Not by washing, so skating".

The entrance to his chambers is located in the eastern building on the second floor. The stairs will be inside at the northeast corner of the building. Talk to Rust. If you have Sebilla in the squad, let her talk to him. The fight will start. During it, don't accidentally kill Saheila. After the battle, turn on spiritism and talk to the spirits of the children killed by Rust, as well as the spirit of Rust Anlon himself. Search all around, in one of the chests there will be a contract to kill, which will continue the quest "Valuable Prey". You can look into the black mirror. Talk to the bound Saheila, untie her and go outside. If you cleared the sawmill yard earlier, then there will be no battle, if not, then get ready for battle. Keep in mind that Lone Wolf mercenaries will try to attack Saheila first. The Worn Key, which can be found on the Witch Doctor's body, opens the gate in the northern part of the sawmill. After you've killed all the enemies, talk to Bowmaster Corbin Dey, standing in the southeast corner of the sawmill yard, just south of the building with the livewood log. He can join your team on the ship (quest "Not by washing, so by skating", there is a bug in the game, and it does not appear on the ship). Also talk to the spirit of Cyrus Oates at the southern entrance to the sawmill, he will thank you for killing Pigboy, and will give additional experience (he should give the quest "Silent Ghost", however, due to a bug, the quest does not start).

Leave the sawmill. Saheila will leave you for a while. Go to the elven camp just to the south. Talk to Saheila. If Sebilla is in your squad, then she will find out the truth about herself. The main character, Saheila, will learn to better own the Source (will give one more Source point), and without consequences for anyone else.
Flames of old love
Near the southern entrance to the sawmill, on the western wooden platform, you can find the spirit of Edie Engrim. She wants her killer to say her name. Here, a mercenary from the Lone Wolves named Vinokur wanders nearby - talk to him. It takes at least level 5 of persuasion to get him to say the victim's name. After he nevertheless utters the cherished words, talk to the ghost again.

No laughing matter
In the western building in the northern room of the sawmill, use spiritism to make the spirit of the Gravedigger appear. Talk to him and agree to help. Dremoseka sleeps in the same room. Try to talk and place a cold hand on her cheek. She will tell everything. Then talk to Gravedigger again and convince him to go to the Halls of Echoes, absorb his Source or just leave him. The treasure will be on the shore to the west of this building. If you then deal with Dremoseka, then the sawdust-covered key, which can be obtained from her body, unlocks the door to her room.
Commission
In the southern part of the western sawmill building, you can talk with the spirit of the paladin Everhart. He will tell you about Mommy's weak spot. After killing her, speak again with the spirit of the paladin Everhart, and then with the paladin paladin Tom Hardwin, who commands the band of paladins that occupied the bridge north of Driftwood, to receive a reward.

Log like log
In the east sawmill building, use spiritism to find an unusual log. Talk to him, and the spirit of the elf who lives in the living tree will ask you to deal with his offender. The spirit of the foreman from the sawmill can be found south of the sawmill among the traps. Find two graves, in the western one - there will be a body. Dig and talk to the ghost using spiritism. To kill him, as the log asks, absorb the Spirit Source. Then return to the log. As a reward, you will receive a livewood shield.

Bitters
In the center of the sawmill, use spiritism to speak with the spirit of the Black Widowmaker. It is necessary to kill the Serpent Root sitting nearby. After you deal with her, talk to the spirit of the Black Widowmaker again to complete the quest.
An eye for an eye
At the sawmill on the eastern wooden platform near the southern entrance, you can find the spirit of the old magician. Remove the bolt from his throat and he will ask you to take revenge on his killer. Deal with the well-aimed shooter who walks around here. After that, talk to the spirit of the magician again, and get one of the proposed skills.
Monster Hunter / Lawyer / Secrets of the Blood Moon Island / Forgotten and Damned and other quests of the Blood Moon Island
monster hunter
In the northeast corner of the western part of the island, Jaan can be found standing near the cage with the demon. This character is also important for Lowse's personal quest. Also, if you complete his quest, then as a reward he will improve your possession of the Source (which is necessary for the story quest). He will ask you to enter the island of the Blood Moon and kill the demon Lawyer.

Lawyer / Secrets of the Island of the Blood Moon
Go to the broken bridge in the north and use spiritism to reveal the hidden sections of the bridge. Use your teleportation abilities to follow them all the way to Blood Moon Island. Beware of traps scattered in these areas.

After reaching the island, open the gate and talk to the Corrupted Pilgrim. He will send you to the Lawyer, who lives in the southern part of the island of the Blood Moon. He will immediately offer, in exchange for a service, to teach him to better master the power of the Source (an additional Source cell), but for this you will have to sacrifice the soul of a stranger whom the Advocate will call for. You can opt out of this ritual. If you have 3 Source cells, then he will give a skill book, but you still have to make a sacrifice. Also, as a reward for the service, the Lawyer can reveal the location of the Nameless Island. The service for him is quite simple - to deal with the representatives of the Black Circle in the center of the island of the Blood Moon, surrounded by an unusual ancient tree.
As soon as you get closer, a conversation with the Torturer of the Black Circle will begin. If the conviction is pumped, then the battle will not start immediately, but if you come a little closer, then the battle cannot be avoided. In the detachment near the Black Circle, there are mostly magicians, try to knock down physical armor and knock it out, and then the battle will not be difficult. After defeating the representatives of the Black Circle, the Advocate will come and tell you where the Nameless Island is.

From the body of the Tormentor of the Black Circle, pick up and read the mysterious letter. The quest will start. You need to go to the Archive. The entrance is hidden in the northeast corner of the island (there is a mark on the map), and in order to find it, you will need a pumped perception. If there are not enough points, you can use a skill that gives "Purity of Mind", for example, "Calm of Mind".
Once inside the Archive, read the book "The Archivist's Diary" lying on the table in the center of the room - this will tell you the name of the tree (Eleaness). On the shelf just to the east of the table, interact with the books and read the medical report ("Possessed Wanderer's Map") - the quest will begin "Bound in Pain". Among the books on the shelf in the southwestern part of the room will be another medical report ("Map of the Possessed Awakened"). Read it and the quest will begin "Uplifting Deception". The third medical report ("Card of the Possessed Child") will lie among the books on the shelf in the northwest corner of the room. Reading it will start the quest "Silent". Also use Spiritualism to talk to the spirit of the Archivist - the quest will start "Forgotten and Damned". After that, read the book "Taming the Holy Fire" by a character with the tag "Scholar". It can be found on the corpse of one of the representatives of the Black Circle, killed near the ancient tree in the center of the island, as well as in a pile of books near the eastern wall of the same archive room with the spirit of the Archivist.
In the northern part of the room there is a secret door, which can be found with a sufficiently high Perception. At the end of the adjoining room on the altar lies the Strange Blade - this is part of the Anathema according to the quest "Family Business". If you have a lizard in your squad, then he will be able to make out the speech of the blade. Either way, take it with you. There is also a glowing tenebrium chest. It can only be hacked, and you will need a theft level of at least 4. Also, when you open it, you will need a Source point. Inside there will be a green pyramid of teleportation.

Before returning to the ancestral tree in the center, you can talk to the spirits of Brother Kaylan in the northwestern part of the island and the Elven Pilgrim (druid) in the southwestern part of the island next to the cages to learn more about the Doctor and the ancestor tree (the quest will start "Druid", it's buggy, so it doesn't appear in the log).
We go to the center of the island and turn on spiritism to try to talk with the ancestral tree. The lawyer will be against, and the fight will begin. After the victory, talk to the ancestor tree again. Call him by name (Eleaness), and she will pronounce the name of the demon who enslaved her - Adramalich.
Forgotten and damned
First you need to collect a couple of silver ingots: one will lie on the pier in the eastern part of the island and be guarded by demons, the second will be near the ancient forge in the north of the map. After that, you need to use this ancient forge and create two lever handles (recipe: ancient forge + silver ingot). After that, you can proceed directly to the task. There are four vaults to visit. One is located in the east of the island near the pier of the island of the Blood Moon and with an entrance in the form of a hatch on a pedestal. There will be nothing interesting inside, except for loot, but it is mandatory to visit in order to complete the quest. Three others are located in the southern part of the island and are directly related to tasks "Bound in Pain", "Uplifting Deception" and "Silent". The entrance to these vaults is in the form of statues that need to sing a hymn that we learned from the book "The Taming of the Sacred Fire".
"Uplifting Deception". The entrance to the vault is marked with a marker on the map and is located near the initial gate of the island of the Blood Moon next to the invisible bridge through which we got to the island. The entrance is under the statue. To open it, read the hymn to the statue, and it will collapse, and a hatch will appear in the vault. Inside, turn on spiritism and talk to the spirit of Brother Robert. He will refuse to let you in. Go a little further to the sealed door and pay attention to the device next to it. Restore the mechanism by replacing the silver handle of the lever. Try to use the device to open the door, but nothing will work. Talk to the spirit of Brother Robert again. If you manage to convince him, he will open the passage himself. If not, then just draw the Source from it.

Go to the opened room. There will be a chained Rajarima. If you manage not to succumb to her persuasion (you need at least 4 persuasion), then just shoot her while she is in chains. If you release her or fail the persuasion level check, she will attack, draining a couple of Source points from the character who was talking to her, and thereby destroying the shackles, and also attacking the nearest character, inflicting huge damage and most likely killing him hero. After the fight, talk to Brother Robert's spirit again to complete the quest.
"Bound in Pain". The entrance to the vault is located under the central statue and is marked on the map. Similarly to the previous one, read the hymn to the statue and open the hatch. Inside, read the four torn pages of the diary lying on the floor. After that, turn on spiritism and talk to the spirit of brother Calvin. As in the previous vault, we restore the door locking device and pull the lever. Then again we talk with the spirit of brother Calvin. If you convince him, then he will open the door himself, if not, absorb his Source. Talk to the Bound Possessed Dwarf. He will ask you to destroy the columns holding him. However, do not rush, first be sure to save. You can also make the upcoming fight a little easier for yourself and attack him before destroying the columns, thereby reducing his health to a minimum of two times.

If you want to save the dwarf's life, you will have to reduce his health to the minimum a couple of times without killing him. Please note that the first time he is affected by "Avoid Death", which does not allow him to die, and the second time he does not have this effect. After that, destroy the pillars, and the demon Morr Rottenmaw will appear. Dwarf - Adventurer will now fight for you. The fight will be difficult in its own way. The demon will, after a single attack, move into one of your companions, which will be indicated by the corresponding icon near the character's portrait, and attack you. He will leave the body of a party member only after he also reduces the health of the possessed companion to a minimum. In order not to kill the character without calculating and killing him, inflicting too much damage on him, use the Life on the Edge skill, which will not give you the opportunity to kill the character for two turns. After you defeat the demon Morr Rottenmaw, talk to the adventurer who was a possessed dwarf. He will be grateful and tell you about the cache (it is located in the southwest of the island and is marked on the map). Then talk to the spirit of brother Calvin.
"Silent". The entrance is located under the western statue and is indicated by a marker on the map. Read the anthem and blow up the statue. Inside, talk to the spirit of Brother Morgan. Say that you will take the girl with you, and he will open the passage for you. Inside the pillared room will be the skeleton of Buttons the cat and a chained, possessed child. Here you will need a high level of persuasion. Talk to the cat and ask permission to help her owner. If the persuasion doesn't work, then Buttons will have to be killed. After that, destroy the columns to which the girl is chained, and then talk to the child. If the level of persuasion is high, then it will be possible to revive the girl a little. After that, teleport the girl to your ship "Lady Vengeance".

After completing all four vaults, you will complete the quest "Forgotten and Damned". After that, return to the demonologist Jaan (quest "Monster Hunter"). He will offer in exchange for the death of the Advocate to teach the possession of the Source (add another Source cell), but in return it will be necessary to kill the demon in the cage nearby. If you already have three Source cells, then he will give you the Summon Inner Demon skill book. If desired, you can refuse the ritual. Also, if you have Lowse in your squad, he will try to expel the demon sitting in it, but he will ask you to find out the name of the demon. This is exactly the same demon whose name we learned during the quest "Secrets of the Blood Moon Island". If you already know, tell Jaan or return after the ancestor tree on the island of the Blood Moon tells you the name of the demon Adramalich. Jaan will start the ritual, but nothing will come of it. The continuation of the story of Louse will be when you arrive in Arks. Jaan can be taken with you to the ship "Lady Vengeance".
Sudden Lovers / Almira's Request
Near the burning ruined Traveling Altar building in Paradise Hills, use Spiritualism to talk to the farmer's spirit. He will tell about a certain witch who fled to the north.
A marker "Almyra's Refuge" will appear in the northeast of the map. You can get to this part of the island either using teleportation skills. We talk in the house with Almira. We agree to take them to a safe place, but first it is desirable to remove the putrid veil from the area, which imposes permanent damage. To do this, we go to the northeast and jump over the rift with the help of teleportation. We fight with the Harbinger of Doom and his henchmen. After that, return to Almira. For the service, she will teach you the power of the Source (will give you an additional Source point). After that, he will ask you for another favor (the quest will start "Almira's Request"). She asks to find the tablet of the Scythe of the Deliverer, the same one that Riker is looking for on the quest "Generous Offer".

It is located in the Black Mines, in a cave where excavations are being carried out. For a more detailed walkthrough, read the section with the passage of the task. "Dark Deeds in the Black Mines". Reach the Ancient Temple and remove the ancient tablet from one of the chests in the center of the room after you remove the huge luminous sphere blocking the path. If you already have a tablet, you can give it to Almira. Otherwise, meet her on your ship and give her there.

Other side quests
hide and seek
In the southern part, just west of the landing site, you can find a shark on the shore. Helping her won't work. Kill her and use the elf to eat the leg, which can be taken from her body. So you will learn about a certain boy Joe. The continuation of the quest will be in Driftwood.

Two children are standing on the quay - Harrietta and Ben Buttons. Tell them the truth or lie about their friend, it's up to you.
When to count chickens
A little north along the road from the looted caravan, you can stumble upon a chicken coop. Talk to Big Margin and she will reveal that their eggs have been stolen and indicate on the map the location where the thieves went.
This place is located a little to the north and is marked with a red marker. On a narrow strip of the beach, you will come across six infected eggs, from which the cubs of the void will hatch. After a few turns, an adult Poison Fiend will also appear. After the victory, a little to the north, take the egg with Squeaker. Go back to the chicken coop and give Big Margin's egg. As a reward, she will tell you where she hid the treasure. It is buried between the chicken coop and the cliff.

Go back to the chickens after you get the ability to see spirits with the "Spiritism" skill in the story. The chickens are all killed, only Piskun survived. Talk to him and he will join the squad. Also use spiritism to talk to the spirit of Big Margin. She will tell you to find your father. We go north, to the bridge controlled by the paladins. We pass along it to the east coast and then we follow to the northeast to the marker. There, talk to the Magic Rooster.

You can either agree to kill Piskun right away, then the quest will end instantly, and you will receive a reward. If you refuse to kill the chick, it will turn into a fiend of the Void and attack you. Each turn it will multiply, so kill the maximum number of copies per turn.
Missing Magisters / Strange Cargo
Near the warehouse on the Driftwood pier, you can stumble upon Master Warland. She is looking for a certain old man. Also, on the veranda of the Black Bull tavern, talk to the elf Stuart, he will also give a few clues.

In the southeast large building of the port of Driftwood (fish warehouse), go to the southeast private room. In one of the barrels, Higba the Junkman will hide. He will ask you to take him out of the city (the quest will start "Strange Cargo"). Walk west along the south wall to the corner of the building. Separate a character with the "Teleportation" skill from the squad and direct him to a wooden elevation a little to the west. There, use teleportation to send Higba to the other side. In gratitude for the salvation, he will give a scroll, and also share information about where he got this item of the masters. If you wish, you can also not save it, but give it to the masters.

We go to the tavern. Buy Meat Stew from Lovrik and eat it as an elf character. You will learn that the masters were killed by the cook Wivlia. Also use spiritism and talk to the spirit of Magister Harrick near the bar. She will tell you about the ring. Go to the cook and file charges. She will say that we have no proof. Therefore, in stealth mode, when Wyvlia moves away, open the unusual floorboard (loose board) in the northwest corner of the kitchen. There will be a master's seal. Take it and talk to Cook Wivlia again. She will attack. You can also not show the ring to the cook, but first talk to the spirit of Master Harrick, as well as Masters Carver or Stuart. Carver will send Master Bellward to arrest the criminal, but she will fail, and the cook will attack you. Another option is to keep everything a secret and not tell the masters what happened. If you fought Wyvlia, take from her body and read the stained recipe ("Wyvlia's Cook List"), which lists the victims.

If you kill the cook and tell Stuart everything first, he will run for the reward instead of you. In any case, to complete the quest, talk to Magister Carver in the barracks and give the Ring to Harrick (Magister's Seal).
Lost and found
Lagan can be seen on the coast southwest of Driftwood. He will tell you that he lost his wedding ring. Approach the water and, if the perception is high enough, a copper ring will appear. Take it. Fiends will appear, led by Moloch of the Void. After the victory, wait until Lagan comes running and give him the ring. If you do not ask for rewards, you will receive experience points.

empty dreams
In the southwestern part of the map, not far from the place where our ship moored, there is a beach with an ancient lamp. Rub it (preferably with a character tagged "Mystic") and a Genie will appear. The conversation will start. When the first opportunity to use characteristics in a conversation presents itself, choose the one that has the "Mystic" tag on it. Then you can get normal rewards. Otherwise, they will be the following: a lightning strike for wanting power, a stolen amulet for wealth (the attitude of the guards towards you will become bad), a book of insults "Children's Tales" for wanting knowledge, and permanent blindness for wanting to kill your enemies.

If the persuasion is successful, the rewards will be the following: the sword "Djinn's Scimitar" for power, the expensive unstolen amulet "Gift of the Genie" for the desire for wealth, a level 3 skill book for wealth, and a level 5 scroll for the desire to kill your enemies. Heroes can also ask to grant their unique wishes, however, the genie will not grant them and will offer to choose from standard options. Also, another option could be a fight with a genie, then you will get experience, depending on the level of the characters, as well as a lamp.
Love has a price
In the tavern, you can talk with Lovrik and ask for something more exotic. For a fee, you can sleep with a lizard. After receiving the key, go up to the second floor and on the opposite side of the corridor, unlock the door to the upper floor to the private quarters. Leave the rest of the members here, and with the chosen hero, go upstairs and talk to Jayra.

Waking up, the hero will see assassins around him. You can either pay them or fight, but you won’t have any things, so the fight will be difficult in its own way. If Ifan ben Mezd slept with the lizard, then the killers, led by Jill Thunders, will simply leave. After you deal with the mercenaries, go downstairs and talk to Lovrik. He will talk about Livi's daughter. We'll have to go to the kitchen and see if he's telling the truth. Ask Weevlia if she knows the girl. After learning the truth, return to the main hall of the tavern, but Lovrik will have run away by this time. This will complete the quest.
Web of carnal desires
In Lohar's hideout, talk to Dorothea the Luxurious. Name her some feat, and then she will offer the fulfillment of one of the desires. If the variant features a huge oak tree, you will permanently get +2 Strength and -2 Constitution, a swan feather - -2 Constitution and +2 Intelligence, a golden chest - +2000 gold and -2 Constitution, a majestic dragon - -2 Constitution and +2 Perception), transparent chrysalis - +1 Shining Idol of Rebirth (which will make it possible to be reborn automatically once per battle) and -2 Constitution.

To receive your reward, follow Dorothea to the western part of Lohar's hideout. Leave your companions a little further away, and you yourself will talk to Dorothea, who has turned into a spider. She will offer a kiss to receive a reward. In the talent menu, the gift will be called "Spider's Kiss". She can also be killed.
Grief will not flood
On the second floor of the Black Bull Inn in Driftwood, enter the room near the stairs. Talk to Captain Ableweather. She will ask you to stop the ringing of the bell. Use spiritism to make the spirit of the sailor Stubbs appear in the room. Convince him that it's time to go to the Halls of Echoes and he will disappear.

Talk to Captain Ableweather again and she will tell you where her ship is and also the compass. The wreckage of the ship can be found in the westernmost part of the map on the beach near the cliff. There is also an exit from the Cave of the Shipbreakers below. Open the hatch on the deck of the ship. In the hold, use teleportation to get a chest out of the fog of death. Or you can go to him as an undead hero. Inside will lie the captain's amulet-compass.

Merchant
On the second floor of the Black Bull Tavern in Driftwood, in the room in the western part, you can meet the merchant Boran Lever. Talk to him and then use spiritism to see the spirit of the real Boran Lever. He will ask you to kill the impostor.

Please note that after death, several items from his goods will randomly drop from his body. Therefore, before accusing him and killing him, buy what you like. After the fight, talk to the spirit of Boran Lever again and complete the quest. On the body of the impostor there will be a key to one of the chests in the room (the second is by the closet near the bed), as well as mysterious orders that will send you to the lone wolves sawmill.
Sleeping adventurer
On the second floor of the Black Bull Inn in Driftwood, in the northern room, you can find a sleepy adventurer in the corner and an unusual chest with a glowing lock near his bed. Interact with the chest (but don't hack). A conversation will start, select the "swear under your breath" option, and the chest will ask you to say a code word. If you are talking to a character with the "joker" tag, then use a special phrase by saying the code word "word".

Otherwise, leave the chest alone and repeat the procedure with the character with the "joker" tag. If there is no one on the team, take control of a character with the tag "mystic" and try to talk to the sleeping adventurer. Select a special phrase tagged "mystic" and then ask for the password and sing a lullaby to it. After that, open the chest.
Stranger in a foreign land
In the cemetery (Pogost) you can meet the spirit of Vilnx Kriva (use spiritism near the altar of wanderings in the northeastern part of the cemetery (Pogost)). He will ask for his body to be reburied. Dig a grave near his spirit. Take the separated leg of the lizard and throw it into the eternal fire (between the statues in the form of dragons, where there was a chest according to the quest "Snake language"). The spirit of Wilnx Kriva will appear and thank you.

Shelter of heroes
In Riker's house in the cemetery (Pogost), on the first floor in the hall in the southern part of the building, you can read the book "The Feats of Four", lying on a pedestal near the dining table. This will start the quest. A marker will appear just south of the altar of wanderings. Follow there and find four sarcophagi in the part of the cemetery separated by a fence (Pogosta). Interact with each of them to find out the location of their treasures. After you finish studying the fourth sarcophagus, these same heroes will appear in the form of undead.

The fight will start. Each of the opponents will have two lives, at first there will be an easier form, after death the protection will increase significantly. After the victory, find the treasure of each of the heroes (markers will appear on the map):
- Buried Treasures of Garrick - Northeast of the cemetery (Pogost)
- Buried Treasures of Vidia - in the southeastern part of the Black Mines near the entrance to the excavations
- Buried Treasures of Bromley - near the sawmill in the northern part of the map, not far from the root-bridge over the river.
Buried Treasures of Halla - northeast of the sawmill, on the shore near the caravan.
Priceless loot
Due to a bug (or intentional changes by the developers) it is not displayed in the journal as a quest. In Riker's house in the cemetery (Pogost) on the first floor near the stairs, use spiritism to make the head of the deer glow. Interact with her and a deer spirit will appear. He will ask you to find a special place in the grass.

We leave the cemetery (Pogost) through the northern gate next to Riker's house. Go across the road and use spiritism to make the spirit of the deer hunter appear. Inside the circle of flowers, with enough perception points, a mound will appear. Dig up the corpse of Chaucer's deer, and you can pick up a note and a bow from deer antlers from the corpse of a hunter.
Competition in popularity
Due to a bug (or intentional changes by the developers), it does not appear in the journal as a quest, but it does give experience. On the second floor of Riker's house in the cemetery (Pogost), in private chambers, you can meet the dog Point and the cat named Whitetail. They argue over who the owner likes best.

In persuasion, you can use Dot's collar (can be found in the basement of the house - a hatch behind the stairs on the first floor) if you want to side with the cat, as well as Whitetail's ball (lying on the floor in the room with these animals) if you want to side with the dog. As a reward, the cat will tell you about the diamond under the bathroom, and the dog will tell you about the hatch to the basement in Riker's office.
existential crisis
In the cemetery (Pogost), go down the stairs just southeast of the altar of wanderings. From a pile of grass, someone will start talking to you and ask you to dig it out. As soon as you complete the request, Crispin's skeleton will appear. He wants to play a game where you have to answer three questions correctly.

If you have undead (Fane) in your squad, then go through this quest with them, in the dialogue options, select the options marked with the "undead" tag. If there is none in the detachment, then go to Riker's house and read the three volumes of "The Essence of Existence" (on the first floor - in the study and hall, and also on the second floor - in private quarters).
Opposites attract
Rory the rat and Betty the turtle can be found in the basement of Riker's house. Talk to the turtle and then to the rat, ask her to sit quietly for a while, but nothing will come of it. Then talk to the turtle again and create a food path. It is better to start it from a turtle. If everything is done correctly, then Rory the rat will run up to Betty and a purple haze will appear around them. Talk to the turtle again and the quest will end.

snake language
In Riker's office, the Salamander Ziu can be found. To communicate with her, you must be either a lizard with the talent "Animal Friend" and the tags "Scientist" and "Nobleman" (Red Prince). If you do not have a lizard in a team with these tags, but there is a character of a different race that matches the conditions, you can use a mask of reincarnation on it. You can also return to the ship "Lady Vengeance" and use the mirror in the hold to redistribute the talents, but the tags cannot be changed.

Having learned the password, go to the eternal fire in the cemetery (Pogost), teleport the box from the fire and interact with it to open it.
Man and his dog

On Driftwood Square, near the fountain, you can meet a beggar and his dog named Ryzhik. If you have the Animal Friend talent, talk to the dog and put your hand on the scruff of the neck in conversation, then you will notice that he has a spiked collar around his neck. Turn the collar inside out. The dog will run away. Burn with a beggar-loafer, you can blackmail him and get money. Find the dog in the graveyard on the east side of the island near the south gate. He will tell you that the memorial in the center smells strange. This will complete the quest.
Dangerous to yourself and others
Northeast of the cemetery on the hill there is a house near which Gregorius Swann walks. Convince him that you can help and go down to the basement of the hut. MUST approach the woman with a character with the "Scientist" tag, otherwise you will not be able to cure her. Examine it, and notice a trace of trepanation. A fight will start and 4 demons will appear. To get the maximum amount of experience points, then kill them first, and then take on Natalie Bromhead. Reduce her health to a minimum, but do not kill her, and then the fight will end, and a dialogue will begin in which you will have to carry out an operation. It is recommended to save during the battle when you see that there are 1-2 turns left. In the next part, there is a hidden test for the level of the "intelligence" and "dexterity" characteristics. If the character who initially approached Natalie before the battle has low levels, then during the battle in the last round, activate "Purity of Mind" on this character (the "Peace of Mind" skill).

For the girl to survive, choose the following options:
After the operation, talk to the girl (if she survived) and then to Gregorius Swann to complete the quest. If the operation was successful, the doctor will make a discount on the goods for you. If not, on the contrary, the attitude will worsen and prices will rise.
bestial treatment
Among the meadows north of Driftwood there are two cows - Mabel and Geraldine. In a conversation, they will tell that in fact they are people who were bewitched by the witch Alice Alisson.

You need to find a potion for them in a hut nearby (slightly to the west). The door to the house, of course, is closed, so it's worth finding the key. It lies on a hill on the south side of the house. Inside the house, you must definitely pick up the witch's eye, and then enter the basement through the hatch in the floor. You must either crack it or take the key from the witch herself. The revived corpse of Alice Allison can be found north of the ruins in the Monastery Forest.

Nailed to a cross, she rushes about in a small area engulfed in fire. You can try to persuade her, but in any case, she will attack. The battle is very difficult, disperse the members of your squad in advance so that from the first move of Alice Allison, everyone does not immediately die. In combat, attack your witch first. Try to knock her out. It is also vulnerable to water magic, but poison and fire should not be used against it, because. it will heal her.

After the fight, take the key to the witch's cellar from the corpse and return to her house. Open the cellar. There will be a lot of rats in a large room, which, when approached, explode, attacking with poison or fire. It would be most optimal to take control of an undead character and destroy all minks from which rats will constantly crawl out, or similarly destroy minks, but with long-range attacks, using elevations so that rats do not attack you.

To open the grate to the next room, use the lever on the floor in the far corner from the entrance. There will be a giant frog STD behind bars. She has the recipe book. To pick it up, you have to kill the frog. Only a character with the tags "Mystic" and "Scientist" at the same time (Fane) can read this book. If there is no such character, then here is the recipe: witch's eye + Caesar mushroom + catalyst. The witch's eye, as already mentioned, can be taken on the first floor of the house, the Caesar mushroom grows everywhere, and the catalyst can most often be found in the Monastic Forest. We prepare the potion, and also take the second vial from the shelf near the desktop. We return to the cows. If you do not ask for a reward, you will get more experience. It should also be remembered that two potions should be given at the same time, otherwise you will help only one bewitched person. Also, you should not drink this potion yourself, because. the hero will turn into a cow, you can help him return to his former appearance only by killing and then resurrecting, or you can let him drink this potion again.
ugly duck
Among the meadows north of Driftwood, you can find Ferno's bird, which has caught a certain disease. Talk to her. It's actually a phoenix, and it's just his turn to be reborn. Just use any fire spell on it and it will turn into an egg. You can just take it or eat it to get the "Phoenix Leap" skill. If you take it into your inventory, then you will not be able to eat it.

Merchant Eithne
You can meet her in the northwestern part of the island, between the ruins in the Monastery Forest and Liam's cache (quest "Aggressive Takeover"). She needs the Corpse Explosion Skill Book. This book can only be crafted by combining two skill books in the crafting menu: necromancy lvl 1-2 + pyrokinetics lvl 1-2. Give the resulting book to Eithna. Then visit her grave in the cemetery (Pogost) - there will be a corresponding marker.

Competitors
The quest is taken from the troll Grog, guarding the stone bridge on the west bank (if you go from the city along the northern road in a straight line after you cross the bridge). The fee he offers is pretty solid, so ask if you can somehow reduce the price. Then he will talk about a competitor - the troll Marga. To find it, go back a little to Driftwood and turn into the northeast branch that runs along the coast. Along the way, you will meet bears standing near the beehives. You can talk to them, but if you try to steal honey from them, they will attack. If you use spiritism, then next you will find the spirit of the Source sorcerer, in a dialogue with which you can find out what happened here. In battle, these bears will turn into Voidtouched.

Marg will stand on a stone bridge connecting the western part of the island and the central one. If you say that Grog sent to kill you to kill him, then Marg will issue a counter offer to deal with a competitor. If you kill Marg first, and tell Grog about it, you will receive a reward, and Grog will take the bridge that Marg controlled and raise the price to indecent heights. If you accept Marg's offer and kill Grog, then Marg will increase the price to very high values. In any case, after receiving a reward for the head of a competitor, in order not to pay for passage through the bridge, you can kill the second troll. Both use the "Troll's Blood" skill in combat, which restores health every turn in large quantities. To remove this effect, attack with the elements they are vulnerable to - fire for Grog and poison for Marg. While Poisoned for Marg and Burning for Grog are active, Troll Blood will not work. You won't be able to knock them down, but you can stun them so that they miss the next turn.

Taste of freedom
This quest can be obtained in the basement of Mordus's house (you can get there on the instructions of Lohar "Shadow over Driftwood"). There is a castle in the form of a skull on the wall - interact with it and get the task. The key to it in the form of a ruby can be found in the cave of the Shipbreakers, according to the same quest "Shadow over Driftwood" (the treasury of Mordus, which can be accessed with the help of his amulet, the Sparkling Eye itself (the so-called ruby key) is in the purse of a dead gnome on altar in that treasury (more details can be found in the section with the passage of the quest "Shadow over Driftwood").

We return with the Sparkling Eye to the basement of Mordus and interact with an unusual castle in the form of a skull. We pass into the appeared secret room and use the hatch to go down below. Before us will be a puzzle with plates. If you click on a slab, the pressed slab and adjacent tiles will light up with an air symbol. If two adjacent plates are pressed next to the stove, then it will light up with a symbol of fire, three - of the earth. Use Spiritualism to give you a clue as to which symbols should light up. Arrange the jugs and your characters in the same way as the screenshot below, and the enchanted door will open.

Inside, we communicate with the chained Withered Undead and release it by pressing the second button on the left (green) on the remote control. Skeletons will appear. Deal with them. Withered by the undead will help you. After the victory, he will offer a choice of skill book. If you ask about learning the power of the Source, then he will simply give a random skill book and escape, destroying Mordus' device. Search the room, near two barrels of water near the northern stairs is an acid-stained key.
We leave the basement and head west, across the bridge. We see that the masters who guarded him died. From here we take the north road. Walking a little forward, you will come across a branch going northeast along the coast. We go there until we reach a fork. If we go to the west, we will stumble upon the Withered Undead (lich) surrounded by corpses.
You can allow him to continue eating (then he will make another kill in the future), you can donate a Source point (then he will not kill anymore, but you will lose one Source point) or attack him.

If you did not engage in battle with him, then our next point will be the reliquary (marked on the map with a marker "Cache of the Lich of the Source"). It is located in the northeastern part of the western part of the island. If before that they allowed him to eat the dead, then this time you will meet him with the corpse of a child. Again, you can kill him or agree to his terms. In order to open the chest, you will need your blood. If you agree, you will lose some health and get a reward.
family business
Near the entrance to the cemetery on the east coast, near the northern or southern entrance, depending on which one you happened to be near, Tarkin will stand. He will tell you that he is looking for an artifact of a certain Surrey family.

In the center of the cemetery, you can meet the dog Andras guarding the entrance to the crypt nearby. If you get close to him or try to open the door, the dog will attack. In battle, he will summon Kedelon Bonebreaker, and then also the undead. To get the maximum experience points, first kill the summoned creatures, and then the dog.
After the fight, use spiritism and talk to the spirit of the dog. If you praise him, he will tell you about Anathema. To get into the crypt, pull the lever next to it to unlock the door, then use the hatch.

Inside will be petrified robbers and Kvanna. To remove the petrification from it, use the Frost Armor spell or any other spell that gives the Magic Shell effect. In any case, after talking with her, the battle will begin. It's easiest to focus on Kwanna herself, not the summoned skeletons. After the fight, take it from her body and read the torn page. Also take the Shadowy Tomb Key from her body. To open the sarcophagus, you will need a hero with pumped strength, but before that, cast the Armor of Frost spell on him or any other spell that gives the Magic Shell effect.
Go outside and follow a little south, to the grave of the Surreys (Shady Tomb). The entrance to it can be recognized by the stairs leading underground. With the help of the key obtained from the body of Kvanna, we unlock the door and get inside.
To the left of the entrance on the wall near the hole in the wall from which light pours. We click on it. We also press the button at the opposite end of the room in a semicircular recess. The door to the next room will open. In the center of it there is a sarcophagus, but you can’t just open it like that. Send someone from the squad with the maximum amount of magic armor (but not undead) to the next room to stand on the pressure plate. The character in the room with the sarcophagus, turn on spiritualism. Three levers will appear on the wall. From the note on Kvanna's body, the order is 2-1-3. Use the levers in the following order: center, closest to the door, and then farthest from the door. The sarcophagus will move and a hatch in the floor will appear.

We find ourselves in a room with a large number of clay guards. Distribute the characters in advance, and then those with maximum armor open the sarcophagus in the center and take its contents, incl. strange artifact. As soon as you are about to leave, these guards will come to life and attack. They have little health, try to attack with area damage spells and you will quickly deal with them. After that, use spiritism to talk to the spirit of Joanna Surrey and try to find out a little about the found artifact. Also, don't forget to clean everything here.

Go outside and talk to Tarkin. He will tell you that this is part of the Anathema, but the second part is needed. It is located on the island of the Blood Moon. You can get it in parallel with the quest "Secrets of the Blood Moon Island". Once in the archive, we pass into the far part of the room behind the hidden door and take the strange blade from the altar. " . If you have a lizard in your squad, then he will be able to make out the speech of the blade. After that, we give all the elements to Tarkin. He might. both near the cemetery and on the ship "Lady Vengeance" near the boat.
Driftwood Arena
In Lohar's hideout under the Black Bull tavern, you can fight in the arena. To do this, go north from Lohar's office. Speak with Arran the Noisy. He will offer to first chat with the current champion - Murga Tenya. She will sit at the end of the northwest branch.

After that, return to Arran and say that you are ready to fight in the arena. This battle will be complicated by the fact that you and your companions will be blindfolded, which means long-range attacks, teleportation over long distances will be impossible. Keep this in mind, and before you go into battle, it's better to save, because. perhaps your level will not be high enough, and you will have to return later. After the victory, talk to Murga, and then again to Arran the Noisy. This fight will be directly for the title of Champion. Only Murga will be against you, but she does quite a lot of damage per turn. After the first round, another opponent will appear - Captive Moloch of the Void. In combat, he likes to cast "Shackle of Pain", in which the target is the same damage inflicted on the caster. After the victory, get the key to the treasury from Arran the Noisy.

The entrance to the treasury is a hatch in the floor under an arch near the place where Murga was. You can't just get the treasure. You will need a hero who can teleport. The gates are closed, so we teleport behind them, but in such a way as not to fall under a stream of steam, otherwise the hero will turn to stone. Then teleport to an elevated position, again, so that the ferry doesn't hit you. When there is a pause, go to the valve and turn it - the steam will no longer go. After that, calmly go down and open the gate to the next room with chests. One of them will contain the key of the Chosen One. You will need it in the future when you get to the Academy of the Seven.
Ledger losses / Aggressive takeover
Speak with Garvan in the eastern part of the Black Bull Inn. Head west from Driftwood. Having crossed the bridge, you should go north, and then before the stone bridge with the troll, turn onto the wooden bridge. Open the chest and fight the fiends of the Void. Return to Garvan to complete the quest.
Quest "Aggressive Takeover" can be obtained from Liam's Spirit Trader on the west coast of Driftwood. Turn on spiritism near Garvan's chest in the clearing. Talk to the spirit, and then dig up the remains nearby.

Return to Driftwood and go to the Black Bull Tavern. Garvan is sitting there at the east table. Talk to him. To kill him, you can use poisoned stew. To do this, buy it from the owner of the Prudence inn, or if in a conversation with her you pretended to know Niles and speak well of him, you will receive meat stew for free, as well as the key to Niles's room on the second floor in the southern part.
In the crafting menu, combine Meat Stew and Void Touched Fish to make Spoiled Stew. Such fish can be found on the shore or bought from a fish seller in the square. Give the chowder to Garvan. As soon as he tastes it, he immediately runs to the latrine. Run after him. When he comes out of the toilet, talk to him, after which the fight will begin. Search his body and take the head.

Return to Liam. Give him Garvan's head and he will point you to the location of the stash. It will be indicated on the map as a marker in the northwestern part of the island.
Test of all seasons
If you go east of the altar of wanderings in the meadows through the stream and climb the hill, you can see an unusual altar surrounded by four statues. Interact with him to start the quest. Use the appropriate spells on the statues to activate them: "Cold Explosion" or "Destructive Hail" in winter, for autumn you need to create a cloud of steam, and then electrify it, for example, with the skill "Electric Discharge" (the cloud can be obtained by putting out the fire with water ), summer - "Laser beam", spring - "Bloody rain".

After you activate all four statues, the battle will begin. Pay attention to which element each of the attackers is immune to. After the victory, you will receive a reward.
three altars
The quest is bugged and does not activate
There are three altars on the map of the island: by the stream east of the wandering altar in the meadows, in the eastern part of the island, north of the paladin-controlled bridge, and in the Monastery Forest west of the ruins. You should visit them all and pray. The first one is not guarded by anyone, near the second one you will meet a Void-touched deer surrounded by normal deer. Get closer and the conversation will start. Say that this is a fiend of the Void, and other deer will come to their senses. The fight will start. After the victory, go to the altar and read the prayer.

Around the third, there will be a Weeping Abomination in the Monastery Forest. Try to talk to him, but he will still attack, and he will call on many wolves to help. His attacks are quite strong, so try to keep him constantly knocked down to make the fight easier. Deal with him first, and then take on the summoned assistants. After praying about three altars, follow the center of the map to the meadows. There will be a restless scarecrow. Talk to him, if the skill of persuasion is not sufficiently developed, then the hero will not be able to take part in the battle. In any case, you will have to defeat the scarecrow and his henchmen.

Buried past
Go to family farm Gareth (there is a marker on the map). Talk to him. If the conviction is sufficiently developed, then you can immediately stop his attempt at revenge (later he will thank you). If you fail to convince, go to the house. Use Spiritualism to talk to Gareth's parents.

Also, a little further down the road, Jonathan's glove will be lying around the fence - take it. Talk to Gareth and head to the Blackpits. The next part is done in conjunction with the quest "On one's last legs". After killing Jonathan, take his ring and return to Gareth. Gareth, in the event of Jonathan's death, will no longer travel with you, and you will not find him on the ship.


